Intune, Defender, and SCCM Single Pane of Glass Reporting
Have you ever wanted to see data from Configuration Manager and Intune in a single report? Or perhaps combine insights from Intune and Defender for Endpoint? Maybe even all three—Configuration Manager, Intune, and Defender for Endpoint? Well, now you can.
With the latest versions of PowerStacks BI for Intune, BI for SCCM, and BI for Defender, you can use Power BI Desktop to connect to multiple datasets and link them seamlessly using common columns. Once the datasets are merged in Power BI Desktop, you can publish the new dataset back to the Power BI service for easy access and sharing across your organization.
In this blog, I’ll demonstrate how to combine data from the BI for Intune and BI for Defender semantic models. You can follow the same approach to use any combination of these three powerful data models, leveraging the User Devices > Device.id column to bring your data together.
Prerequisites:
- Ensure that you have the latest version of Power BI desktop installed.
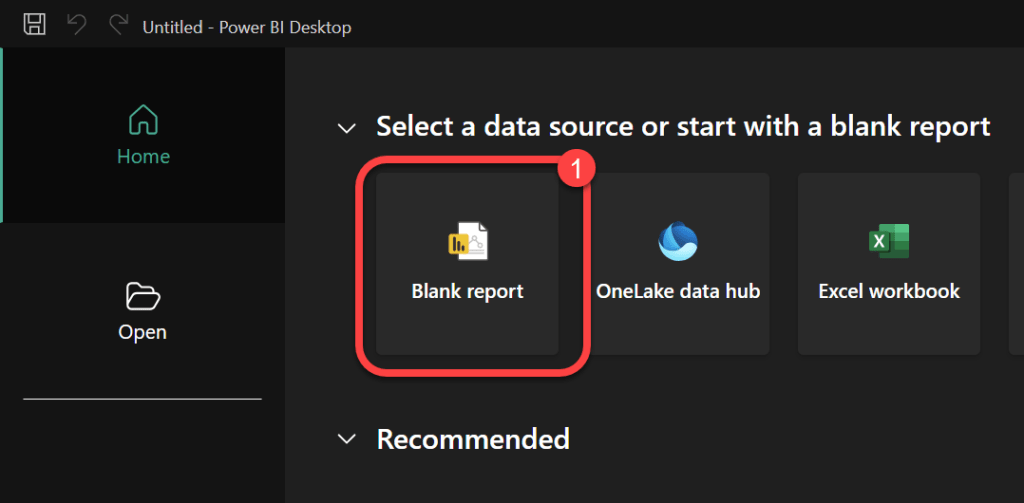
1. Create a Blank Report
- In Power BI Desktop select File>New> Blank report.
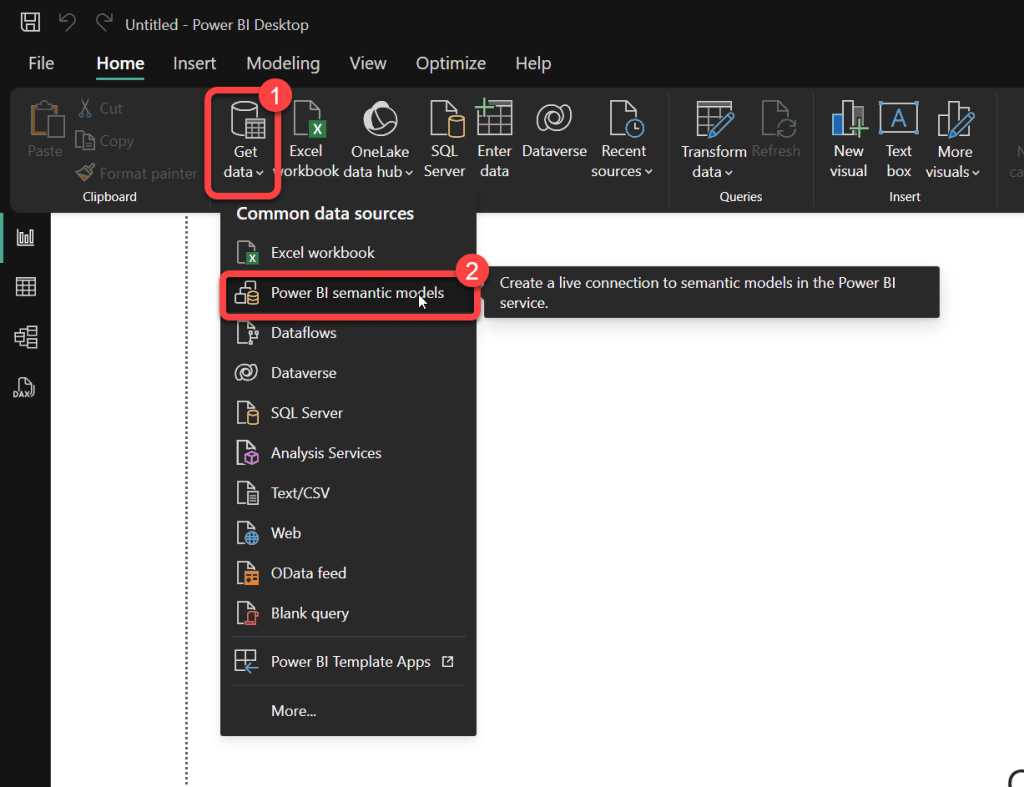
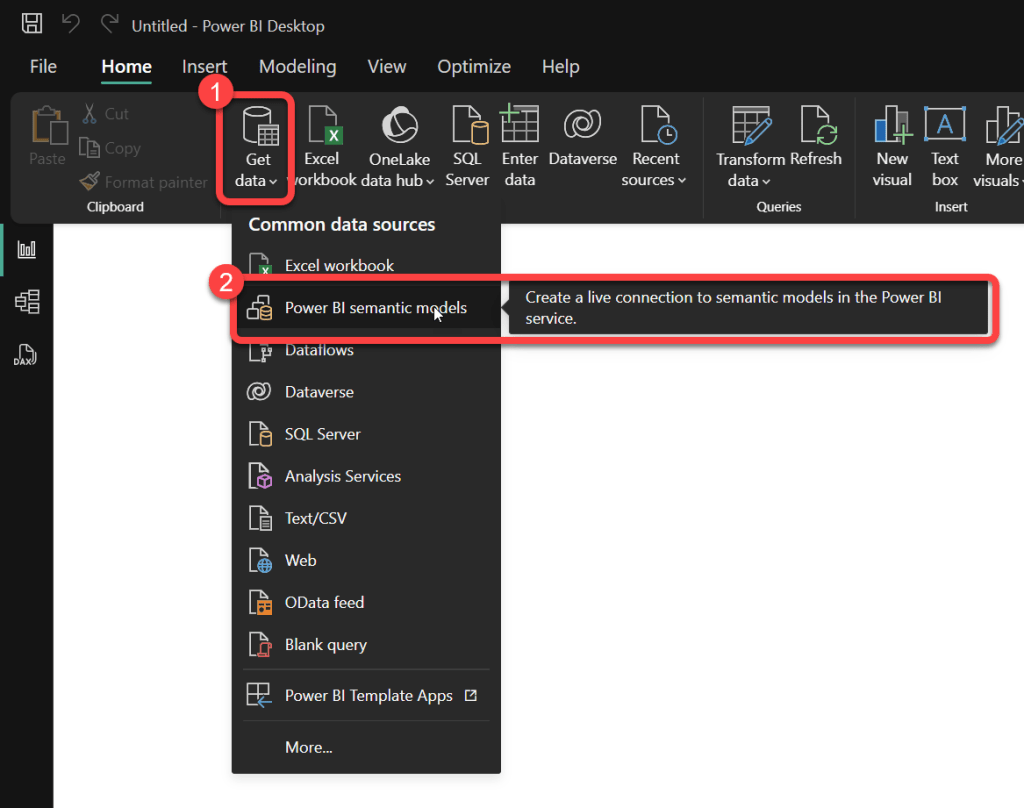
2. Get Data from a Semantic Model
- Select Get Data>Power BI semantic models.
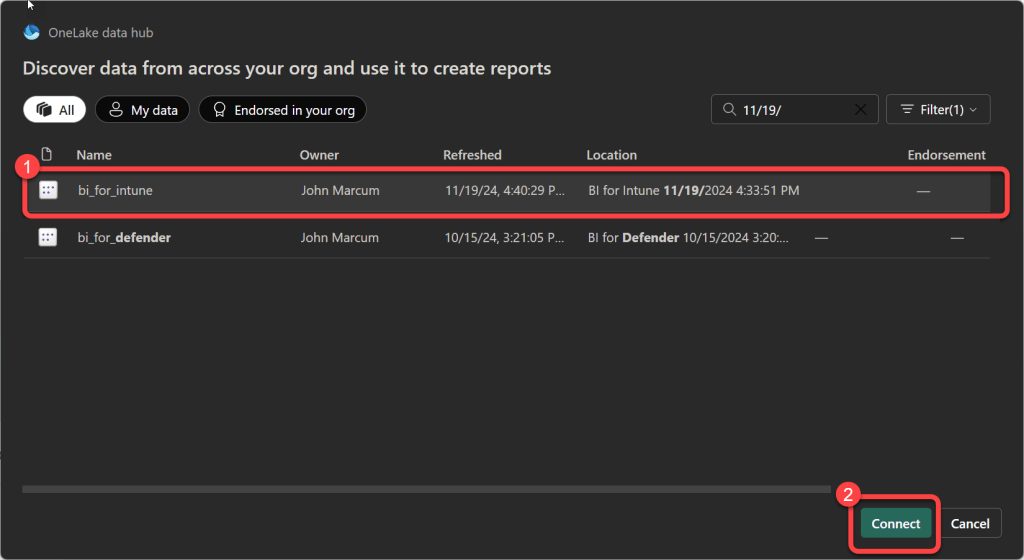
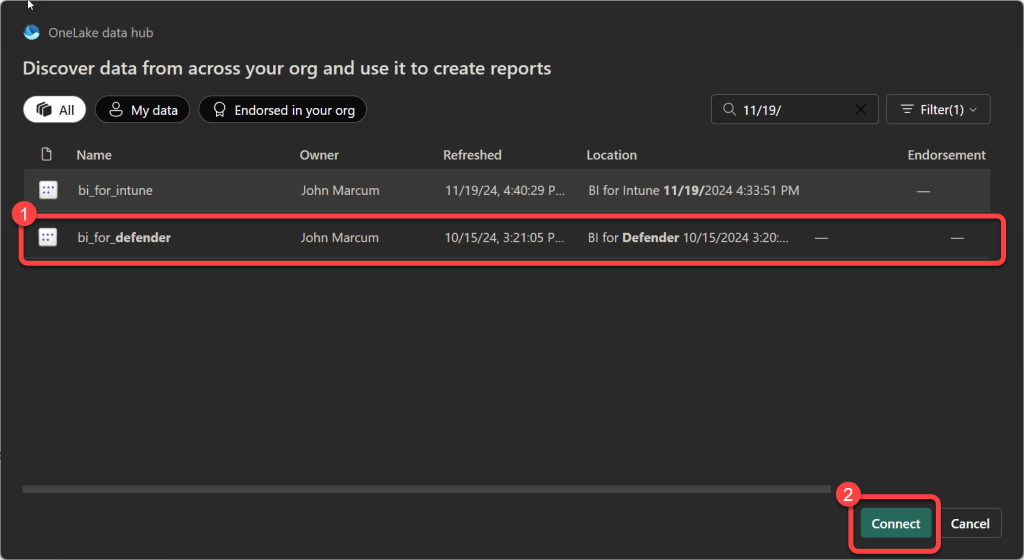
3. Select and Connect the First Model
- Select one of the semantic models that you’d like to use in your new custom reports.
- Select Connect.
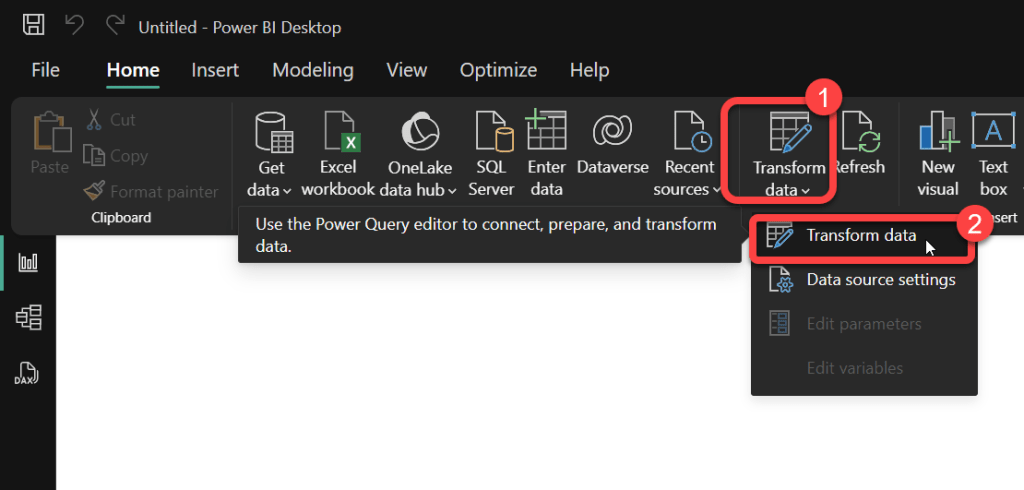
4. Open Transform Data
- On the Home tab select the drop-down button on Transform data.
- Select Transform data.
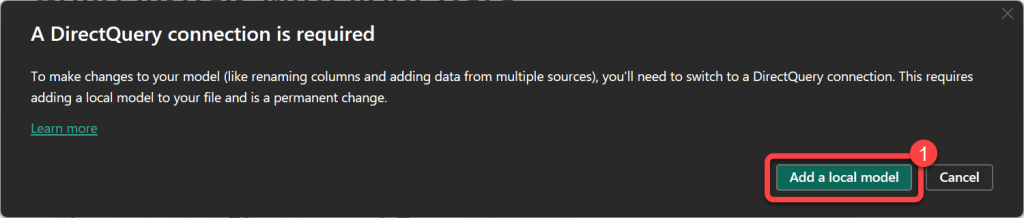
5. Add a Local Model
- When prompted to do so select Add a local model.
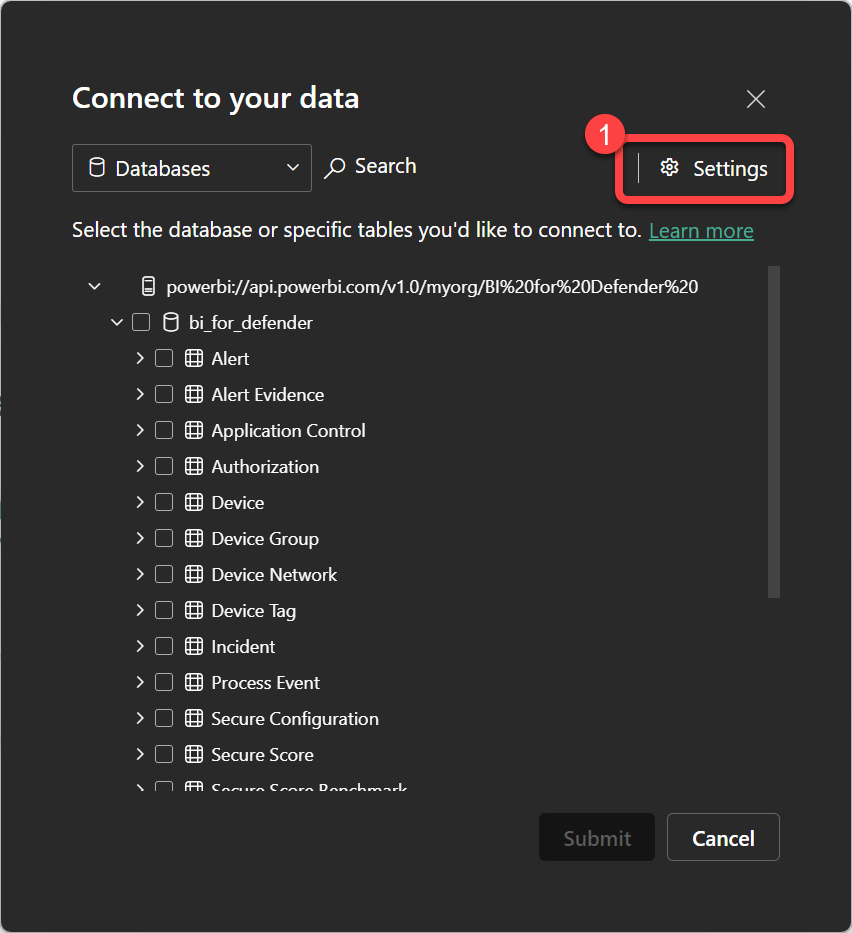
6. Open Connection Settings for the First Model
- In the Connect to your data dialog box select Settings.

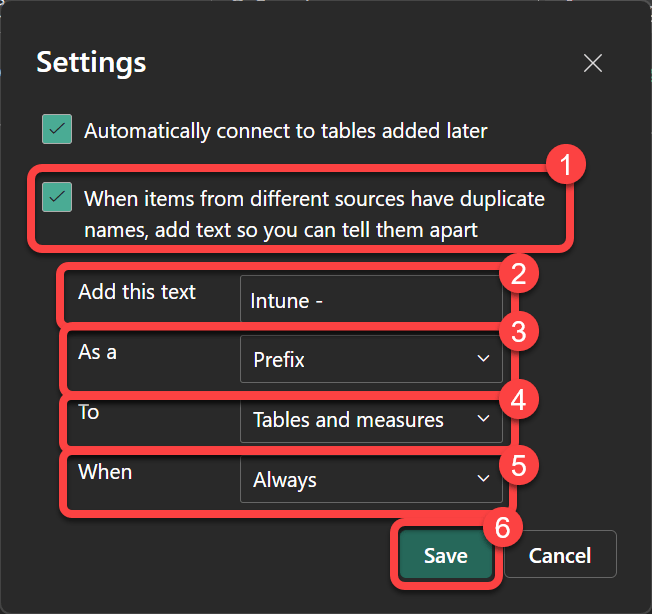
7. Configure a Prefix for the First Model
- In the Settings dialog select the When items from different sources have duplicate names, add text so you can tell them apart checkbox to make the additional options available.
- In the Add this text textbox enter an identifying prefix, for example
Intune - - In the As a dropdown list select Prefix.
- In the To dropdown list select Tables and measures.
- In the When dropdown list select Always.
- Select Save.
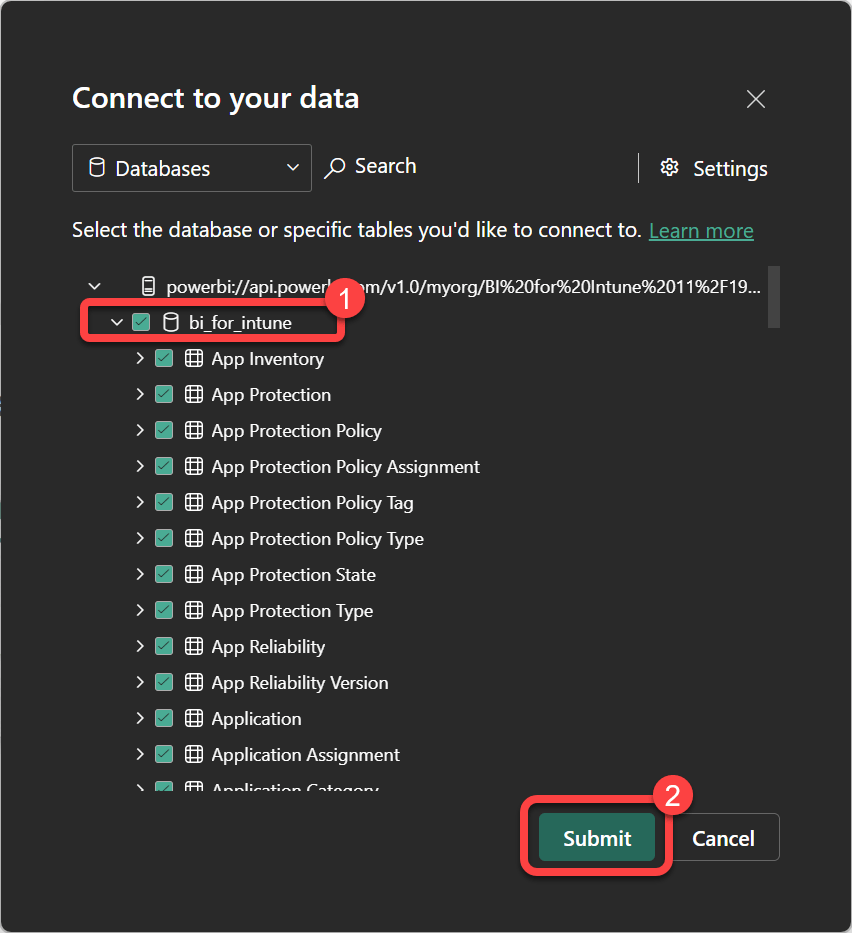
8. Confirm the First Model’s Tables
- In the Connect to your datadialog, ensure that the checkbox for bi_for_intune and all subsequent checkboxes are selected.
9. Add the Second Semantic Model
- Select Get Data>Power BI semantic models.
10. Select and Connect the Second Model
- Select another one of the semantic models that you’d like to use in your new custom reports.
- Select Connect.
11. Open Connection Settings for the Second Model
- In the Connect to your data dialog box select Settings.
12. Configure a Prefix for the Second Model
- In the Settings dialog select the When items from different sources have duplicate names, add text so you can tell them apart checkbox to make the additional options available.
- In the Add this text textbox enter an identifying prefix, for example
MDE - - In the As a dropdown list select Prefix.
- In the To dropdown list select Tables and measures.
- In the When dropdown list select Always.
- Select Save.

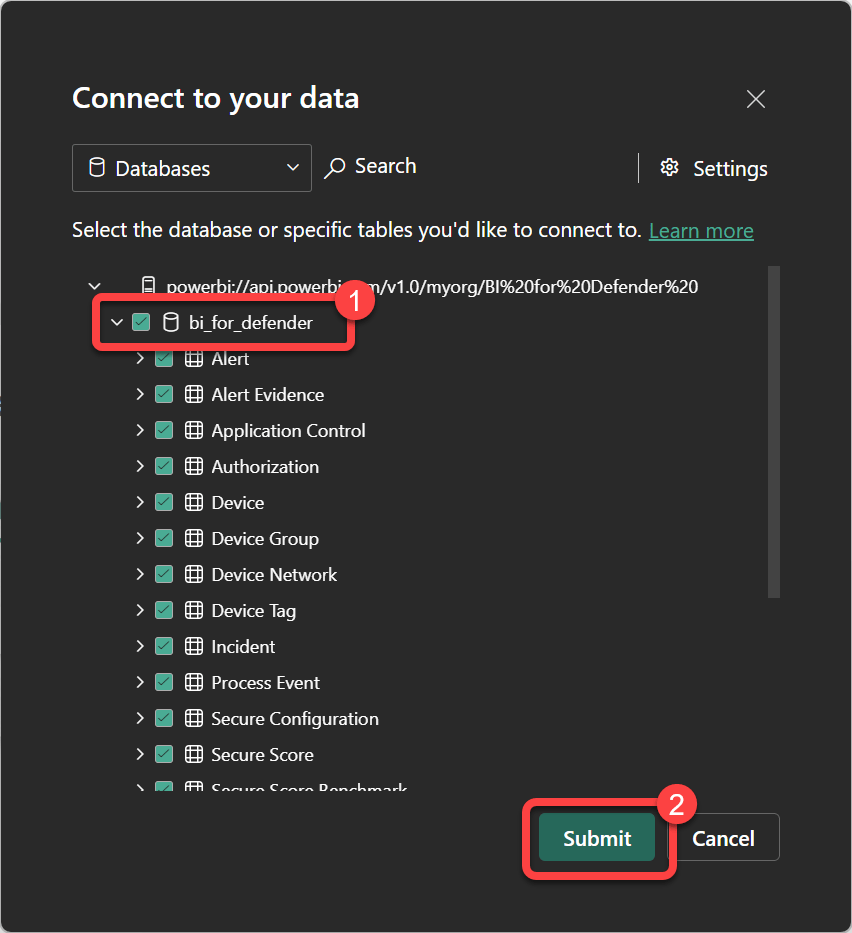
13. Confirm the Second Model’s Tables
- In the Connect to your datadialog, ensure that the checkbox for bi_for_defender and all subsequent checkboxes are selected.
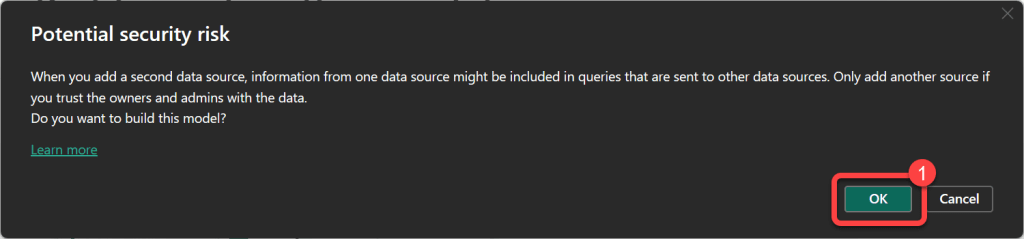
14. Acknowledge the Security Prompt
- In the Potential security risk dialog select Ok.
15. Switch to Model View
- To access Model view, select the Model icon found on the left side of Power BI Desktop.

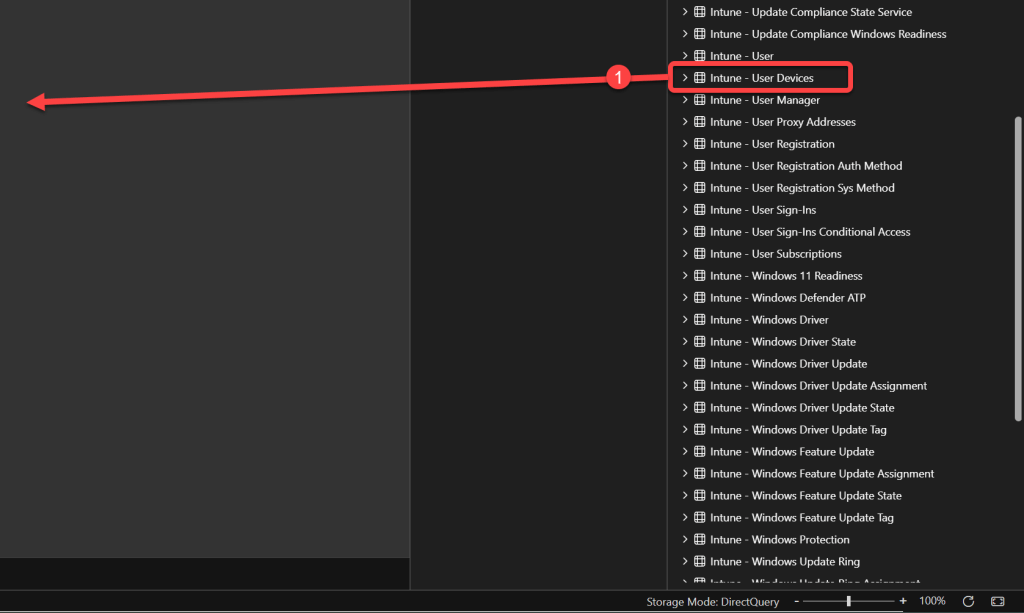
16. Add the First User Devices Table
- In the Data paneof Power BI Desktop, drag the Intune - User Devices table onto the model view layout.
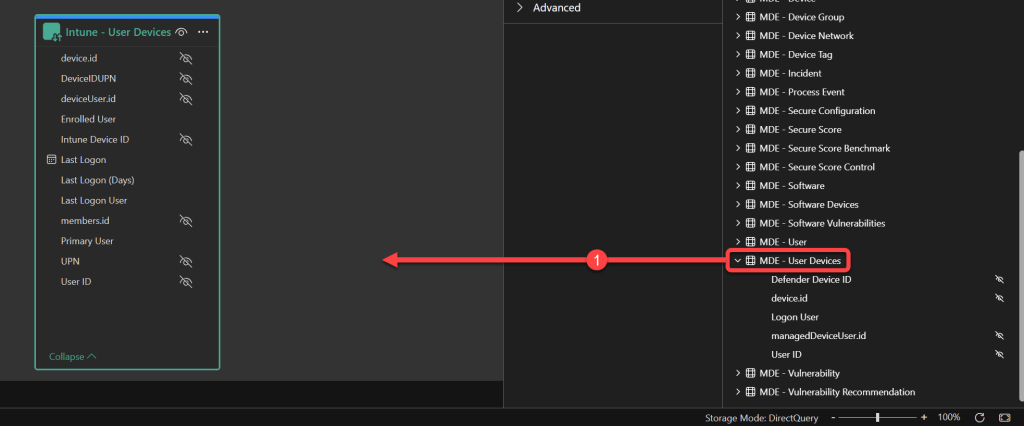
17. Add the Second User Devices Table
- In the Data paneof Power BI Desktop, drag the MDE - User Devices table onto the model view layout.
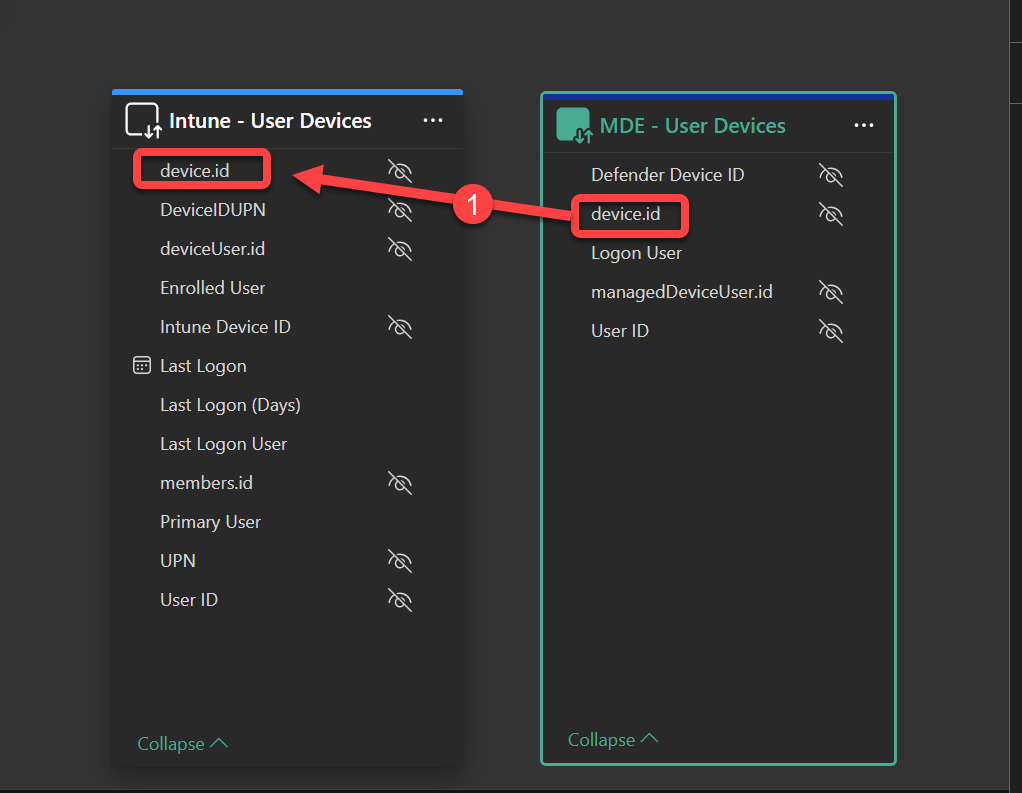
18. Create a Relationship Between the Tables
- With the Intune - User Devices table and the MDE - User Devices table on the model view layout, drag the device.Id column from one table to the other to create a relationship between them.
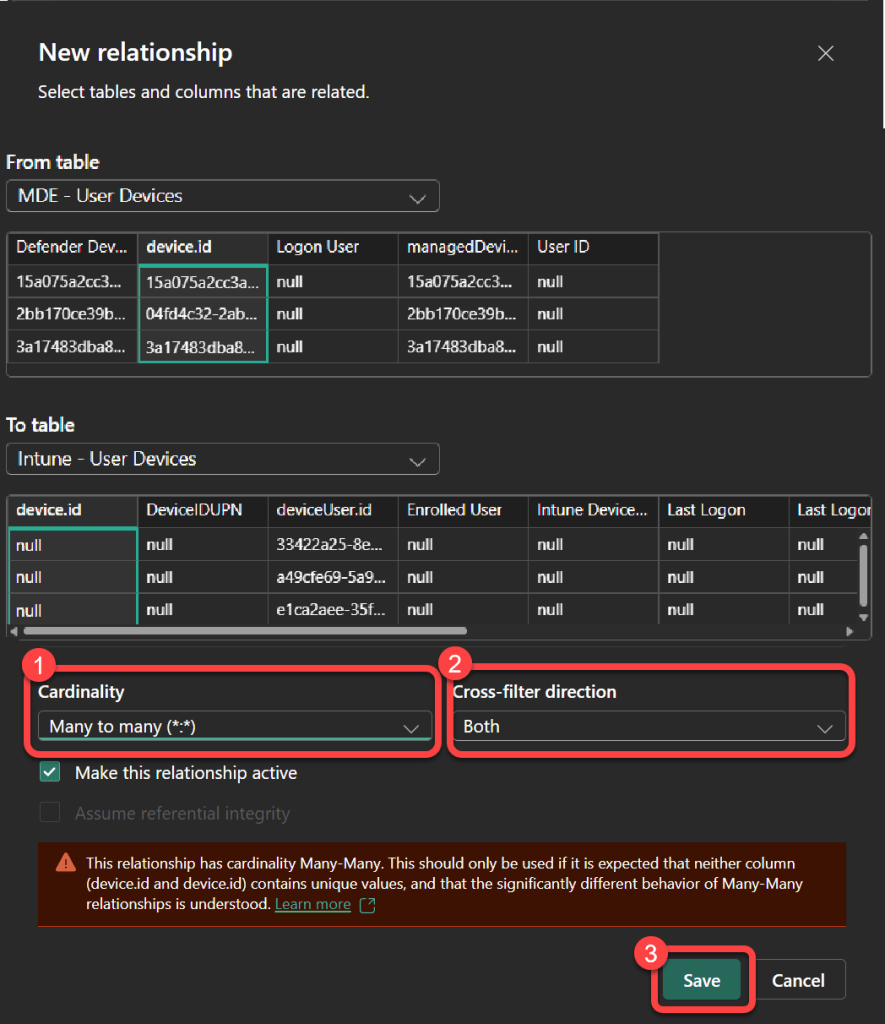
19. Configure the Relationship
- In the New Relationship dialog, ensure that the Cardinality is set to Many-to-Many (.) and the Cross-filter direction is set to Both.
- Select Save.
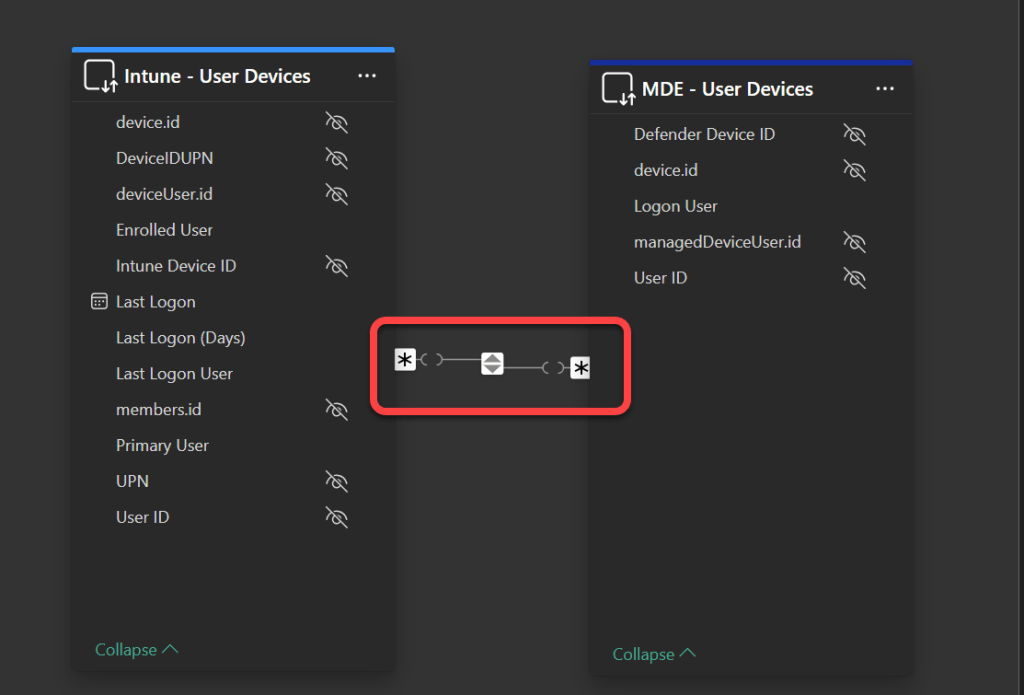
20. Verify the Relationship
- On the model view layout, you should now see that there is a relationship between the two tables.
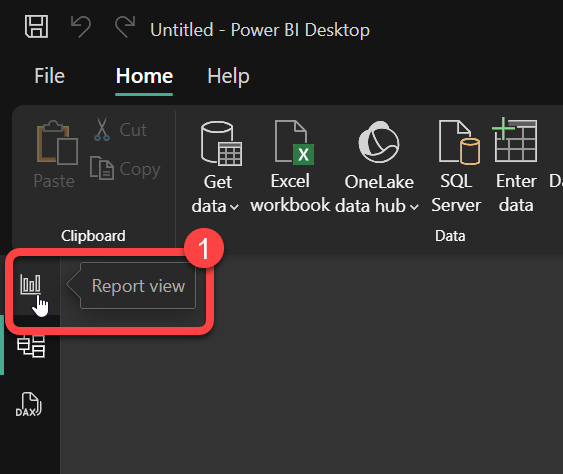
21. Return to Report View
- To access Report view, select the Report icon found on the left side of Power BI Desktop.
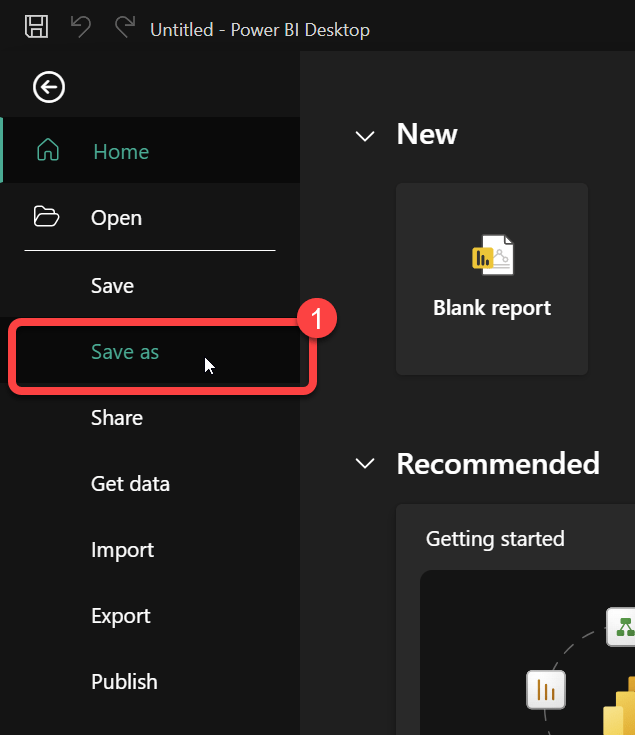
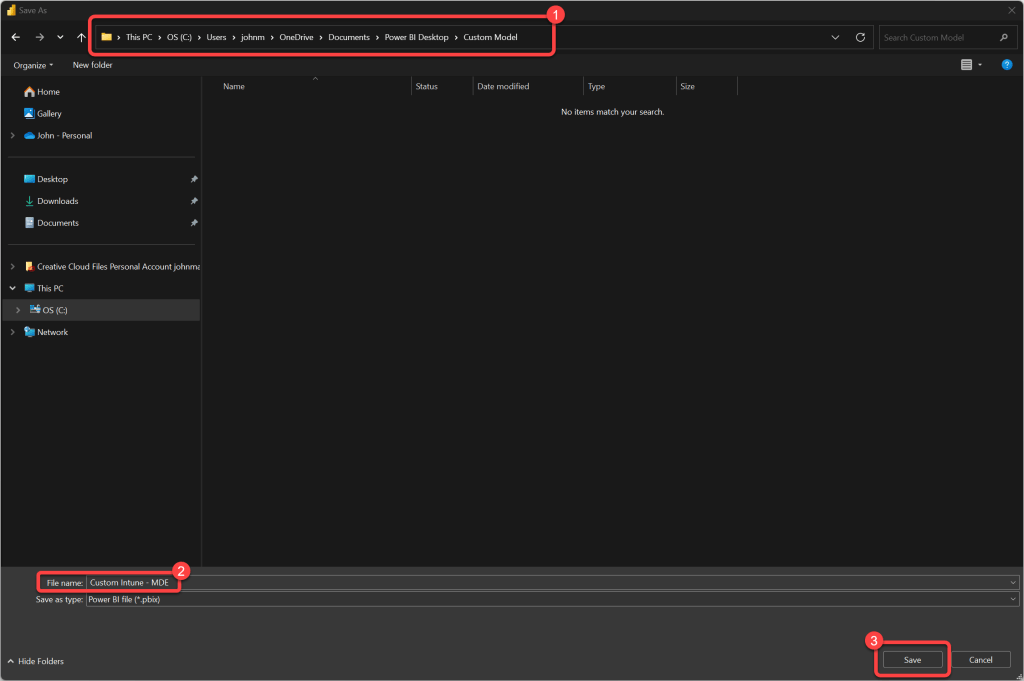
22. Save the Data Model
- To Save your new Power BI data model select File > Save as.
23. Choose a Location and File Name
- Select a location and file name for your Power BI data model.
- Select Save.
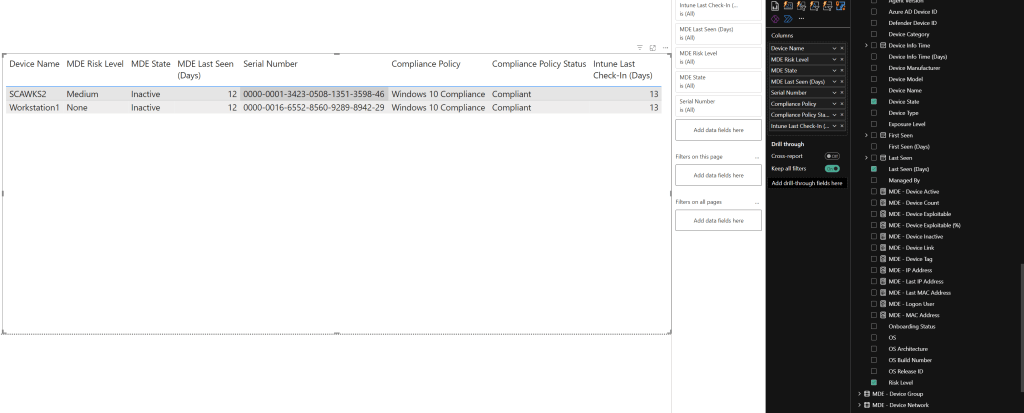
24. Design Your Report
- Design your report(s) however you’d like them. In this example we have combined data from Intune and MDE into the same table.
Pro Tip:
- There are some caveats and limitations to this functionality. You may reach out to PowerStacks Support to learn more.
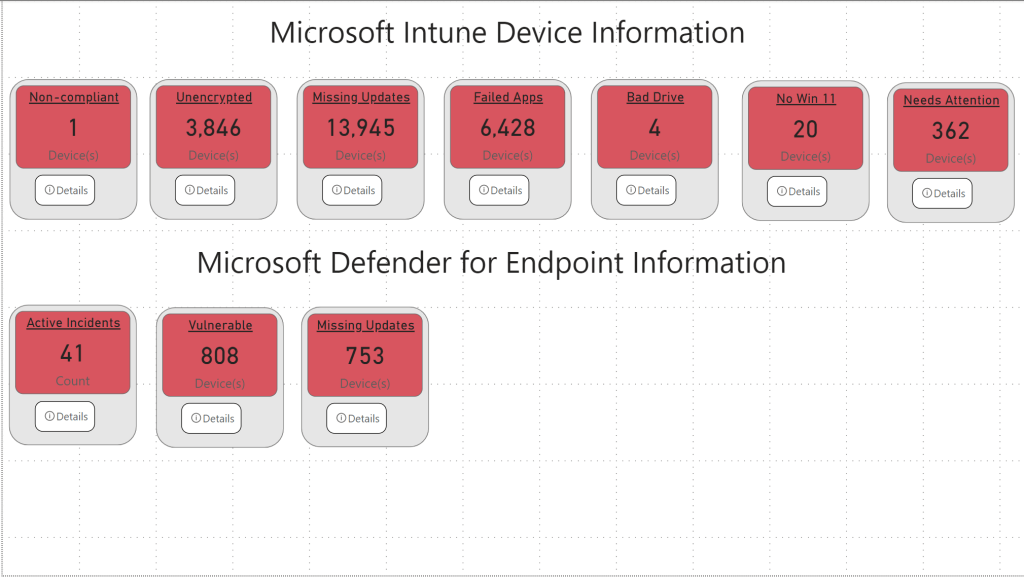
25. Add KPI Drill-Through (Optional)
- In this example we’ve kept the Intune and MDE data separated into individual KPI’s that have drill-through capabilities.
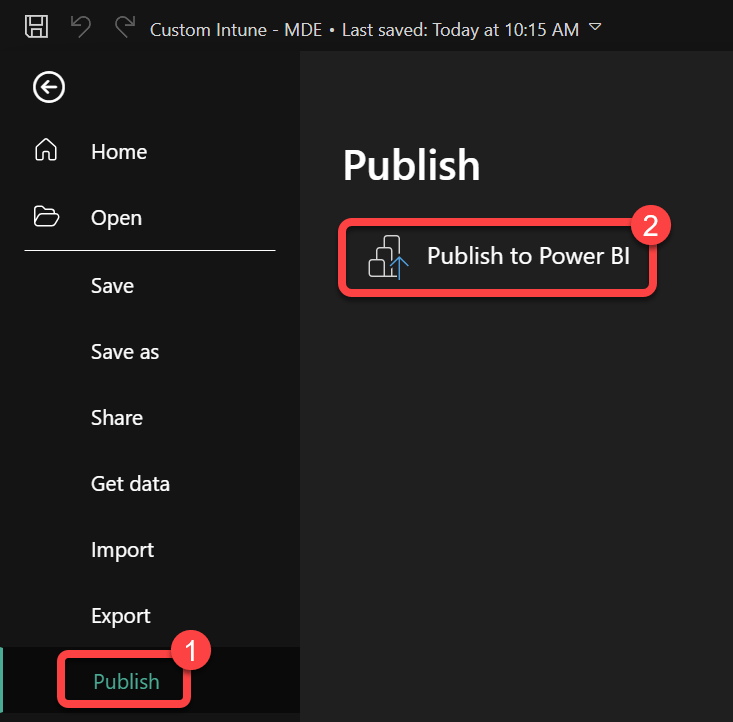
26. Publish to the Power BI Service
- Ensure your report is saved locally in Power BI Desktop.
- Select File > Publish>Publish to Power BI.
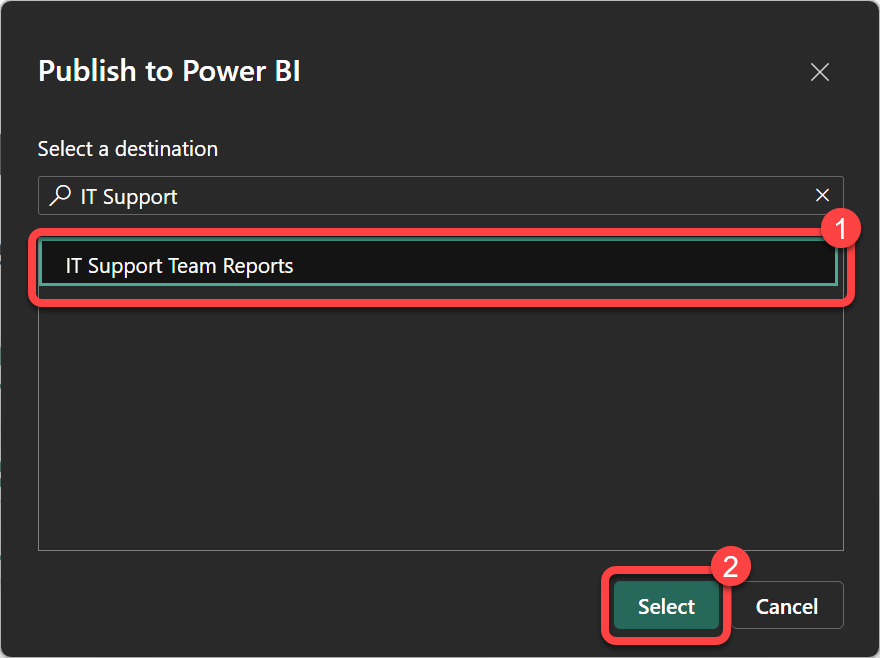
27. Share Your Report
- When prompted, Select your workspace in the Power BI Service where you want the report to be published.
- Once the upload is complete, a confirmation dialog will appear with a link to the report in the Power BI Service. Click the link to view your report online.
- From the Power BI service you may now share your report with others.
Pro Tips:
- Avoid editing your report in both the Power BI service and Power BI Desktop.
- Publish your report(s) into a workspace other than the default PowerStacks workspaces.
- Do not lose the .pbix file that you saved locally.
- Always run a backup before performing in-place upgrades.
 Read also: How to Bypass Intune Device Platform Enrollment Restrictions on Windows
Ready to build your own single pane of glass? Combine data from BI for Intune, BI for SCCM, and BI for Defender to create unified Power BI dashboards covering your entire endpoint management environment. Start a free trial →