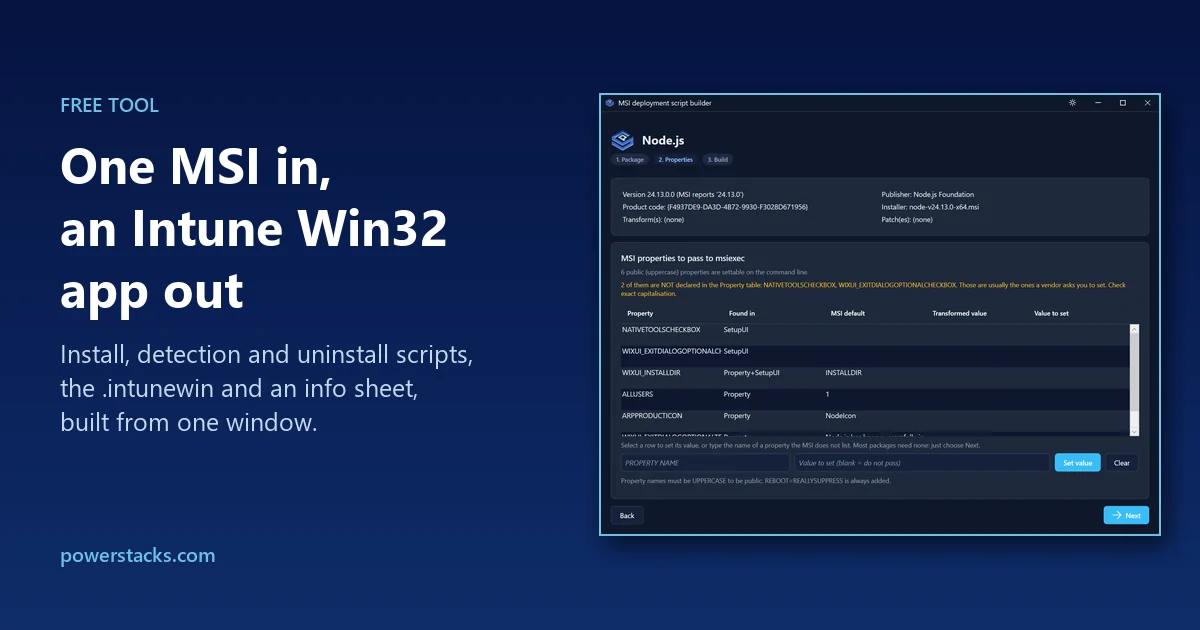
Most of the Win32 apps I package for Intune are the same job: the vendor ships one MSI, maybe with a transform, and it needs to land on devices silently with a detection rule that actually works. It’s not hard. It is repetitive, though, and repetitive work is where the mistakes creep in.
For years my process was to copy the install script from the last package, edit the hardcoded names, copy the detection script, edit those names too, run IntuneWinAppUtil.exe, and then type the install command and return codes into the portal. Every copy drifted a little from the one before it. A bug fixed in one package lived on in ten others.
Of course, we’d love for everyone to be using App Store for Intune, which automates this whole process for over 13,000 apps and supports your own custom apps via upload. We understand that’s not possible for everyone, though.
So for everyone packaging by hand, I built a tool that does the whole thing. Drop the MSI in a folder, run one script, fill in one window, and you get back:
- An install script
- A detection script
- An uninstall script, when the MSI is a bootstrapper that needs one
- The
.intunewinpackage - A deployment info sheet with every value you need for the Intune portal
There’s no script editing involved at all, and it’s free.
Download the tool
The builder, its templates, and everything it needs are in the PowerStacks intune-scripts repository on GitHub:

Copy the whole MsiPackagingTools folder, not just the .ps1. The builder needs its Templates, Assets, and PoshUI folders next to it. If you downloaded it as a zip, unblock it once with Get-ChildItem -Recurse | Unblock-File.
Built on PoshUI
The builder window isn’t something I wrote from scratch. It’s drawn by PoshUI, an open-source PowerShell UI framework by KAnders (Kanders-II on GitHub). PoshUI lets you build Windows 11 style wizards, dashboards, and free-form apps from ordinary PowerShell cmdlets, with no WPF, XAML, or C# required. This tool uses its PoshUI.Canvas module.
Before PoshUI, the builder asked its questions as a string of console prompts. It worked, but it was the kind of thing only the person who wrote it enjoys using. PoshUI turned it into a three-page window that anyone on a packaging team can pick up without reading the code first. If you write PowerShell tools for other people, it’s well worth a look.
PoshUI 1.4.1 is included unmodified in the PoshUI folder under its MIT license. That license, including KAnders’ copyright notice, is in PoshUI\LICENSE, and it needs to stay with the folder whenever you copy or share it. Thank you, KAnders, for building it and giving it to the community.
Why I didn’t just keep copying scripts
Three problems kept biting, roughly in order of how much pain they caused, and there were two more reasons on top of those.
Vendor command lines are often wrong, and they fail silently
An app owner sends you a command line. It looks plausible. The install returns 0, Intune reports success, and the setting never gets applied.
I hit this on a real package. The app owner supplied:
BrowserUrl=https://yourtenant.example.comBoth halves of that are wrong. The string BrowserUrl appears nowhere in the MSI, so nothing reads it. And Windows Installer only treats a property as public, meaning settable from the command line, when its name is entirely uppercase. Mixed-case properties are private and get discarded in the elevated part of the install, which is exactly the context an Intune SYSTEM install runs in.
The real property was BROWSERURL. Getting it wrong meant the registry value was written as an empty string and nothing anywhere reported a problem.
The part that surprised me: BROWSERURL has no row in the MSI’s Property table. Whether a property is public has nothing to do with whether it’s declared, so the properties a vendor tells you to set are often missing from the obvious place to look. The builder reads three sources instead of one:
| Source | What it means |
|---|---|
Property | Declared in the Property table, so it has a default |
SetupUI | Bound to a control in the setup UI, a field a human would type into |
Chained | Referenced as [PROPERTY] in a chained sub-package’s command line |
Anything found only through SetupUI or Chained is called out at the top of the list, because those are the ones you’d otherwise miss. Type a mixed-case name and the builder warns you, and tells you if the MSI exposes the uppercase spelling.
Version comparison has a trap that causes reinstall loops
An MSI’s ProductVersion is often three fields (1.43.8), while the DisplayVersion in the registry is four (1.43.8.0). In PowerShell, [version]'1.43.8' has a Revision of -1, so:
[version]'1.43.8' -ge [version]'1.43.8.0' # $falseA detection script built on that comparison says “not installed” on a device where the app is installed. Intune reinstalls it every evaluation cycle, forever.
Version checking in the builder is optional. It’s a single checkbox, Perform version check, on the first page. Leave it unticked and detection only looks for the product name, which is the right choice for apps that update themselves, like Adobe Acrobat Reader. If you do use it, the generated scripts normalize every version to four fields before comparing, and use -ge so a newer version still counts as installed.
Either way, there’s one more protection against the same loop: if the name matches but the installed version is missing or can’t be parsed, the app is treated as installed and a warning is logged, rather than running msiexec over the top of it.
Hand-copied scripts drift apart
All the shared logic lives in templates. The generated scripts are disposable output. Fix a bug once in the template, regenerate, and every package that gets rebuilt picks it up.
A detection script is the most reliable detection method
In my experience, a custom detection script is the most reliable way to detect a Win32 app. Intune’s built-in rules each depend on one thing staying put, and none of them reliably do. MSI product codes change between releases. File names, versions, and install paths change. Personally, I’ve found registry rules unreliable too. A script can check both the 64-bit and 32-bit uninstall keys, normalize versions, and fail safe when something’s missing, and detection by script has always worked for me.
The catch is that someone has to write that script for every app. That’s exactly the part the builder takes off your plate.
You don’t need to be comfortable in PowerShell
Not every Intune admin writes PowerShell, and they shouldn’t have to in order to package an app properly. Because the builder generates the install, detection, and uninstall scripts for you, anyone on the team can produce a solid package by filling in a window. The people who do know PowerShell can still read every line of what it generates, and fix the templates when something needs to change.
Using the builder
You need Windows PowerShell 5.1 (or PowerShell 7 on Windows), an elevated session on an interactive desktop, and IntuneWinAppUtil.exe from Microsoft’s Win32 Content Prep Tool if you want the .intunewin built for you. The MSI is read through the WindowsInstaller.Installer COM object that’s already on every supported Windows build, so there’s nothing else to install.
Put the MSI (and its .mst or .msp, if it has them) in a clean folder of its own. Everything in that folder goes into the .intunewin, so don’t leave anything else in there.
1. Run the builder
From an elevated PowerShell prompt, with no arguments:
cd C:\MsiPackagingTools.\New-MsiDeploymentScripts.ps1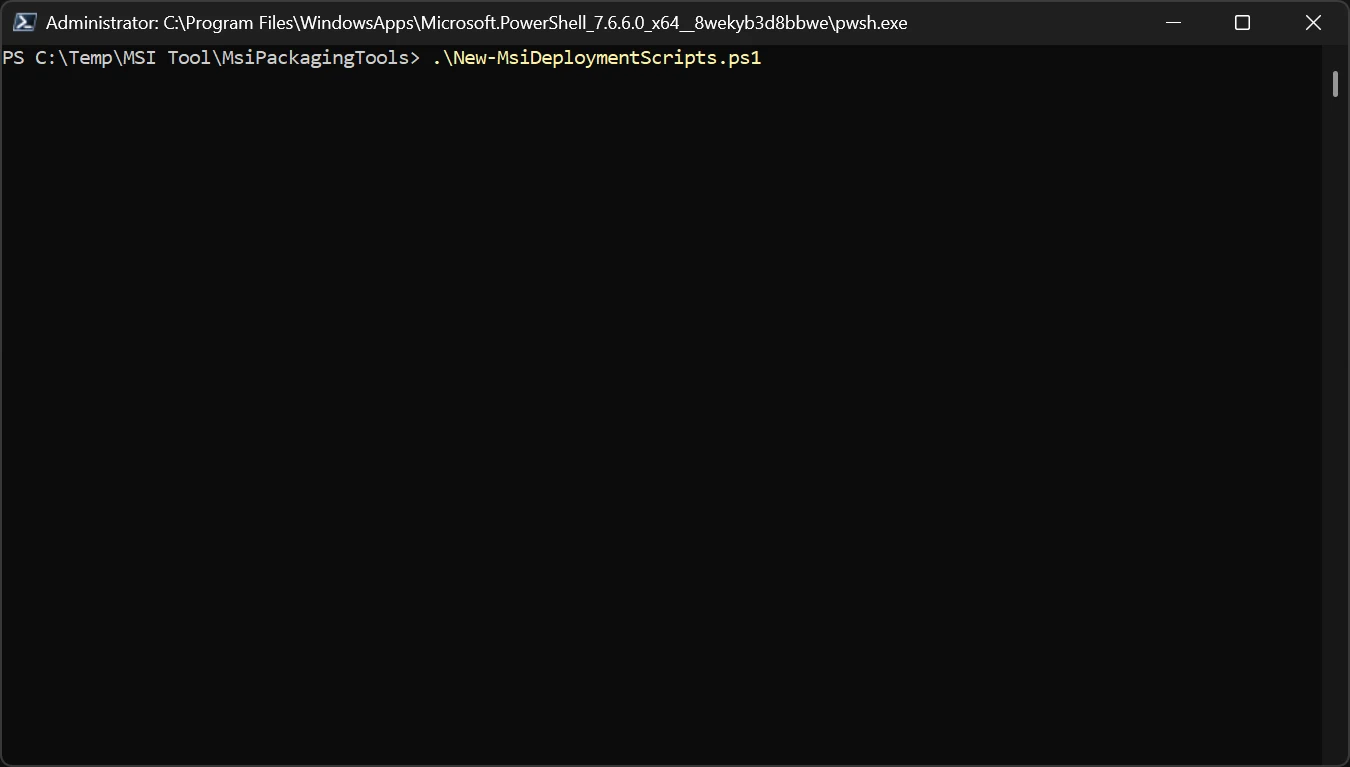
The builder window opens. It has three pages, and Back works on every one of them without losing what you entered.
2. Package page
Pick the MSI. Optionally pick a package folder (leave it empty to use the folder the MSI is in), a transform, and a patch. Then decide on the version check: leave it on for apps you upgrade by repackaging, turn it off for apps that update themselves.
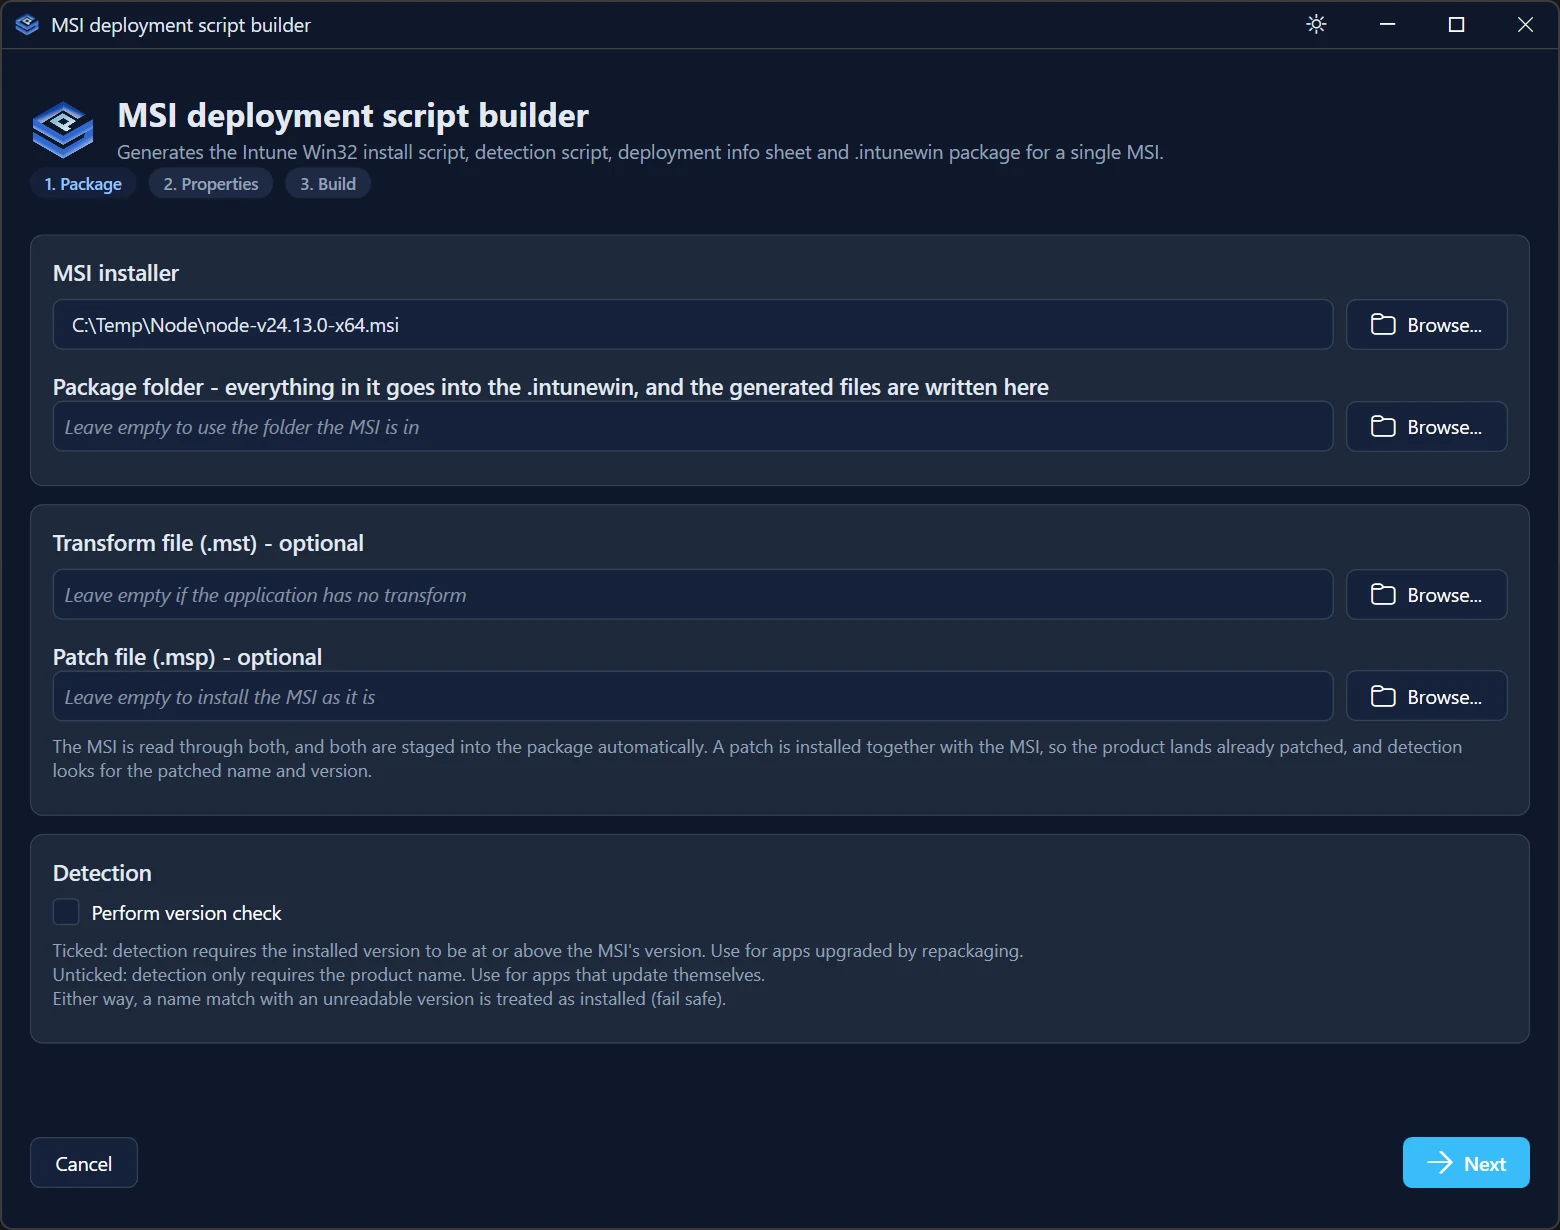
Select Next and the builder reads the MSI, through the transform and patch if you chose them. A patch matters here because it changes the version and often the product name, and detection has to match what actually ends up installed. A patch that was built for a different product is rejected before anything is packaged.
3. Properties page
This is the page to actually read. The top shows what the builder found: product name, version, product code, publisher. Below that is every property you can set on the command line, with the undeclared ones flagged in orange.
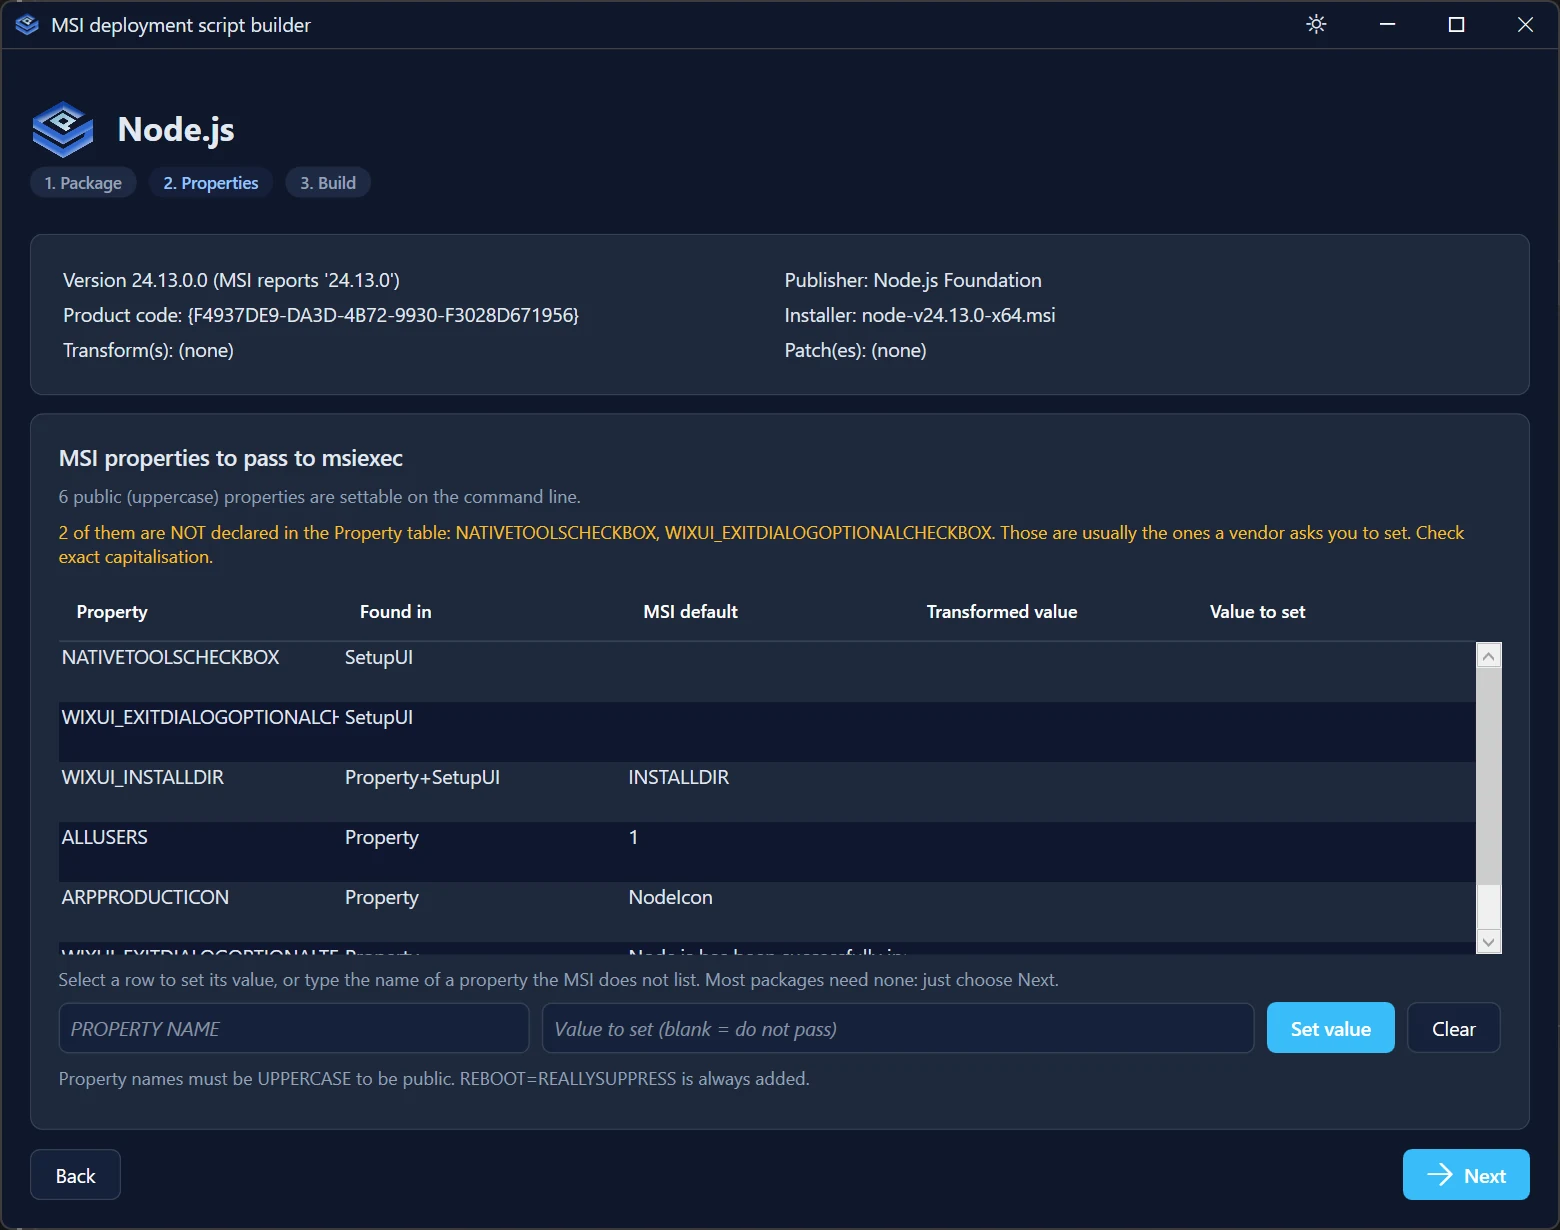
Most packages need nothing here, so Next is all this page asks of you. To set a property, select its row, type a value, and select Set value. If a transform already sets a property, that shows in the Transformed value column. A value you set here goes on the msiexec command line and wins over the transform without changing the .mst.
Bootstrapper MSIs get a warning on this page too, more on those below.
4. Build page
The Build page shows the complete msiexec command line the install script will run, so you can check it before anything is generated. Give it a short product name if you want readable file names, leave Build the .intunewin package ticked, and select Generate.
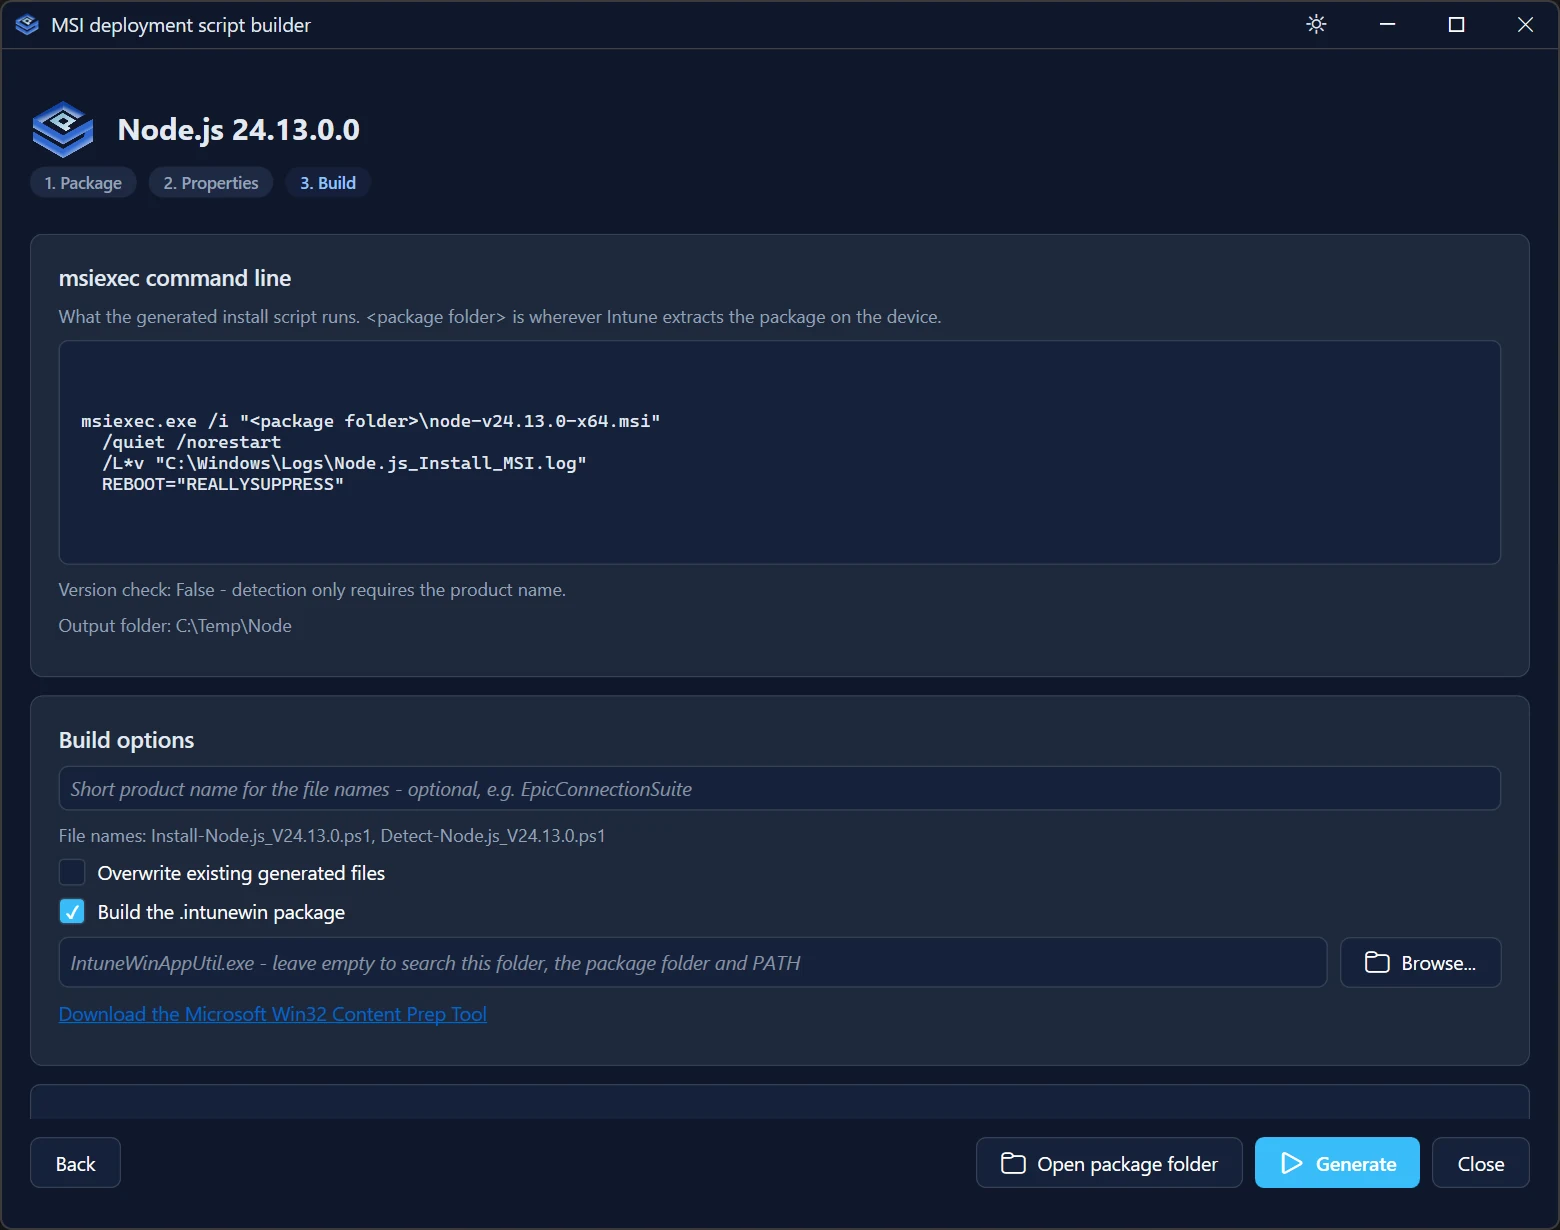
The build log streams into the window. When it finishes you get the install and uninstall commands with Copy buttons, and Open package folder takes you straight to the output.
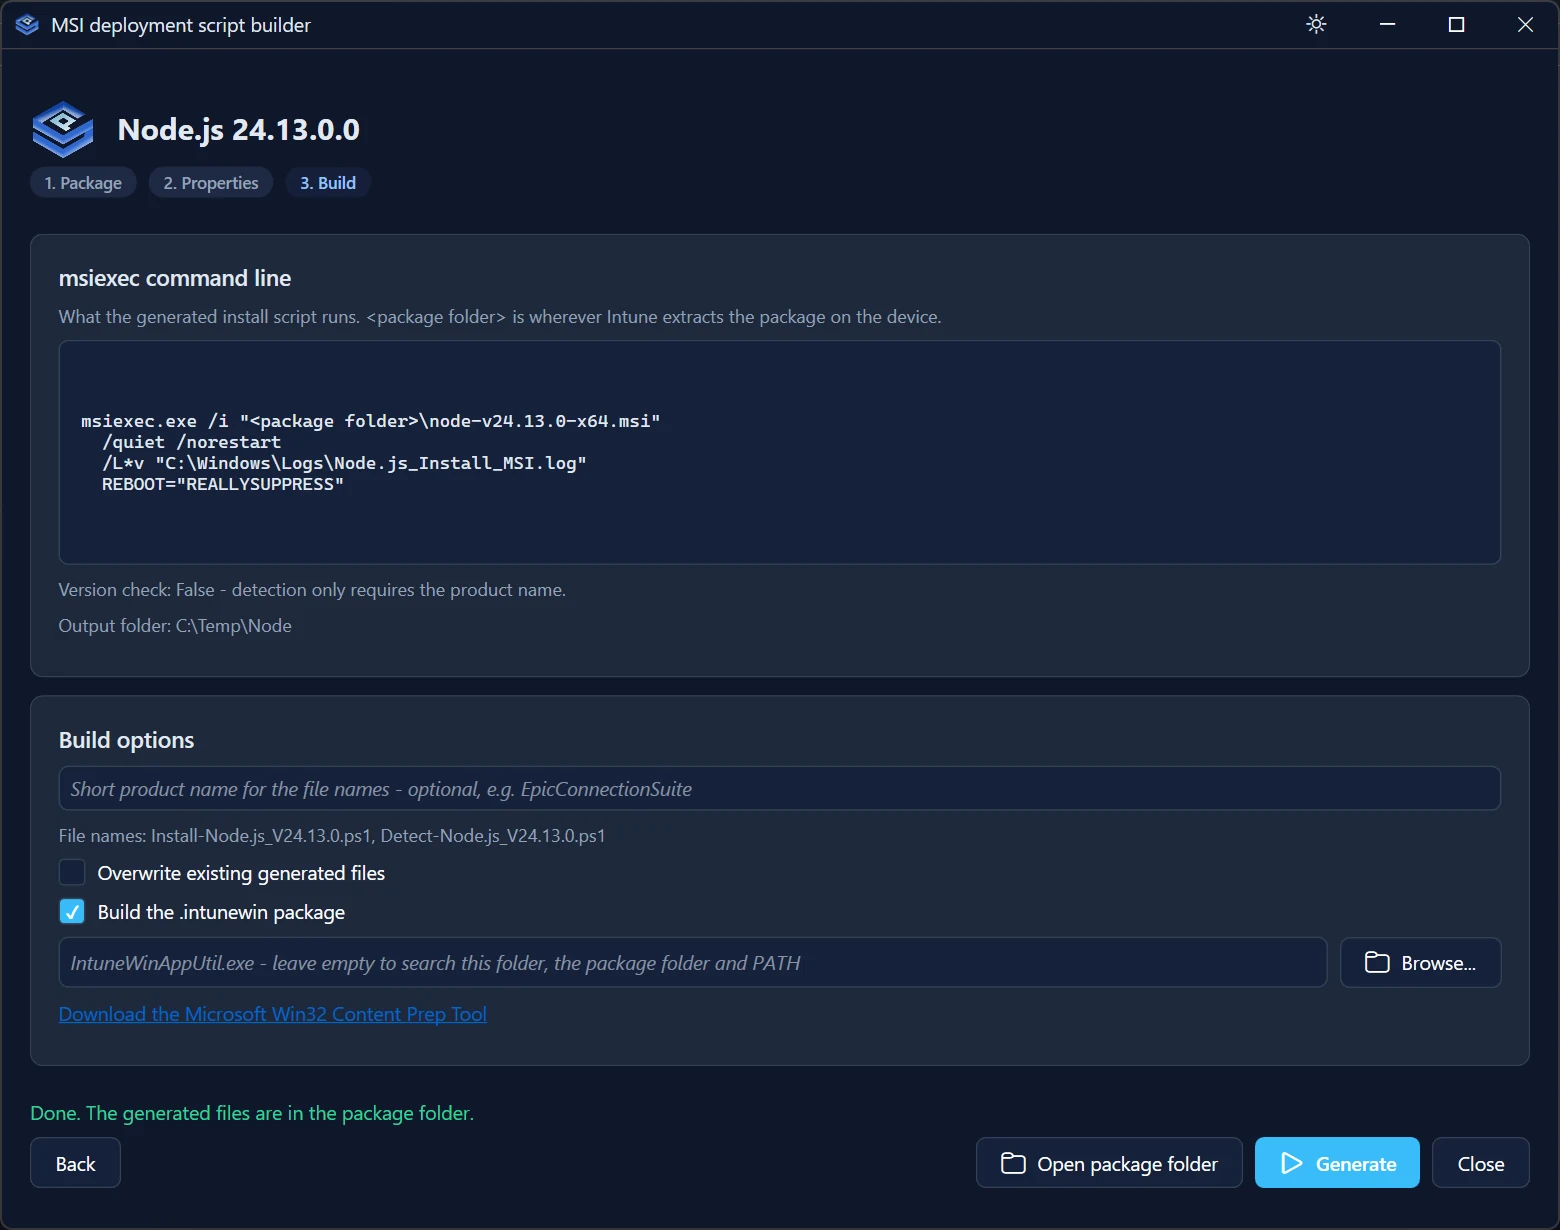
What you get
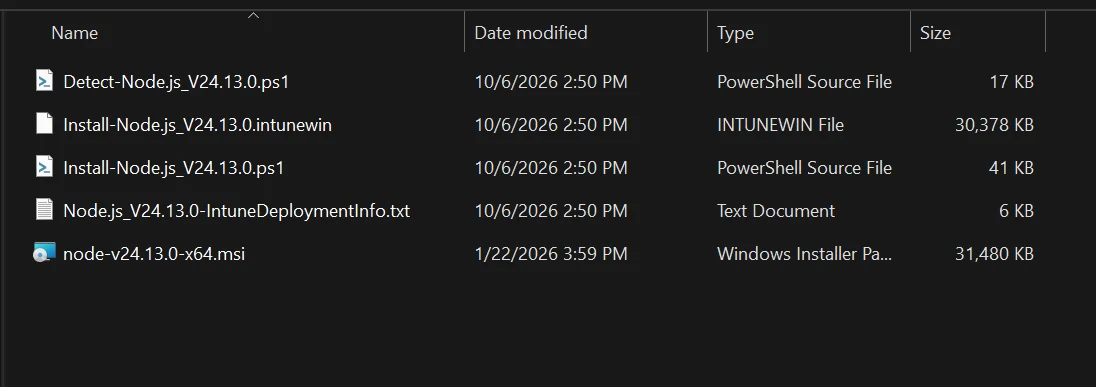
| File | What to do with it |
|---|---|
Install-<Product>_V<Version>.ps1 | Already inside the .intunewin |
Detect-<Product>_V<Version>.ps1 | Upload to Intune separately as the custom detection script |
Uninstall-<Product>_V<Version>.ps1 | Inside the .intunewin, only generated for chained MSIs |
Install-<Product>_V<Version>.intunewin | Upload to Intune as the app package |
<Product>_V<Version>-IntuneDeploymentInfo.txt | Your reference, not shipped |
The info sheet is the part I use most. It has the install command, uninstall command, return codes, detection settings, and client log paths, all ready to paste.
Creating the app in Intune
In the Intune admin center, go to Apps > Windows > Add > Windows app (Win32) and select the .intunewin. Take Publisher and App Version straight from the info sheet. They come from the MSI, so they match what detection looks for. The Intune screenshots in this section are from a different package than the Node.js example above.
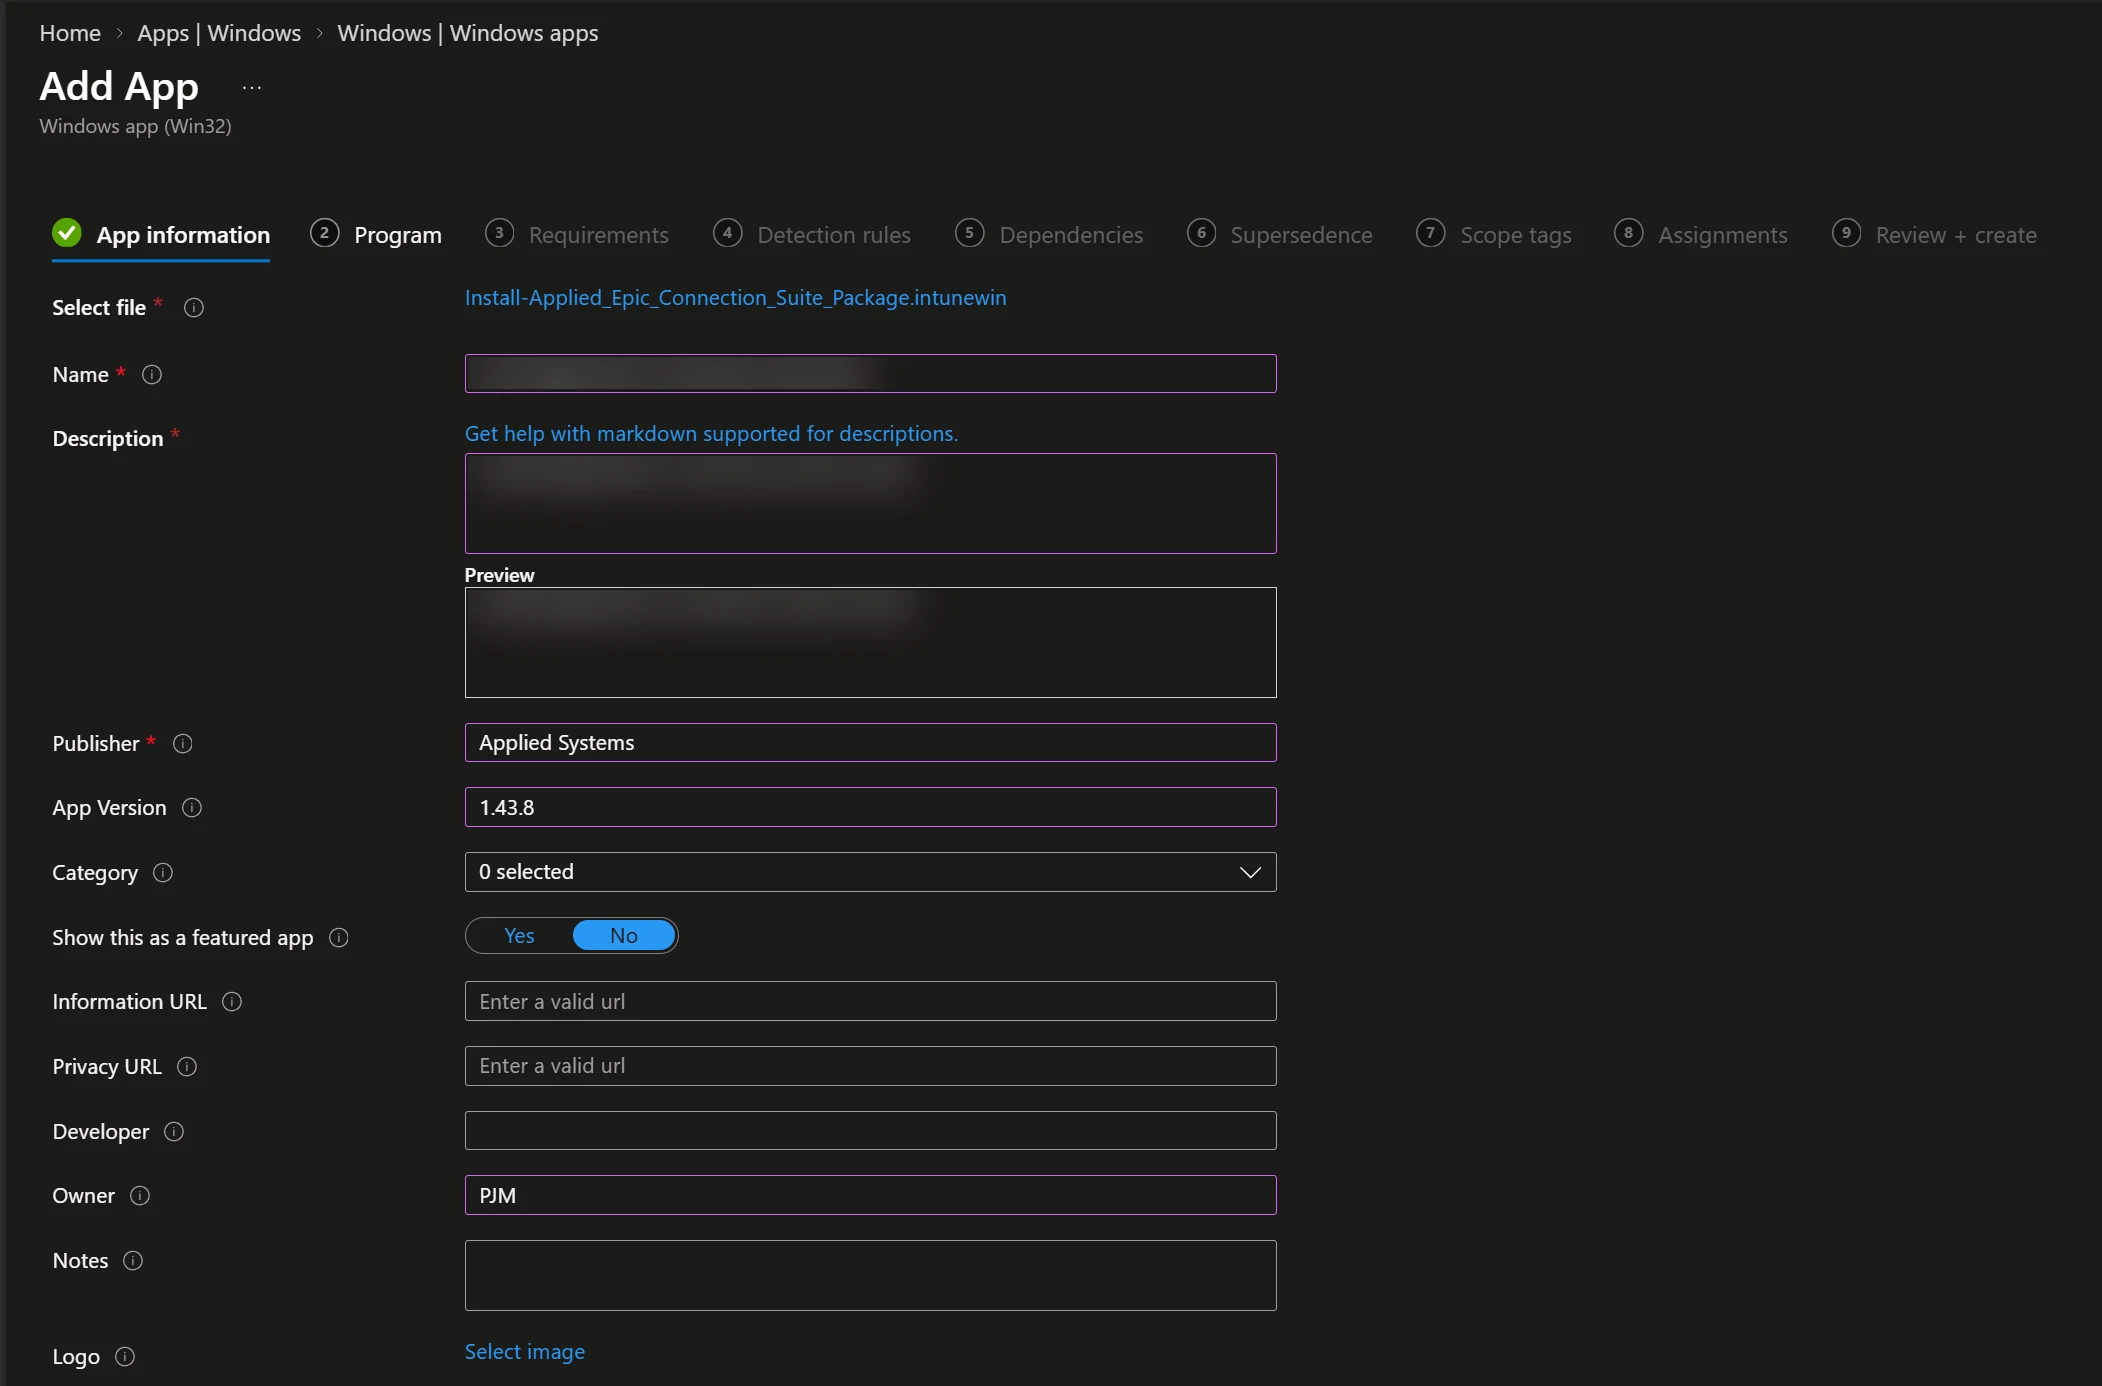
On the Program tab, set the installer and uninstaller type to PowerShell script and browse to the generated scripts. Set Device restart behavior to Determine behavior based on return codes. That’s what lets the script’s exit codes drive restarts.
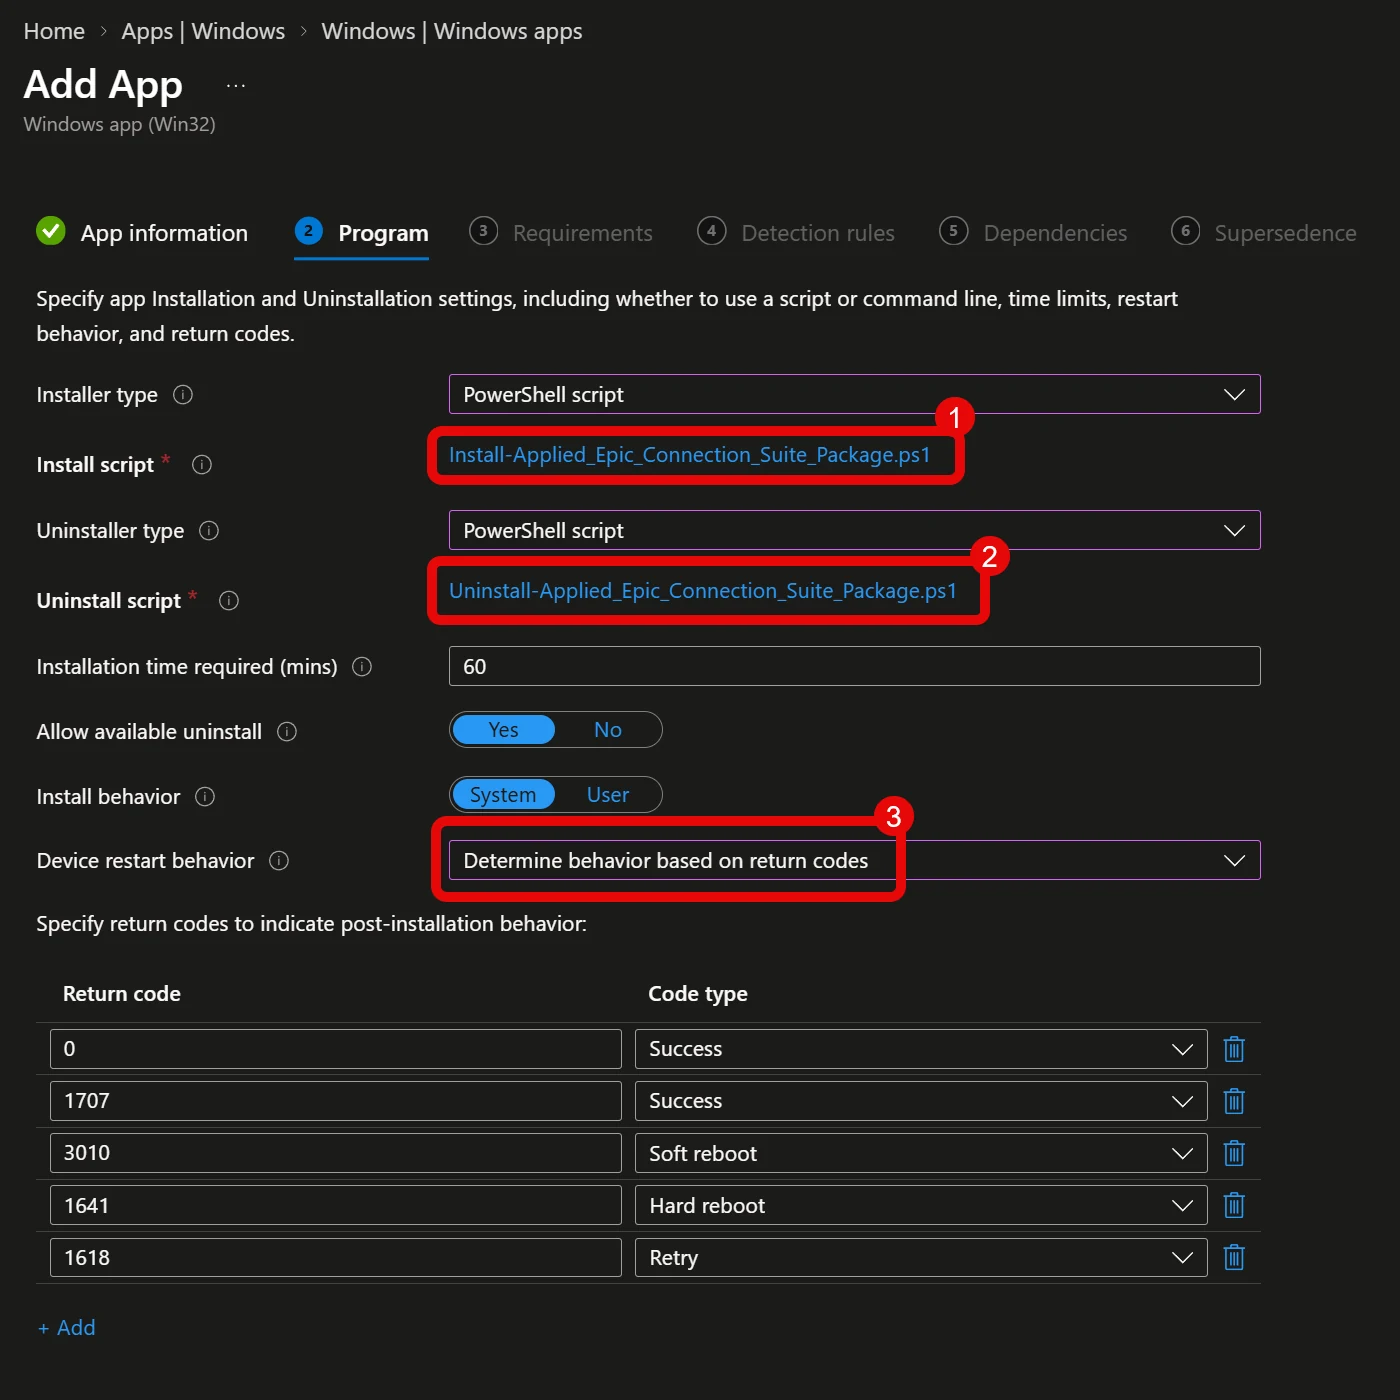
The install script passes msiexec’s real exit code through to Intune rather than flattening it. 3010 stays 3010, 1641 stays 1641, and 1618 (another install holding the Windows Installer lock) comes back as a retry instead of a failure. Those all line up with Intune’s default return codes, so normally there’s nothing to change. Don’t add 1 as a success code to make a red app turn green. It means the install really failed, and the log will tell you why.
On Detection rules, choose Use a custom detection script, upload the Detect- script, and leave both Run script as 32-bit process and Enforce script signature check set to No.
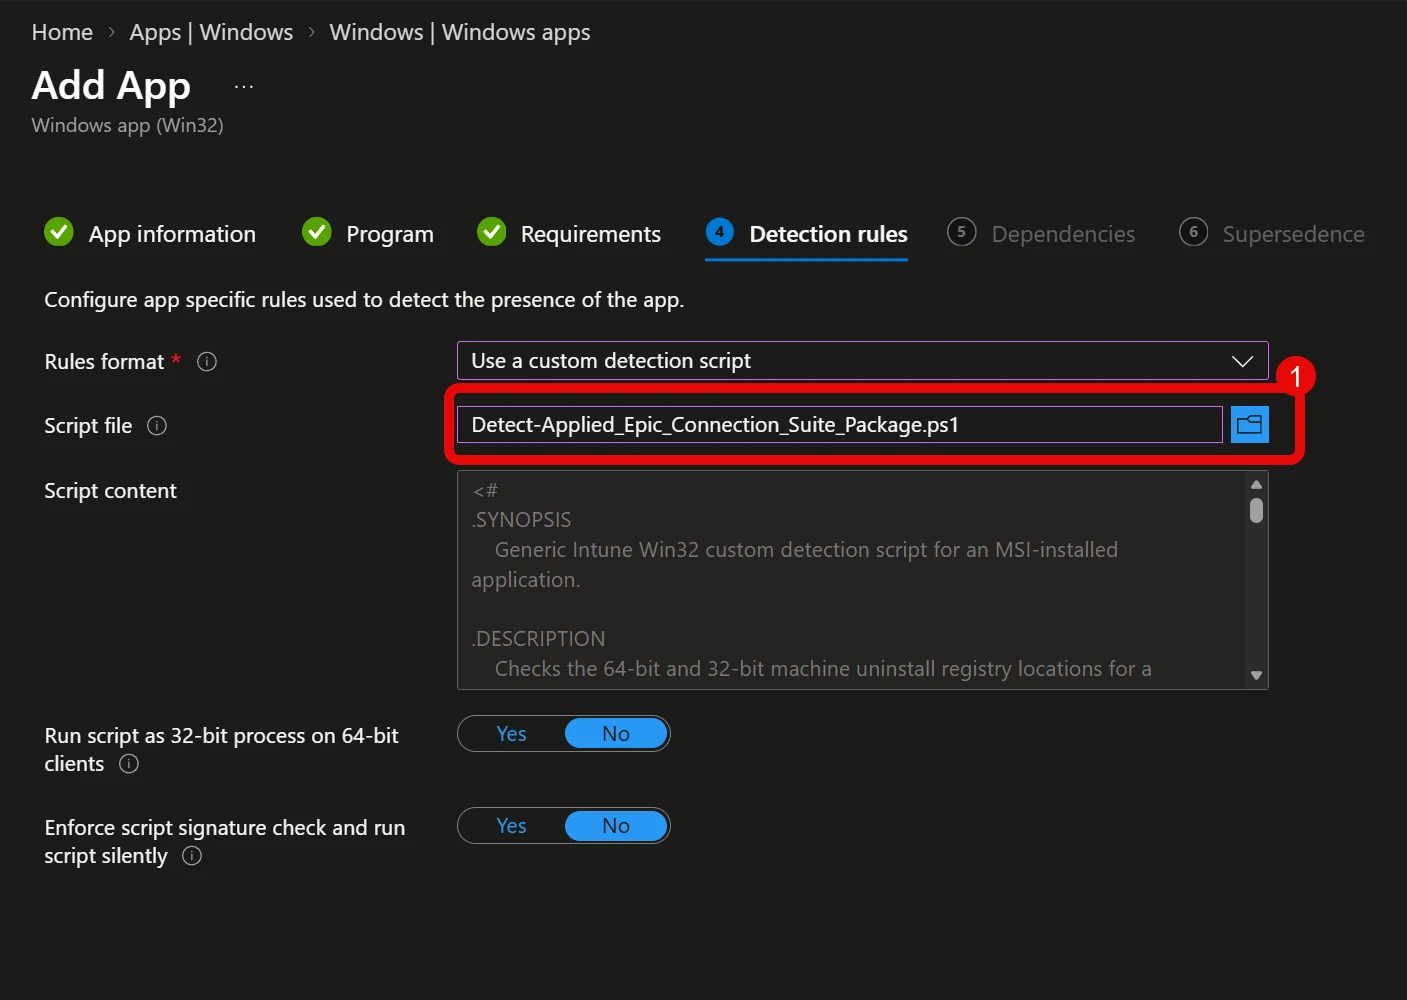
The detection script matches DisplayName plus a minimum version in both the 64-bit and 32-bit uninstall keys, rather than the MSI product code. A lot of vendors change the product code on every release, and the built-in MSI rule can’t express “this version or newer”. The info sheet still lists the product code if you’d rather use it for a given app.
Bootstrapper MSIs
Some MSIs are bootstrappers that chain a set of sub-MSIs. The builder detects this and tells you, because it changes three things:
- Restart suppression doesn’t propagate.
/norestartapplies to the parent. A sub-package that ignores it can trigger a restart. - Properties don’t propagate either. A property only reaches a sub-package if the parent forwards it explicitly.
- Each sub-package registers its own Add/Remove Programs entry, so uninstalling the parent alone can leave orphans behind.
For chained MSIs the builder generates an uninstall script that removes the parent first, waits for the vendor’s chainer to finish, then removes any component that’s still registered, one product code at a time. Every product code is fixed at build time, so the script can never remove something unrelated. If a prerequisite’s product code isn’t recorded anywhere in the MSI, the builder names it so you can find the code on a test device and pass it back in with -AdditionalProductCode.
Running it unattended
The window is a front end for the same script. Every value can be passed on the command line, and -NonInteractive skips the window entirely, which makes it usable in a pipeline:
.\New-MsiDeploymentScripts.ps1 -PackageFolder 'C:\Packages\MyApp' ` -MsiProperties ([ordered]@{ BROWSERURL = 'https://example.contoso.com' }) ` -NonInteractive -BuildIntuneWin -ForceThe window’s Generate button runs exactly this, so the window and a pipeline produce identical output. Over PowerShell Remoting, in a scheduled task, or with -NoGui, the builder falls back to console prompts automatically. Run Get-Help .\New-MsiDeploymentScripts.ps1 -Full for every parameter and more examples.
A few rules I follow
- Never trust a vendor-supplied property name. Check it against the MSI. Uppercase, or it isn’t public.
- Read the Properties page before selecting Next. The undeclared-property list and the bootstrapper warnings are the whole point.
- Verify the property landed on a pilot device. An exit code of
0proves nothing here, because it returns0either way. - Fix logic in the templates, not in a generated script. Anything you change in a generated script is lost the next time it’s rebuilt.
- Test the uninstall for any chained MSI before it reaches production.
What it doesn’t do
It installs exactly one MSI. Multi-MSI installs, EXE installers, and anything needing user interaction need a different approach (PSADT is the usual answer for the last one). Detection works by reading the product name and version out of the MSI at build time (through any transform or patch) and baking them into the detection script, which then looks for a matching DisplayName and DisplayVersion in Add/Remove Programs, the uninstall keys in the registry. That covers any well-behaved MSI, but an app that needs file or file-version detection needs its own detection script.
If you’re packaging by hand, this builder has saved me a lot of time, and I hope it does the same for you.
As always, these scripts are provided as-is. Test in a lab before you use them in production.