
For quite some time we have had warranty reporting for Dell, Lenovo, and GETAC devices. We used to also support Microsoft devices but, unfortunately, both Microsoft and HP have taken their warranty API’s offline. We have chosen not to bring this functionality into Intune as we expect that Microsoft will add it natively to Intune soon. However, some customers need the data now, so we are providing this solution as a work-around until we see what the native Intune warranty information looks like once it is released.
We aren’t going to pretend this is a complete, robust solution but it will give you the warranty end date in a report. Hopefully this is helpful while we wait for Microsoft to bring us a better solution.
**Note:**The script has code in it to collect warranty data for Microsoft devices however Microsoft has taken their API offline. Prerequisites:
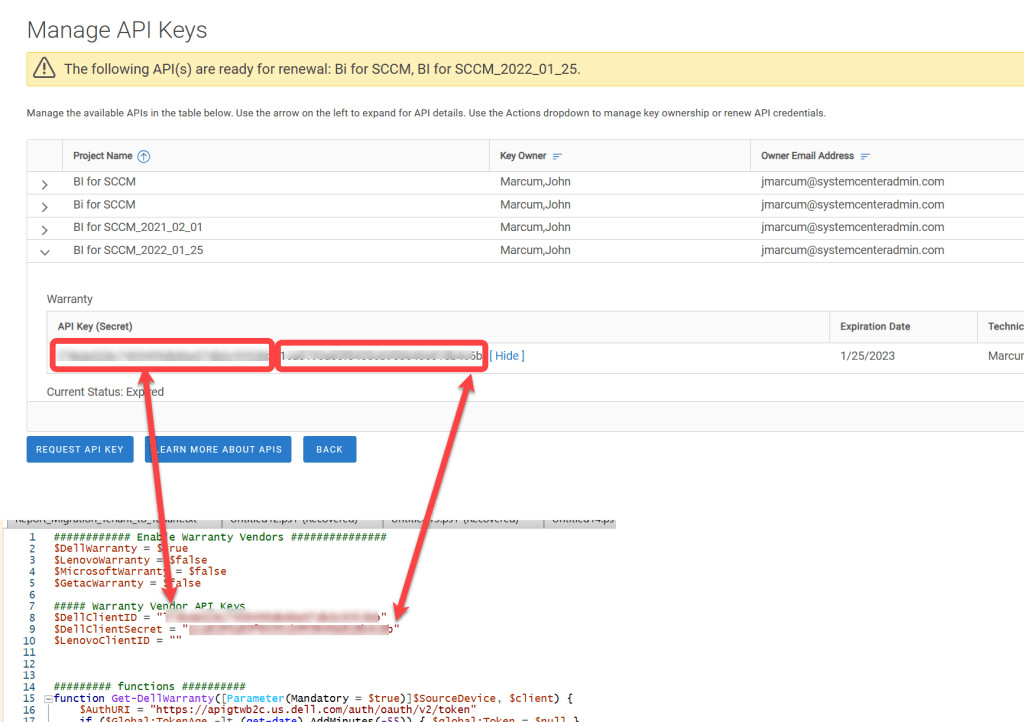
- Dell requires an API token in order to access their warranty API. You must apply for the token at https://techdirect.dell.com/Portal/APIs.aspx
- Lenovo requires a client token in order to access their warranty API. Getting the token from Lenovo can be a bit more difficult than getting a token from Dell. You will need to have your Lenovo account rep request a key on your behalf.
The script(s) referenced above are available on GitHub:

Get the scripts on GitHub: powerstacks-corp/Windows-Enhanced-Inventory
1. Edit the Script
- Copy the PowerShell script from above into your favorite code editor.
- Enable or disable each of the manufacturer’s warranty collection in the Enable Warranty Vendors section by entering either $true or $false.
- If applicable enter the Dell Client ID and Client Secret values. When you retrieve this info from TechDirect it will be in a format similar to xxxxxxxxxx (yyyyyyyyy). The part before the opening parenthesis is the Client ID, the part inside the parenthesis is the Client Secret. (Note: Do not enter the parenthesis themselves in the script)
- If applicable enter the Lenovo Client ID provided to you by your Lenovo account rep.
- Ensure the saved script is encoded in UTF-8.
- Save the edited script.
2. Create a Remediation Script
- Using Remediation scripts in Intune is a great way to run any scripts on a schedule. However, unless you extend warranties this script only needs to run once on each computer. This document shows how to use a Remediation script but using a Script in Intune is also feasible.
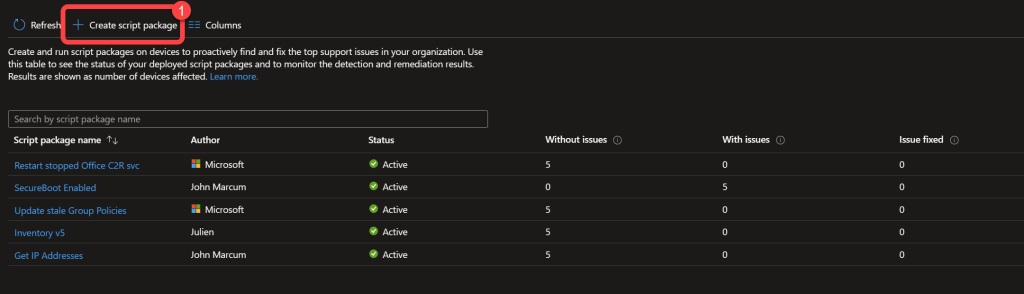
- In the Intune admin center, go to Devices > Remediations.
- Choose Create script package button to create a script package.
- n the Basics step, give the script package a Name and optionally, a Description.
- Select Next.
3. Upload the Script
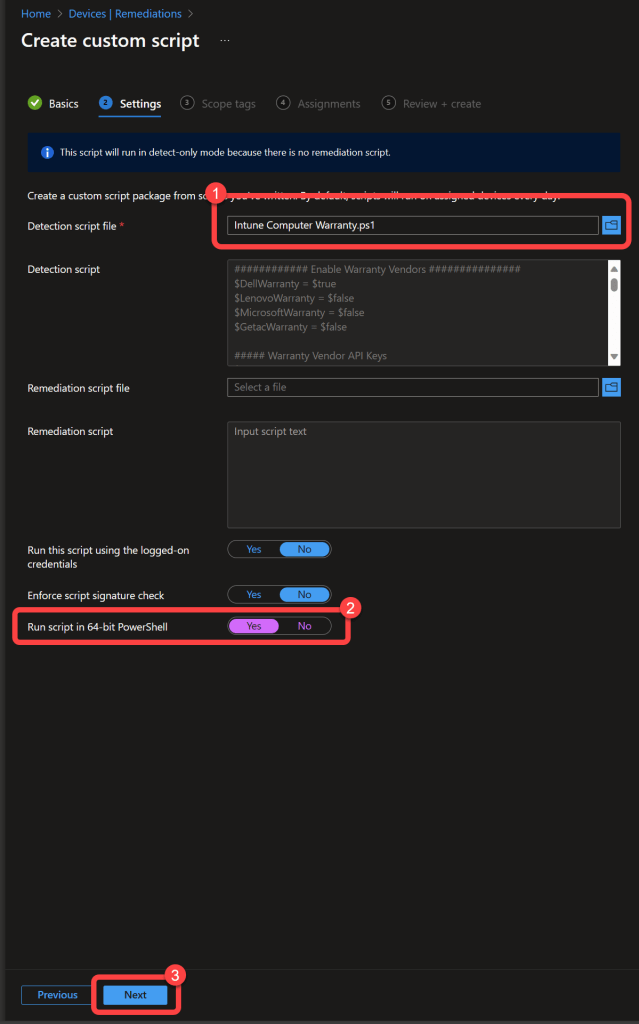
- On the Settings step, upload the warranty script as the Detection script.
- No Remediation script will be used.
- Select Yes on the Run script in 64-bit PowerShellslider.
- Select Next.
- Selecting Scope Tags is optional.
- Select Next.
4. Deploy the Script
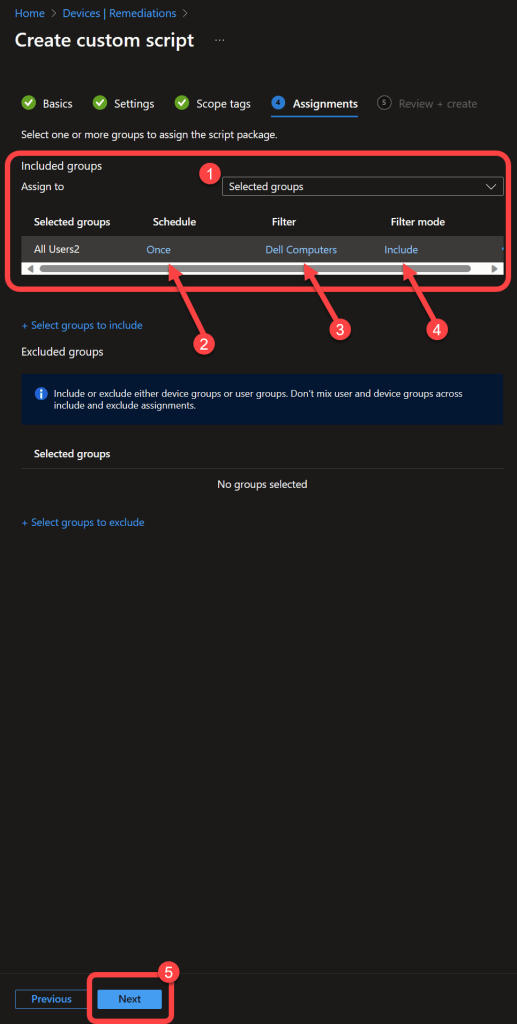
- On the Assignments pane, select the group(s) to which you want to deploy the script package.
- Select the Schedule that you would like to run the script. Once is acceptable for most customers.
- You can also use filtersto limit the script to running only on devices manufactured by the vendor(s) for which you want to collect warranty data.
- Select Next.
- Select Create.
5. Take a Break
- Wait some time for devices to run the script and return data.
- Ensure that a refresh cycle has run in Power BI.

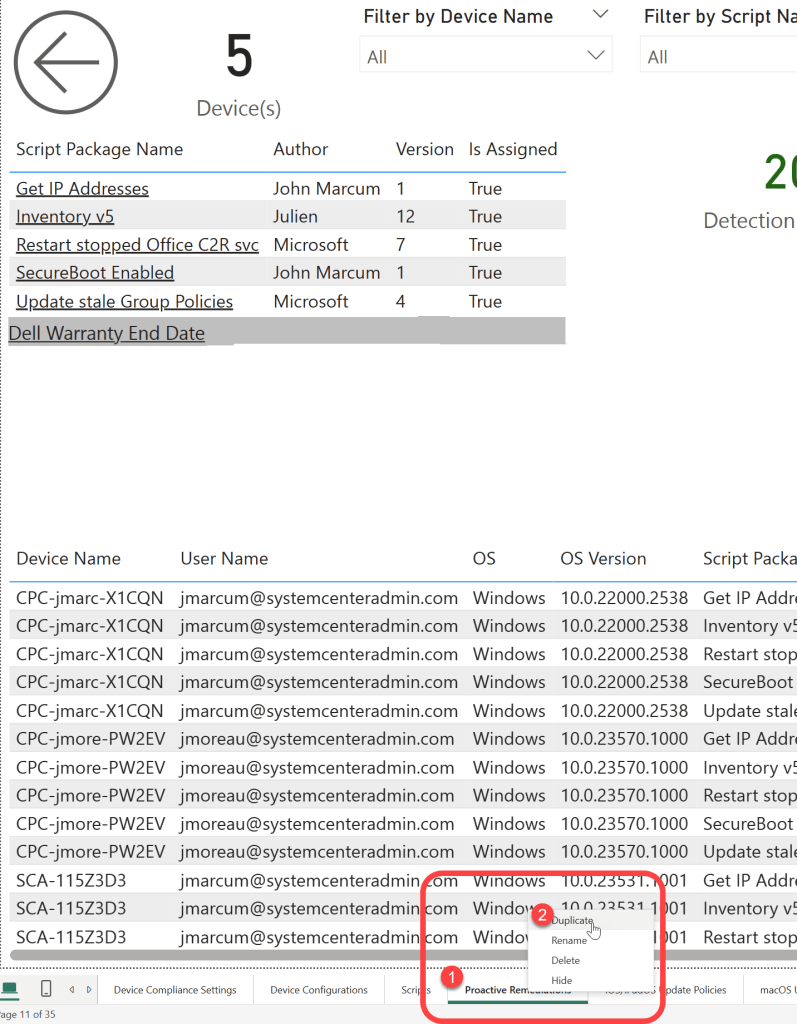
6. Duplicate the Proactive Remediations Page
- Open your BI for Intune report.
- Go to Edit mode.
- Select the Proactive Remediations page.
- Right click the Proactive Remediationstab.
- Select Duplicate.
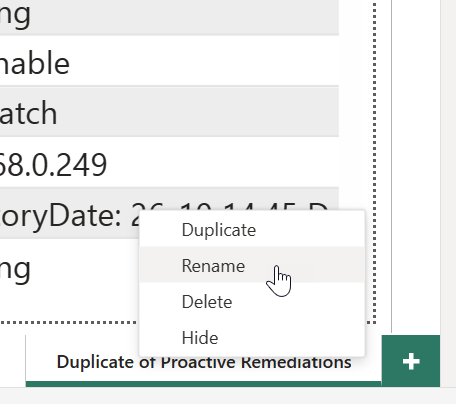
7. Rename the New Page
- Right click the new page tab.
- Select Rename.
- Enter a name for the new page.
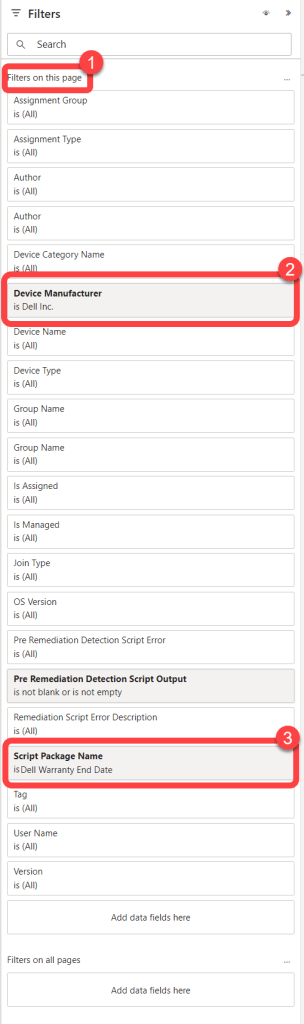
8. Add Filters to the Warranty Page
- On the Filters pane add apage filter for Script Package Name and select your warranty script remediation package.
- Add any other filters that you find necessary.
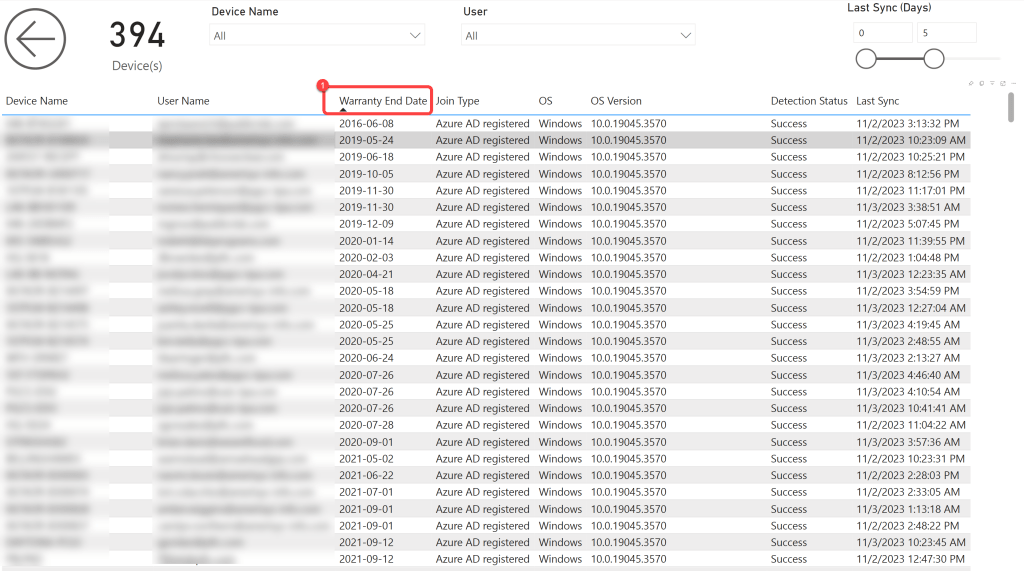
9. Customize the Warranty Page
- You might want to customize the warranty page to make it easier to consume.
- The script will output the warranty end date as the “Pre Remediation Script Output”. You can see this in the table on the page.
- In this example I’ve removed some of the unnecessary visuals and renamed the “Pre Remediation Script Output” field in the table to “Warranty End Date”.
- Save your report and return to reading view.
Want comprehensive device reporting beyond warranty data? BI for Intune provides pre-built Power BI dashboards for device inventory, compliance, app deployments, Windows Updates, proactive remediations, and more — all in one place. Start a free trial →