Create the Microsoft Entra App Registration
Synchronizing data from Microsoft Defender for Endpoint is done using application permissions. Here we are configuring the permissions required for Power BI to connect to the Microsoft API’s to retrieve the data.
Prerequisites: The user performing this step requires Global Admin and Subscription Admin rights.
Step 1: Create a New App Registration
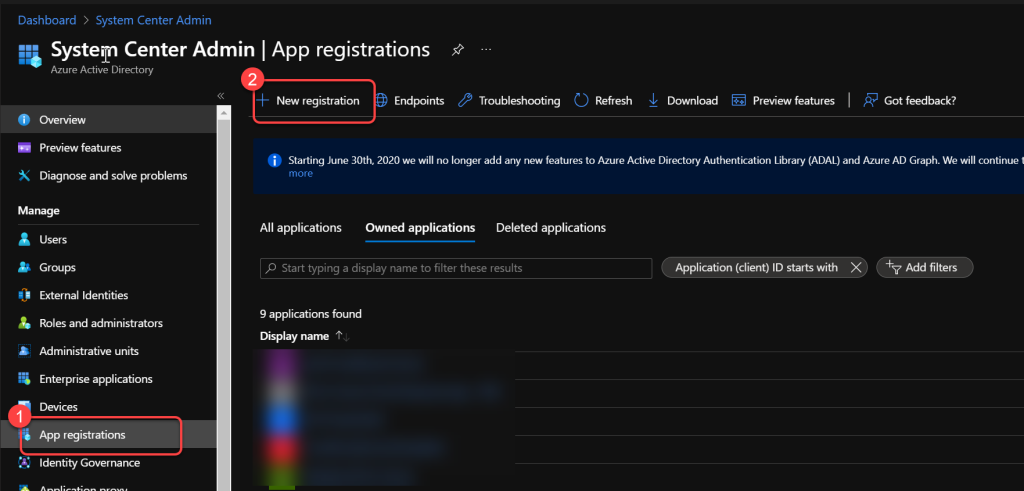
Section titled “Step 1: Create a New App Registration”- Log in to portal.azure.com using a global administrator account.
- Search for and select App registrations.
- Select New registration.
Step 2: Register the Application
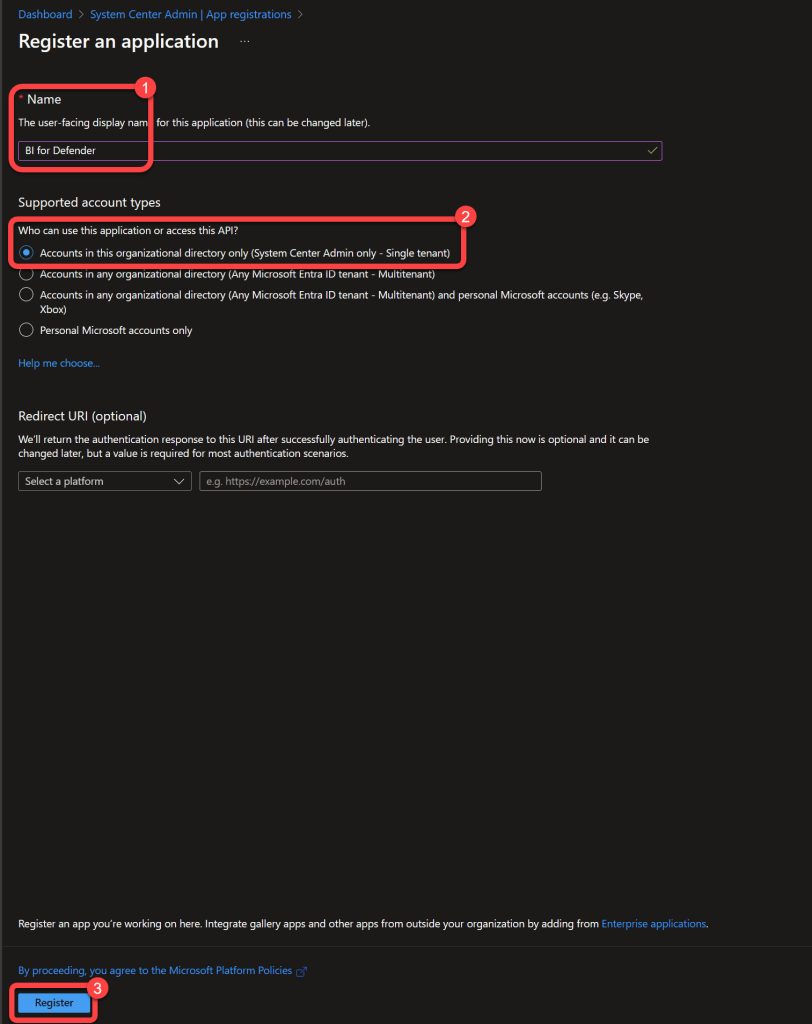
Section titled “Step 2: Register the Application”- Enter a Name for the application. (This will not be seen by anyone other than admins.)
- Specify who can use the application as Accounts in this organizational directory only.
- Select Register.
Step 3: Open API Permissions
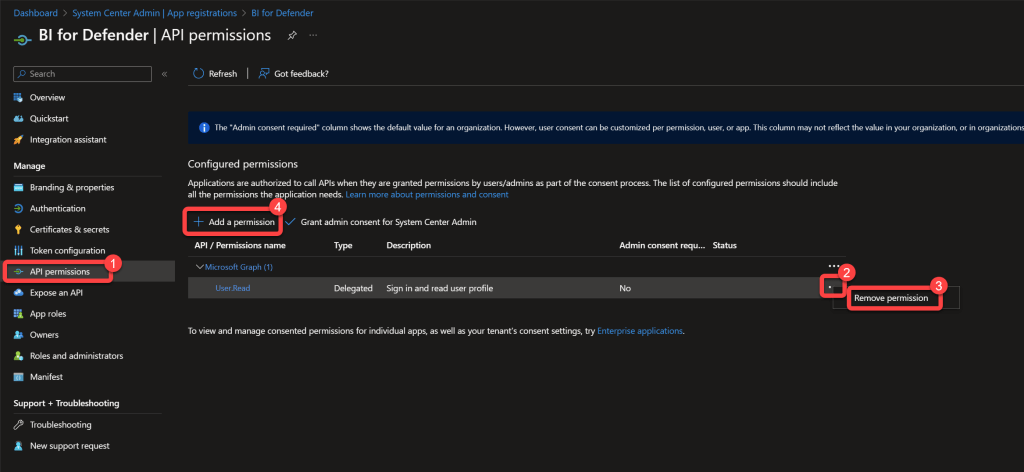
Section titled “Step 3: Open API Permissions”- On the Enterprise App page select API Permissions.
- Remove the User.Read permission.
- Select Add a permission.
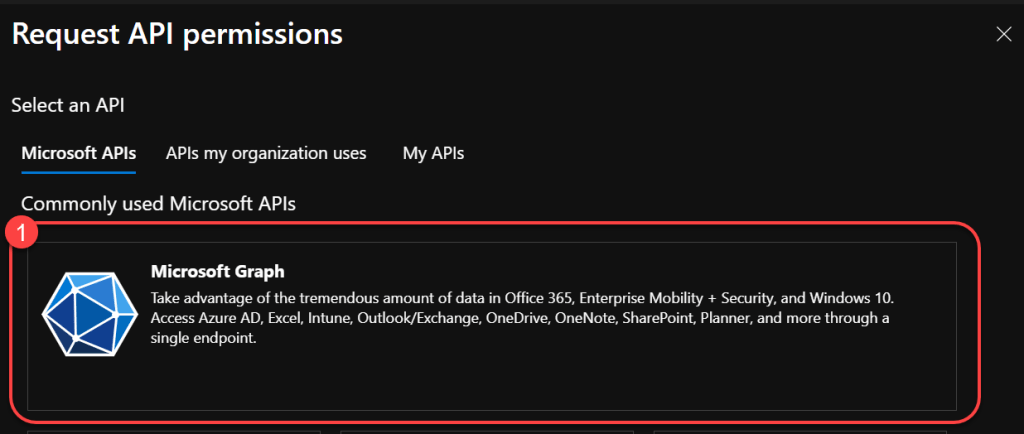
Step 4: Select Microsoft Graph
Section titled “Step 4: Select Microsoft Graph”- Select Microsoft Graph.
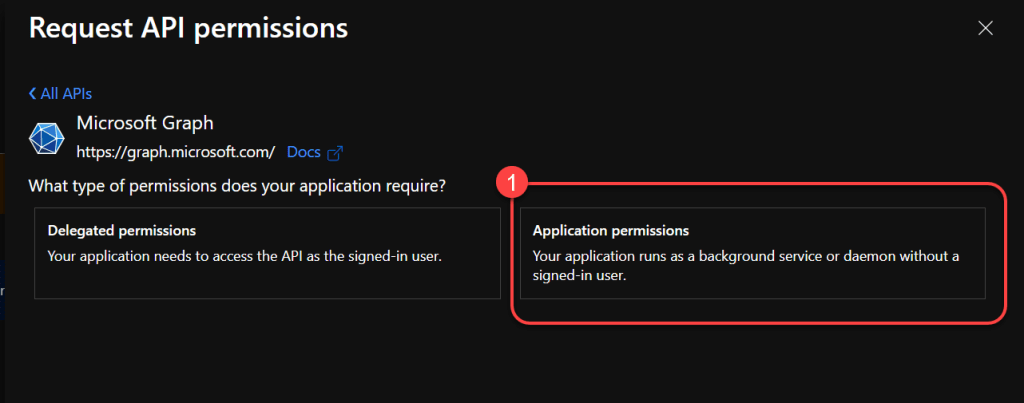
Step 5: Choose Application Permissions
Section titled “Step 5: Choose Application Permissions”- Select Application permissions.
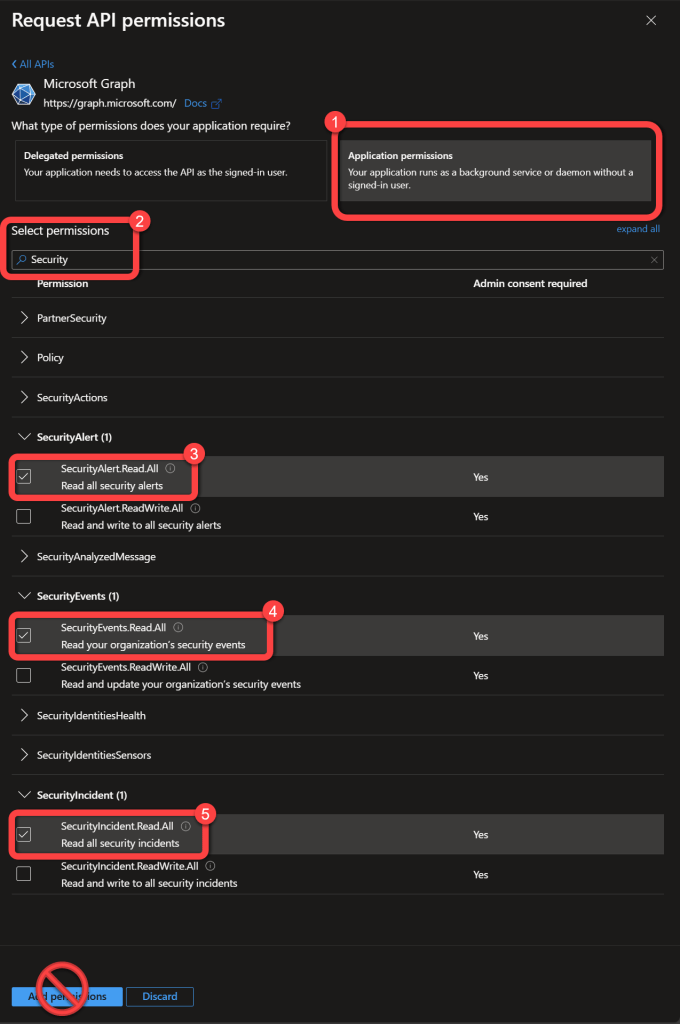
Step 6: Add Security Permissions
Section titled “Step 6: Add Security Permissions”- Search for Security.
- Select the following permissions:
- SecurityAlert.Read.All
- SecurityEvents.Read.All
- SecurityIncident.Read.All
- Do not select the Add permissions button, continue to the next step.
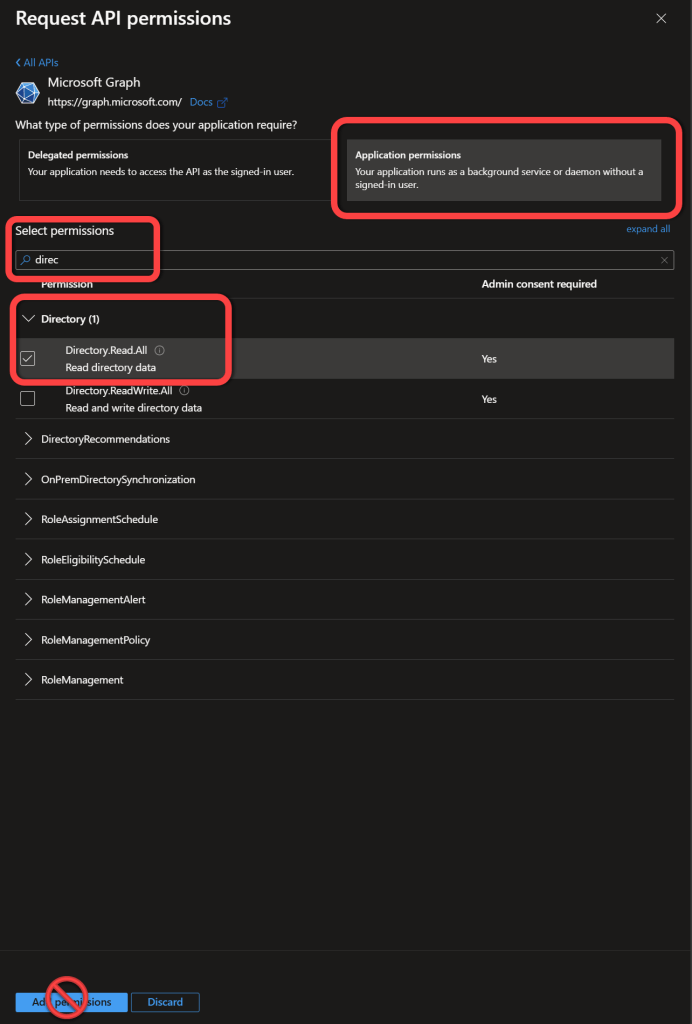
Step 7: Add Directory Permissions
Section titled “Step 7: Add Directory Permissions”- Search for Directory.
- Select the following permissions:
- Directory.Read.All
- Do not select the Add permissions button, continue to the next step.
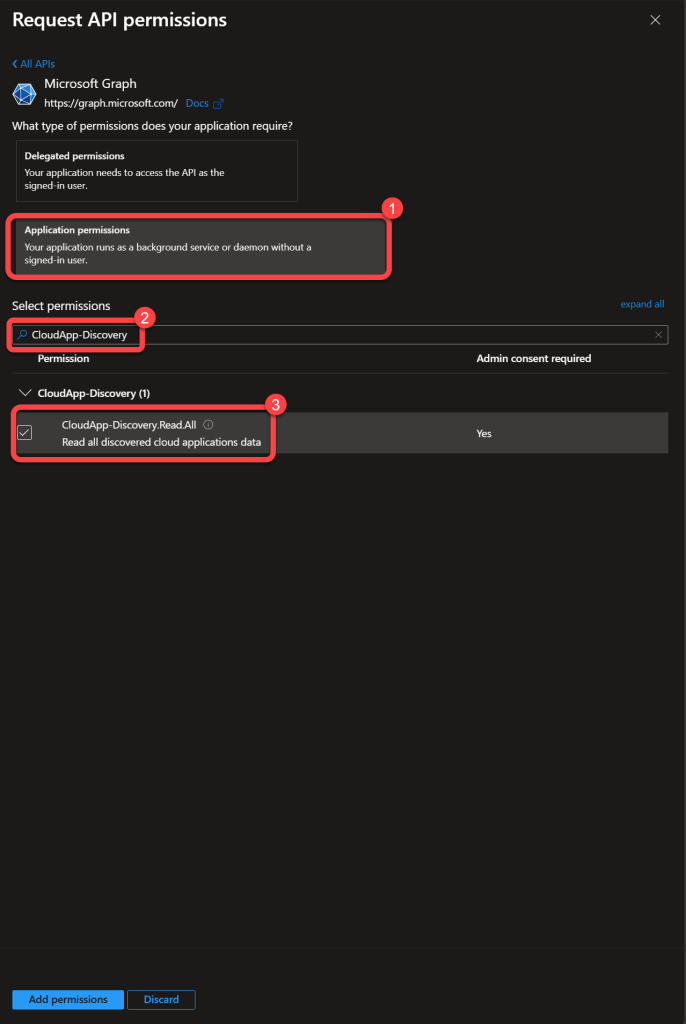
Step 8: Add CloudApp-Discovery Permissions
Section titled “Step 8: Add CloudApp-Discovery Permissions”- Search for CloudApp-Discovery.
- Select the following permissions:
- CloudApp-Discovery.Read.All
- Do not select the Add permissions button, continue to the next step.
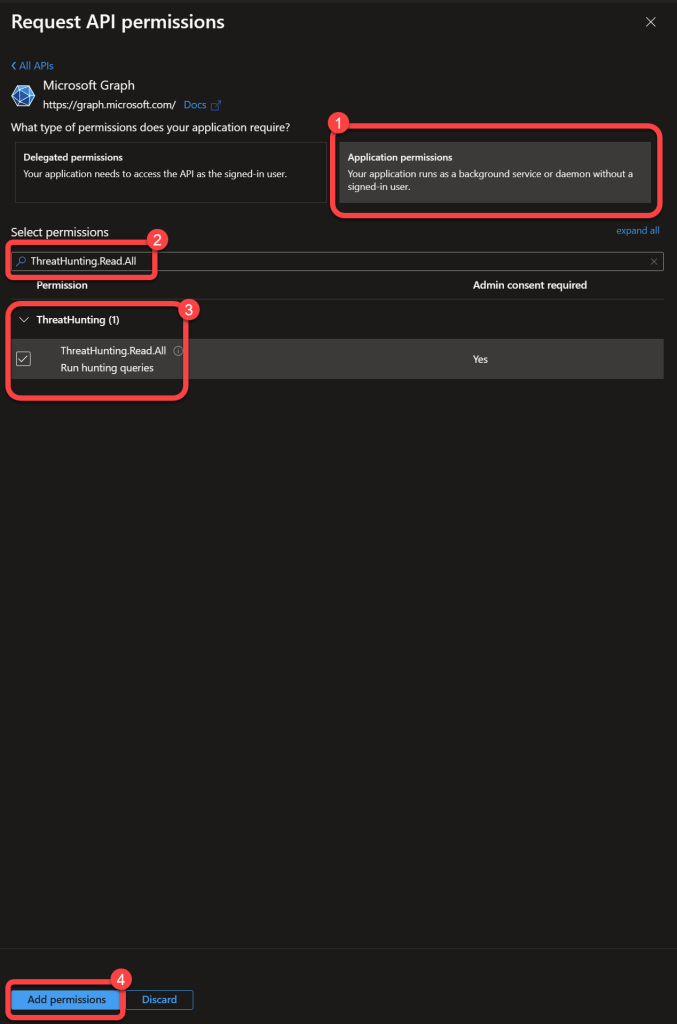
Step 9: Add ThreatHunting Permissions
Section titled “Step 9: Add ThreatHunting Permissions”- Search for ThreatHunting.
- Select ThreatHunting.Read.All.
- Select the Add permissions button.
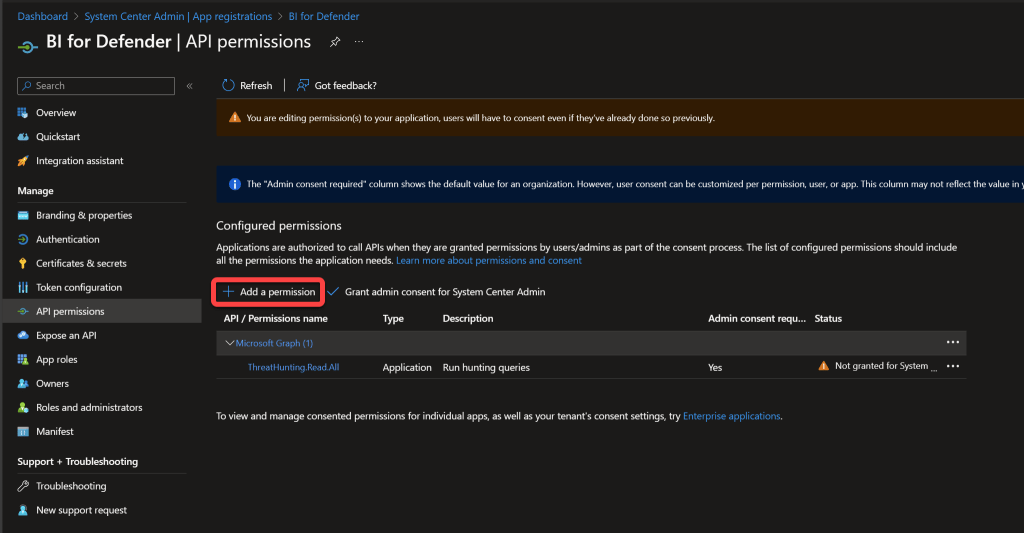
Step 10: Add Another Permission Set
Section titled “Step 10: Add Another Permission Set”- On the Enterprise App page select API Permissions.
- Select Add a permission.
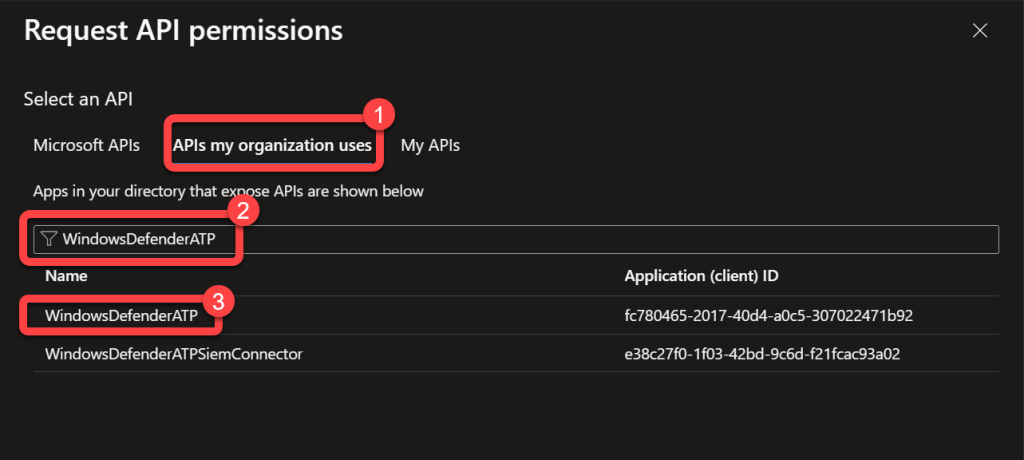
Step 11: Select WindowsDefenderATP API
Section titled “Step 11: Select WindowsDefenderATP API”- Select APIs my organization uses.
- Search for WindowsDefenderATP.
- Select WindowsDefenderATP in the search results.
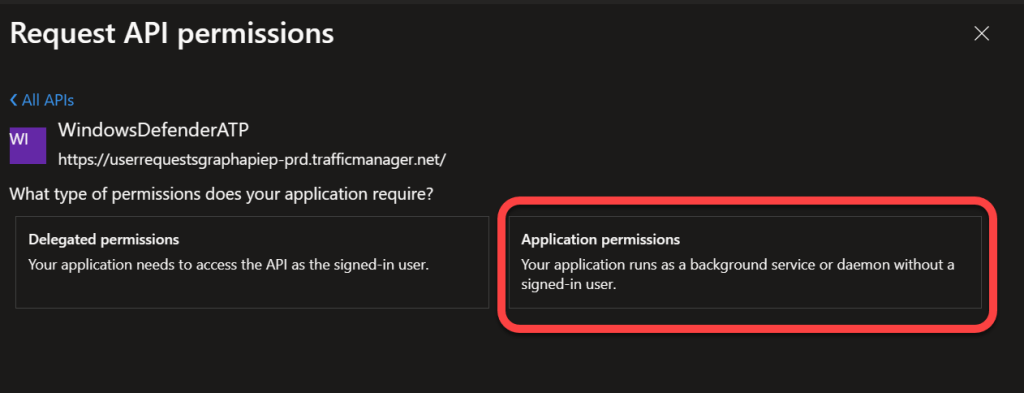
Step 12: Choose Application Permissions
Section titled “Step 12: Choose Application Permissions”- Select Application permissions.
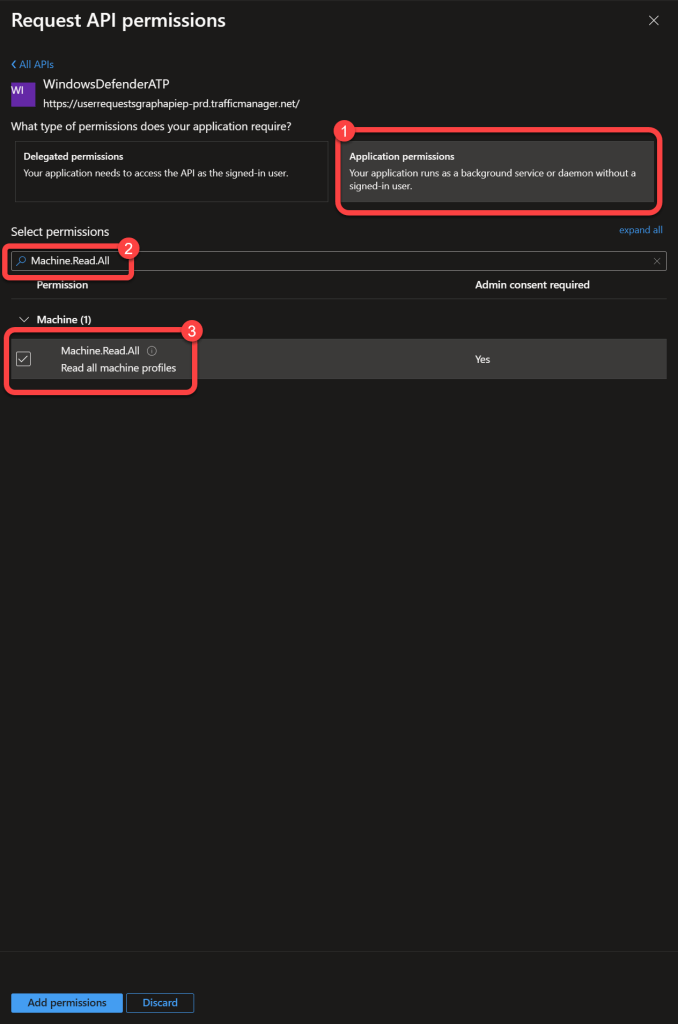
Step 13: Add Machine Permissions
Section titled “Step 13: Add Machine Permissions”- Search for Machine.
- Select the following permissions:
- Machine.Read.All
- Do not select the Add permissions button, continue to the next step.
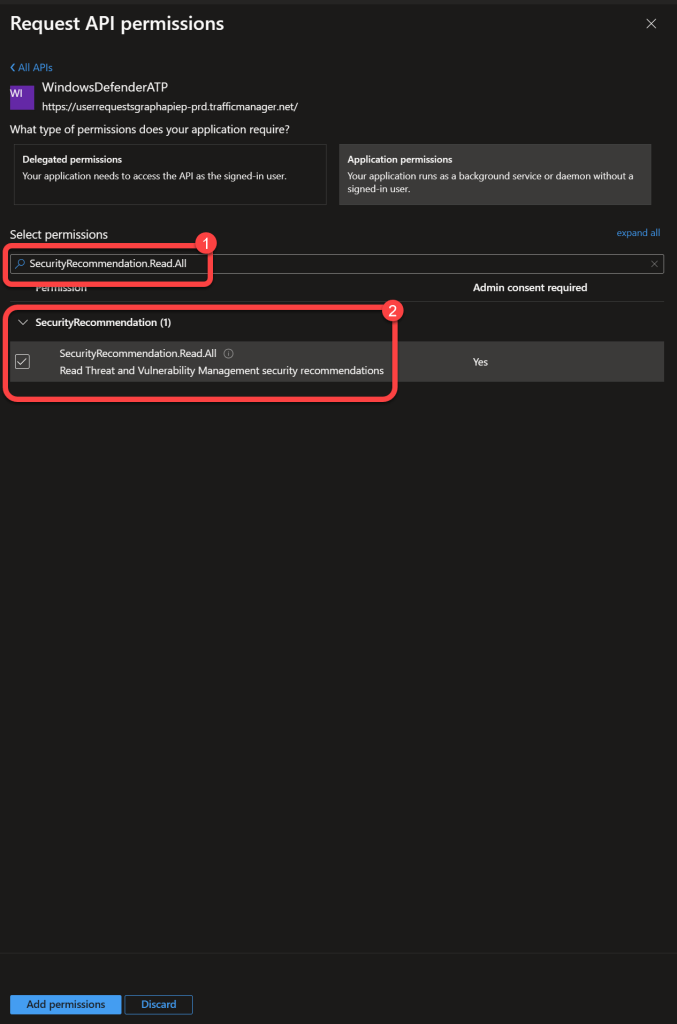
Step 14: Add SecurityRecommendation Permissions
Section titled “Step 14: Add SecurityRecommendation Permissions”- Search for SecurityRecommendation.
- Select the following permissions:
- SecurityRecommendation.Read.All
- Do not select the Add permissions button, continue to the next step.
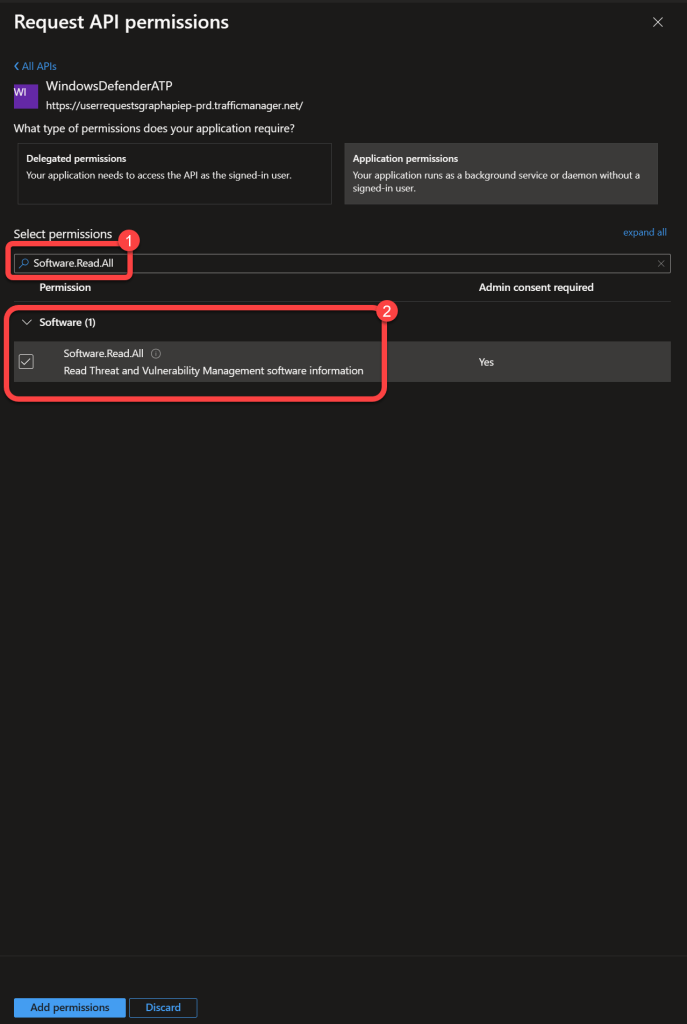
Step 15: Add Software Permissions
Section titled “Step 15: Add Software Permissions”- Search for Software.
- Select the following permissions:
- Software.Read.All
- Do not select the Add permissions button, continue to the next step.
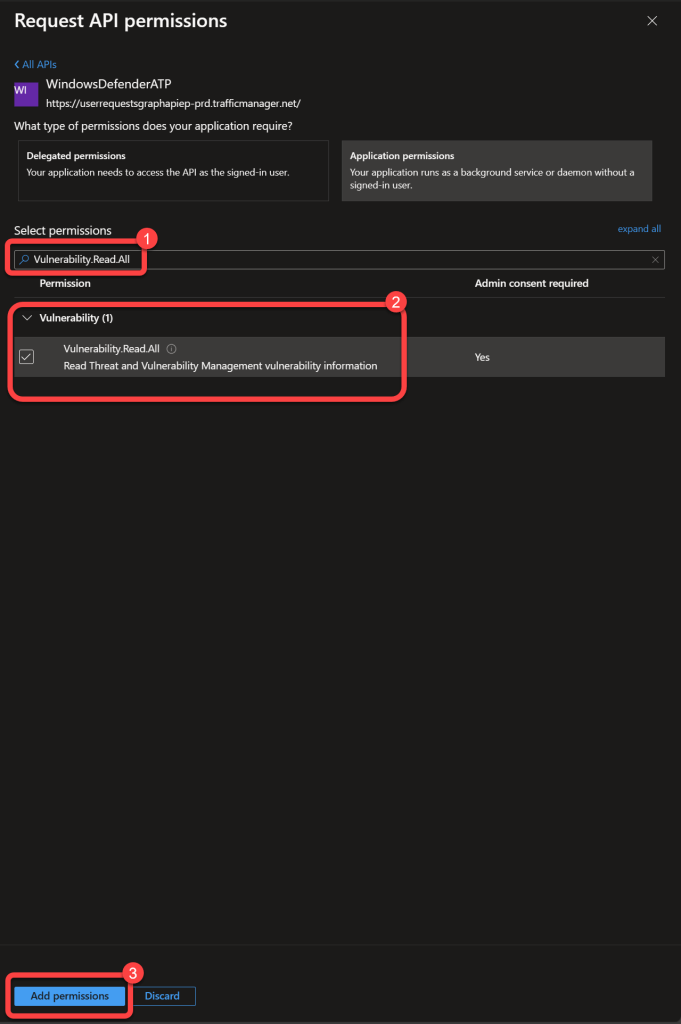
Step 16: Add Vulnerability Permissions
Section titled “Step 16: Add Vulnerability Permissions”- Search for Vulnerability.
- Select the following permissions:
- Vulnerability.Read.All
- Select the Add permissions button.
Step 17: Grant Admin Consent
Section titled “Step 17: Grant Admin Consent”- Select **Grant admin consent for **.

Step 18: Confirm Admin Consent
Section titled “Step 18: Confirm Admin Consent”- Select Yes at the prompt.

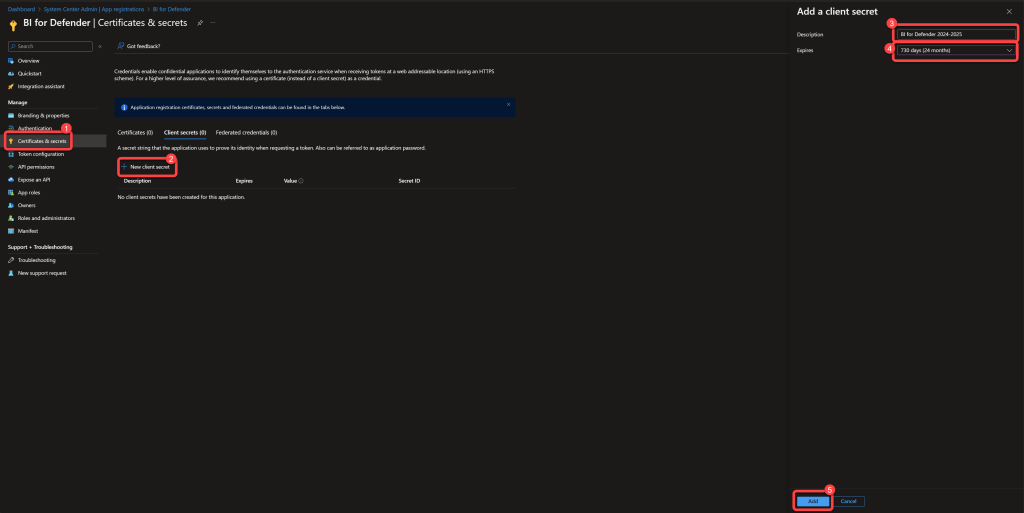
Step 19: Create a Client Secret
Section titled “Step 19: Create a Client Secret”- Select Certificates & secrets.
- Select New client secret.
- Enter a Description.
- Select a value for Expires.
- Select Add.
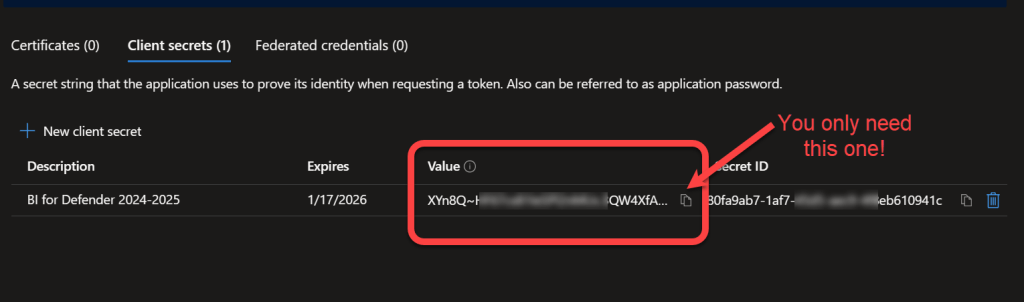
Step 20: Record the Client Secret Value
Section titled “Step 20: Record the Client Secret Value”-
Record the Value data as the Azure AD Client Secret. This will be used later in the installation process. The value can only be displayed once, if you fail to record it here you will have to create a new one.
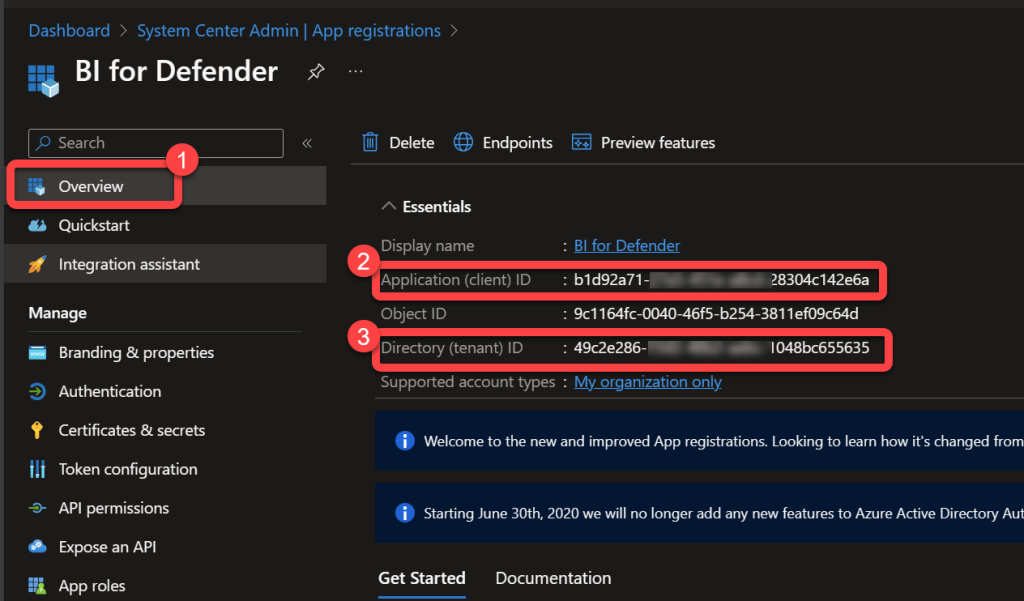
Step 21: Record the App and Tenant IDs
Section titled “Step 21: Record the App and Tenant IDs”- Select Overview.
- Record the Application (client) ID as the Azure AD Client ID. This will be used later in the installation process.
- Record the Directory (tenant) ID as the Azure AD Tenant ID. This will be used later in the installation process.
- The Azure AD Application registration is now complete.