Inventory BitLocker
To populate the data required to see the status of BitLocker encryption, add the Win32_EncryptableVolume class to hardware inventory and import the PowerStacks BitLocker MOF to extend it with additional encryption properties. Skipping this step will not generate any errors, but the encryption fields under Computer Disk (for example, Is Encrypted) will be blank.
The default Win32_EncryptableVolume class reports only Device ID, Drive Letter, Persistent Volume ID, and Protection Status. Importing the BitLocker MOF adds Conversion Status, Encryption Method, and Is Volume Initialized For Protection, giving a fuller picture of each volume’s encryption state.
For background on extending Configuration Manager hardware inventory, see How to extend hardware inventory in the Configuration Manager documentation.
Prerequisites:
- Hardware inventory must be enabled.
- Permissions to edit the default hardware inventory settings.
Step 1: Save the BitLocker MOF File
Section titled “Step 1: Save the BitLocker MOF File”Download BitLocker.mof and save it somewhere on your Configuration Manager Primary Site Server (for example, C:\Temp\BitLocker.mof). You will import it in a later step.
Step 2: Open the Default Client Settings
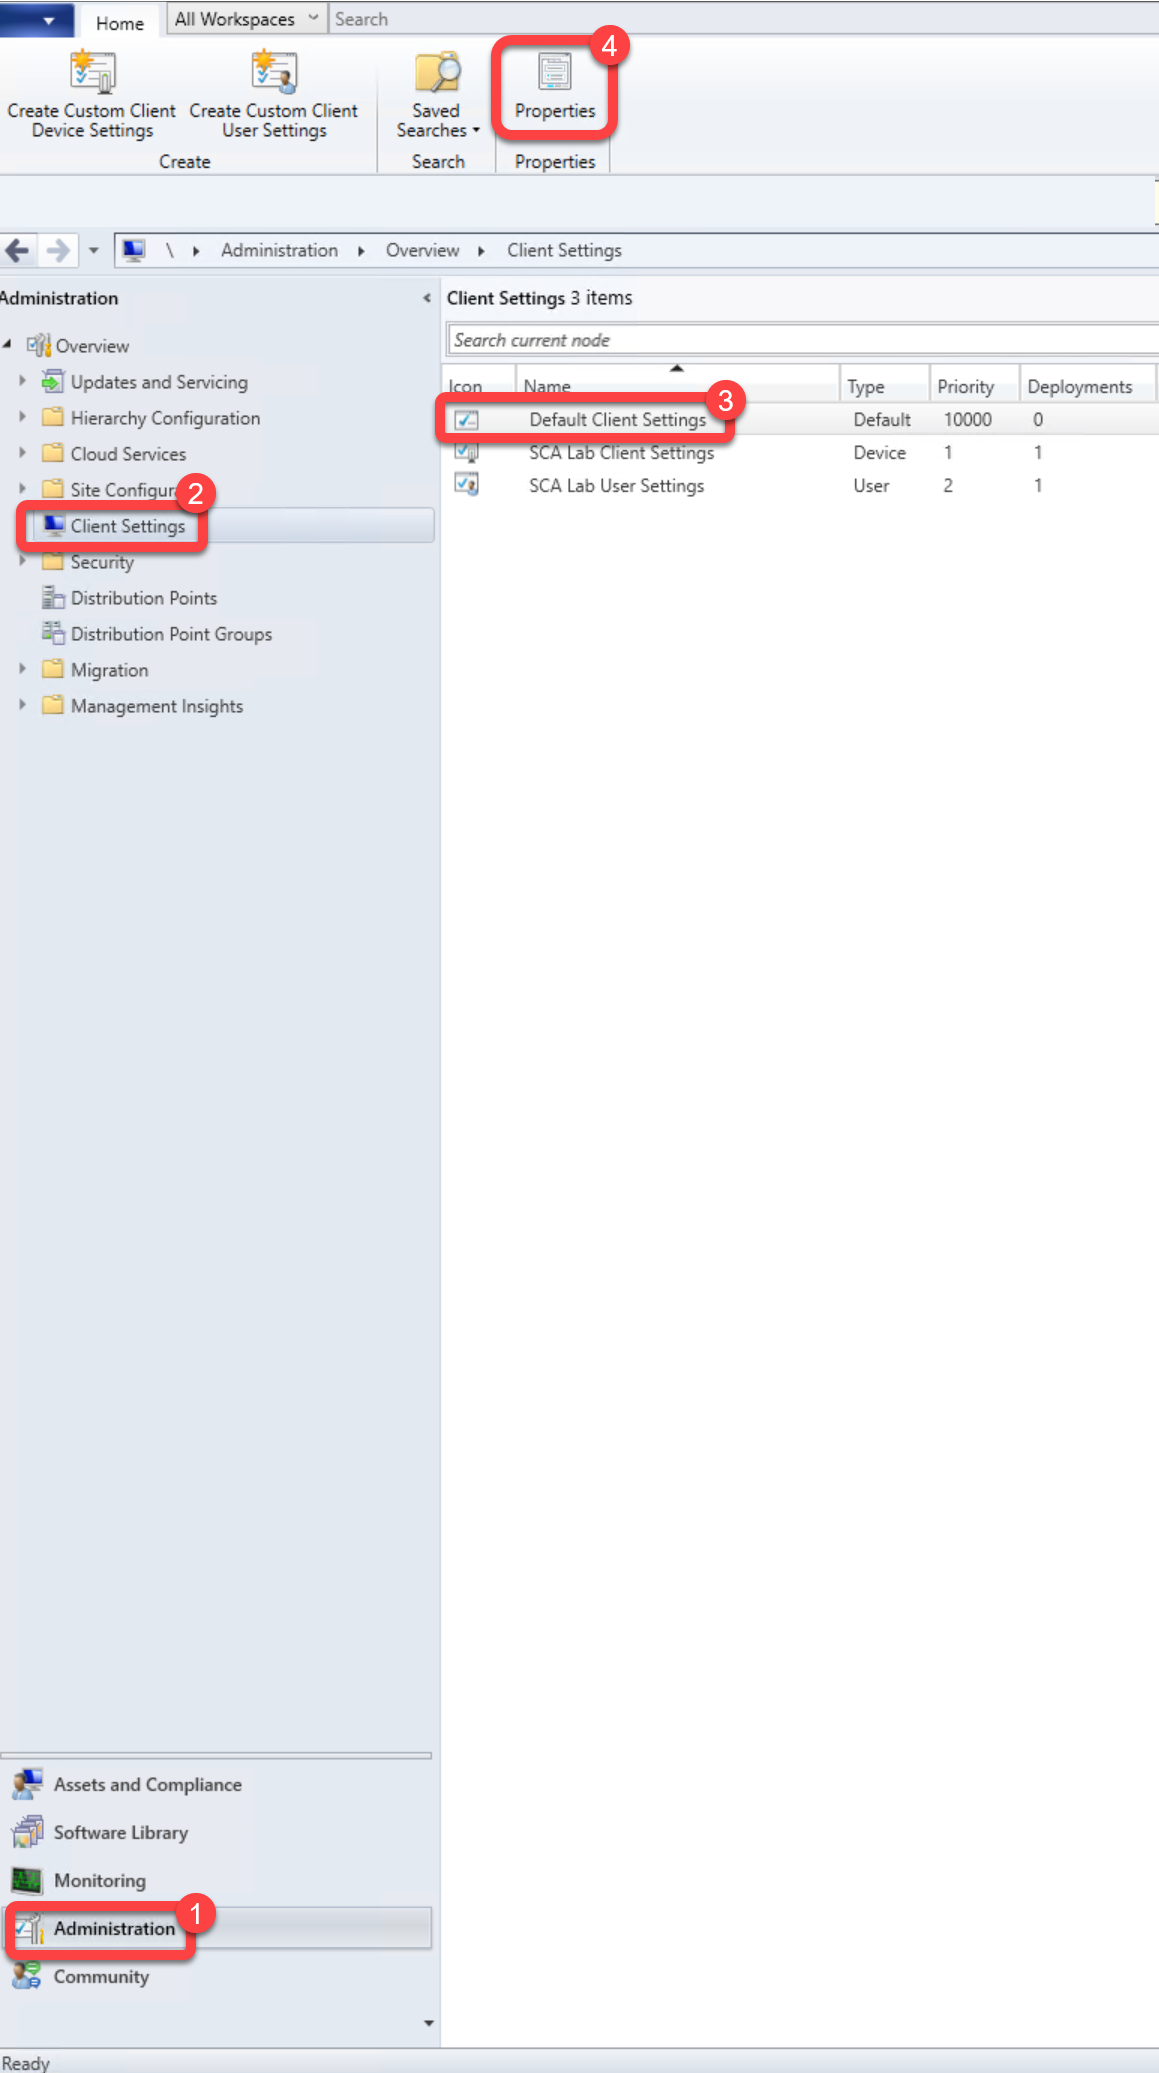
Section titled “Step 2: Open the Default Client Settings”- In the Configuration Manager console, go to the Administration workspace.
- Select the Client Settings node.
- Select the Default Client Settings.
- On the Home tab, in the Properties group, choose Properties.
Step 3: Open Hardware Inventory Classes
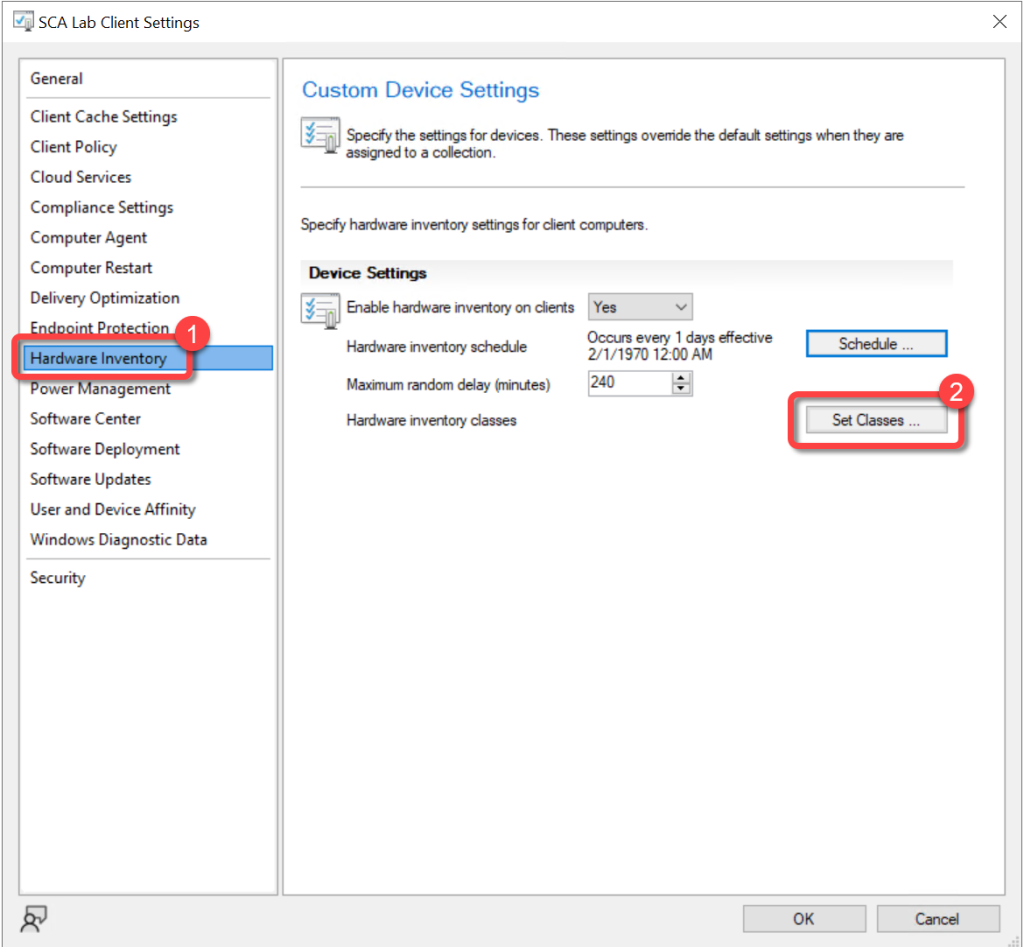
Section titled “Step 3: Open Hardware Inventory Classes”- In the Default Settings dialog, choose Hardware Inventory.
- In the Device Settings list, select Set Classes.
Step 4: Enable the Win32_EncryptableVolume Class
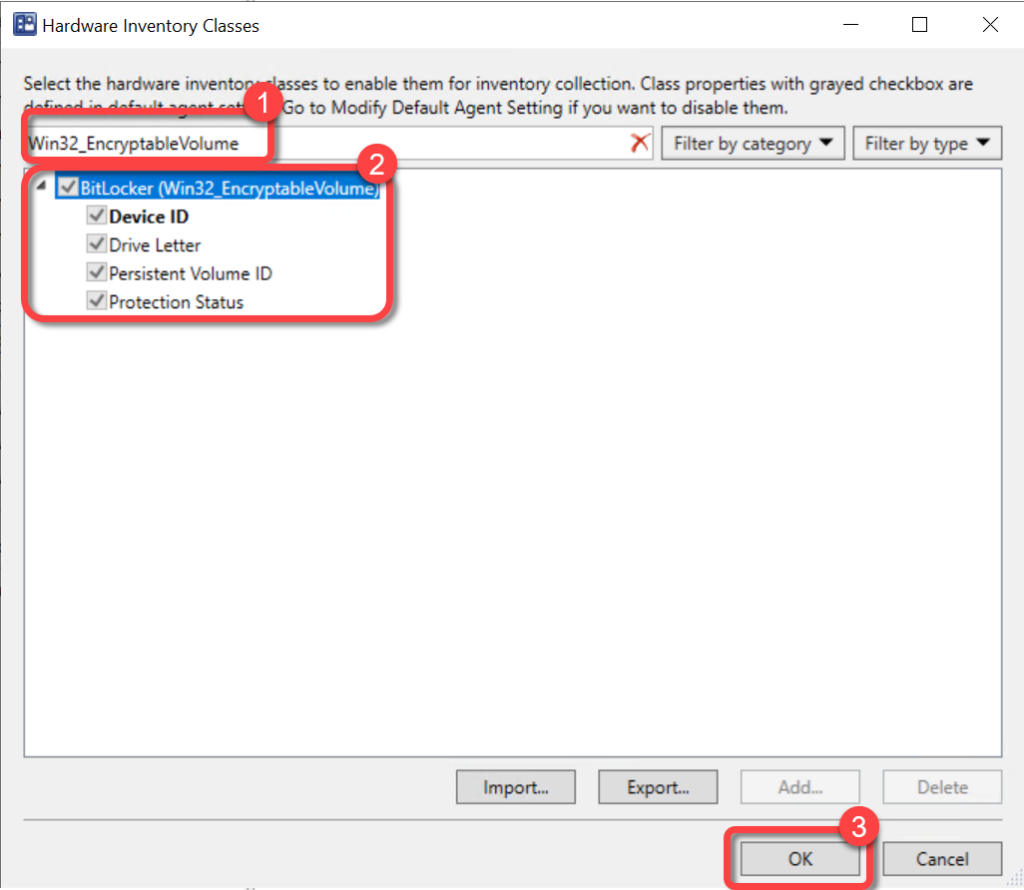
Section titled “Step 4: Enable the Win32_EncryptableVolume Class”- In the Hardware Inventory Classes dialog, use the Search for inventory classes field to search for Win32_EncryptableVolume.
- Select the Win32_EncryptableVolume class.
At this point the class reports only the basic properties: Device ID, Drive Letter, Persistent Volume ID, and Protection Status. Leave the dialog open and continue to the next step to extend it.
Step 5: Import the BitLocker MOF
Section titled “Step 5: Import the BitLocker MOF”-
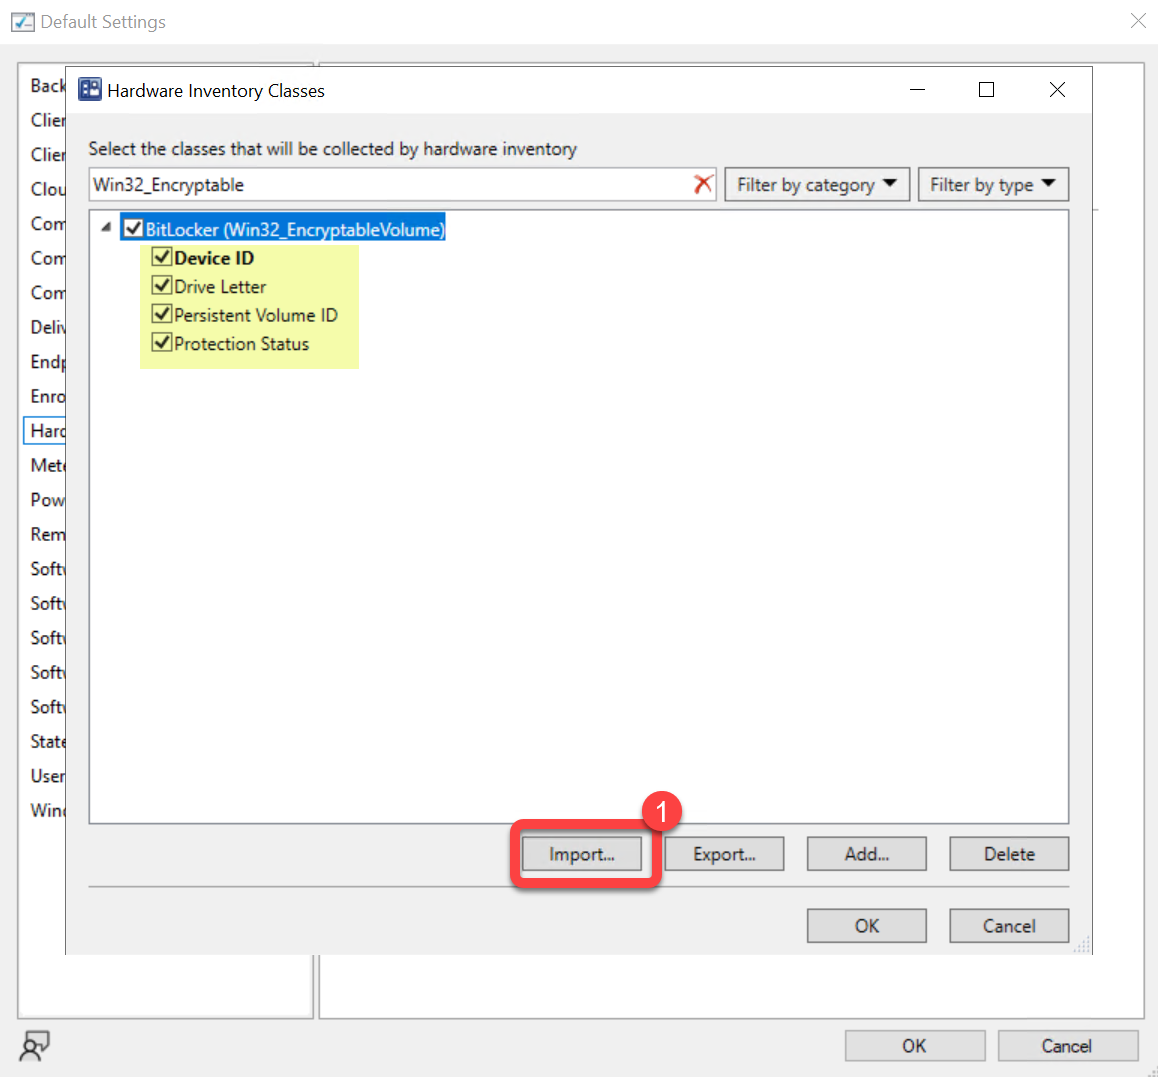
In the Hardware Inventory Classes dialog, select Import.
-
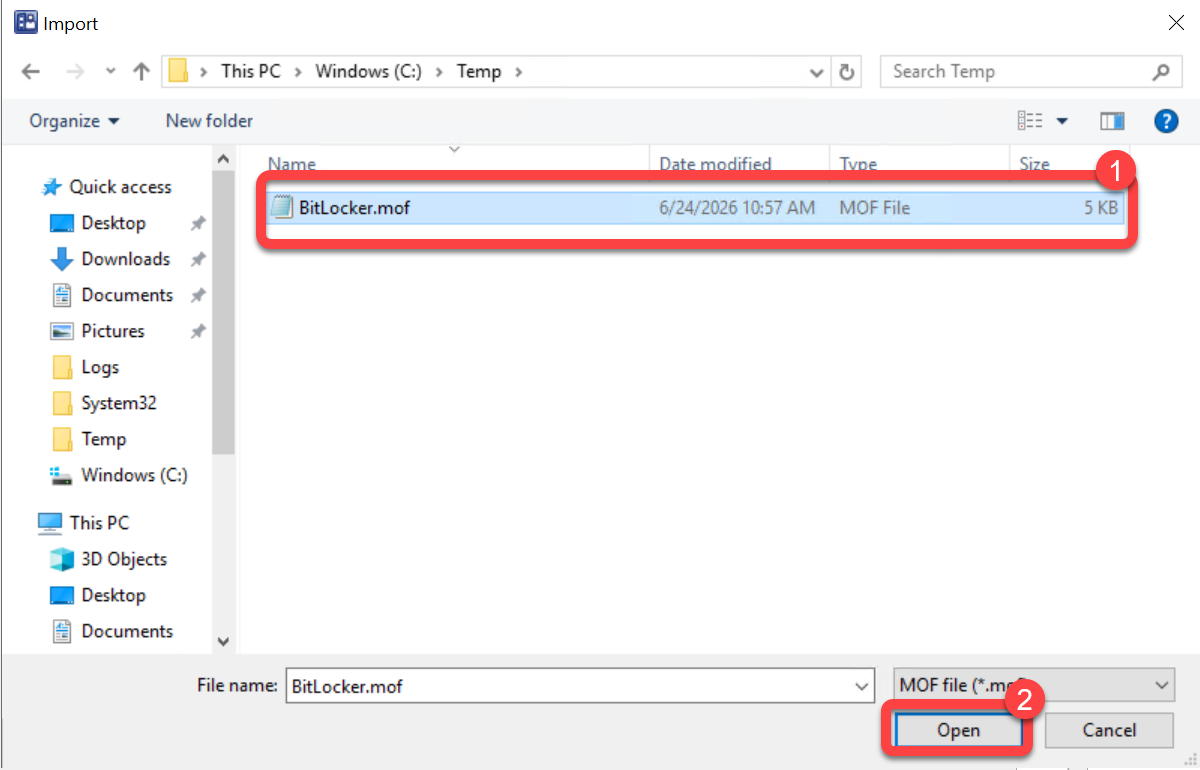
Browse to the BitLocker.mof file you saved in Step 1, then select Open.
-
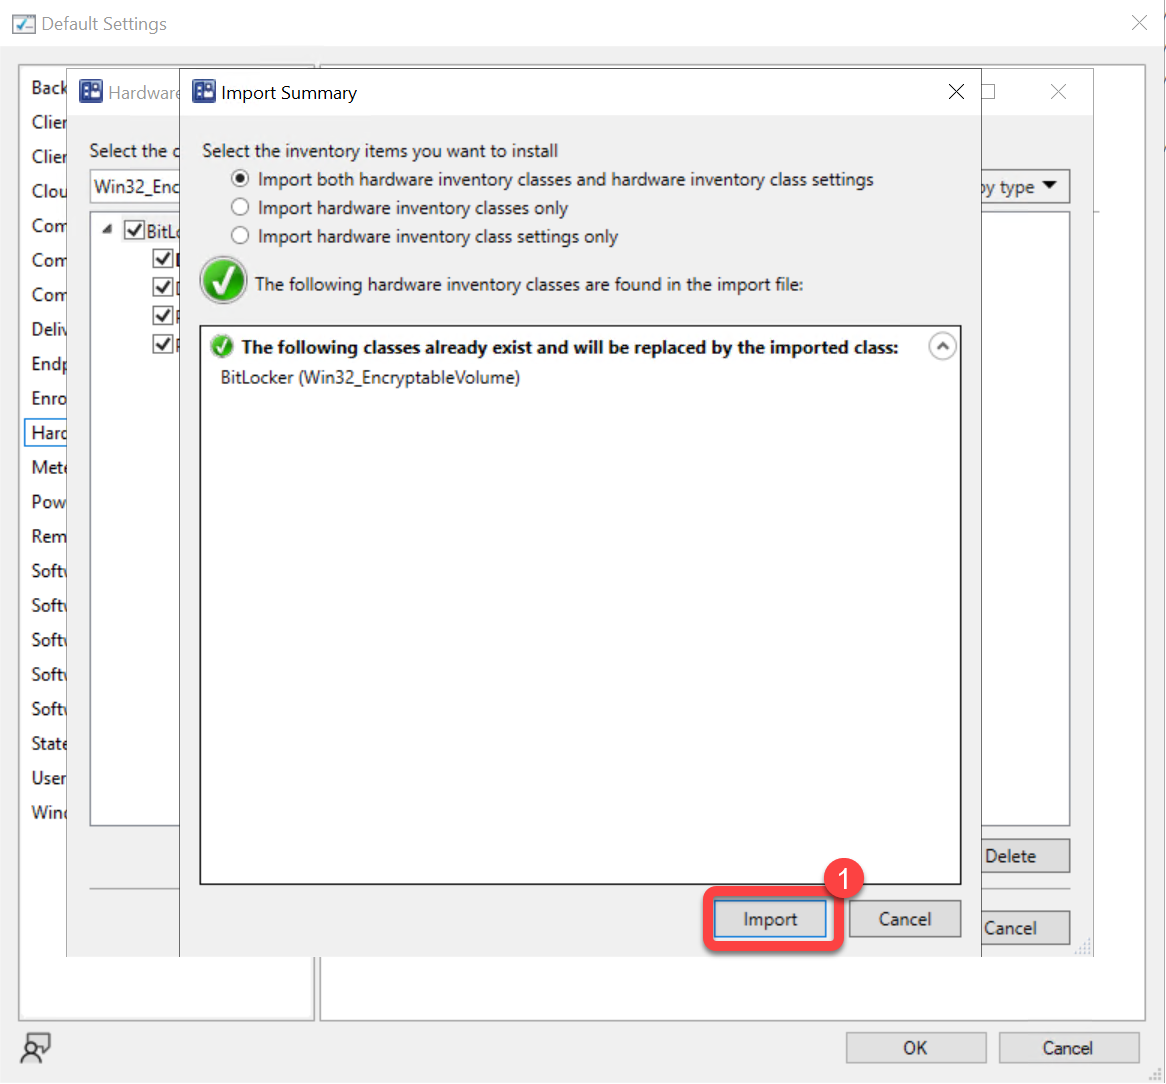
In the Import Summary dialog, leave Import both hardware inventory classes and hardware inventory class settings selected. The summary confirms the existing BitLocker (Win32_EncryptableVolume) class will be replaced by the imported class. Select Import.
Step 6: Confirm the Extended Properties
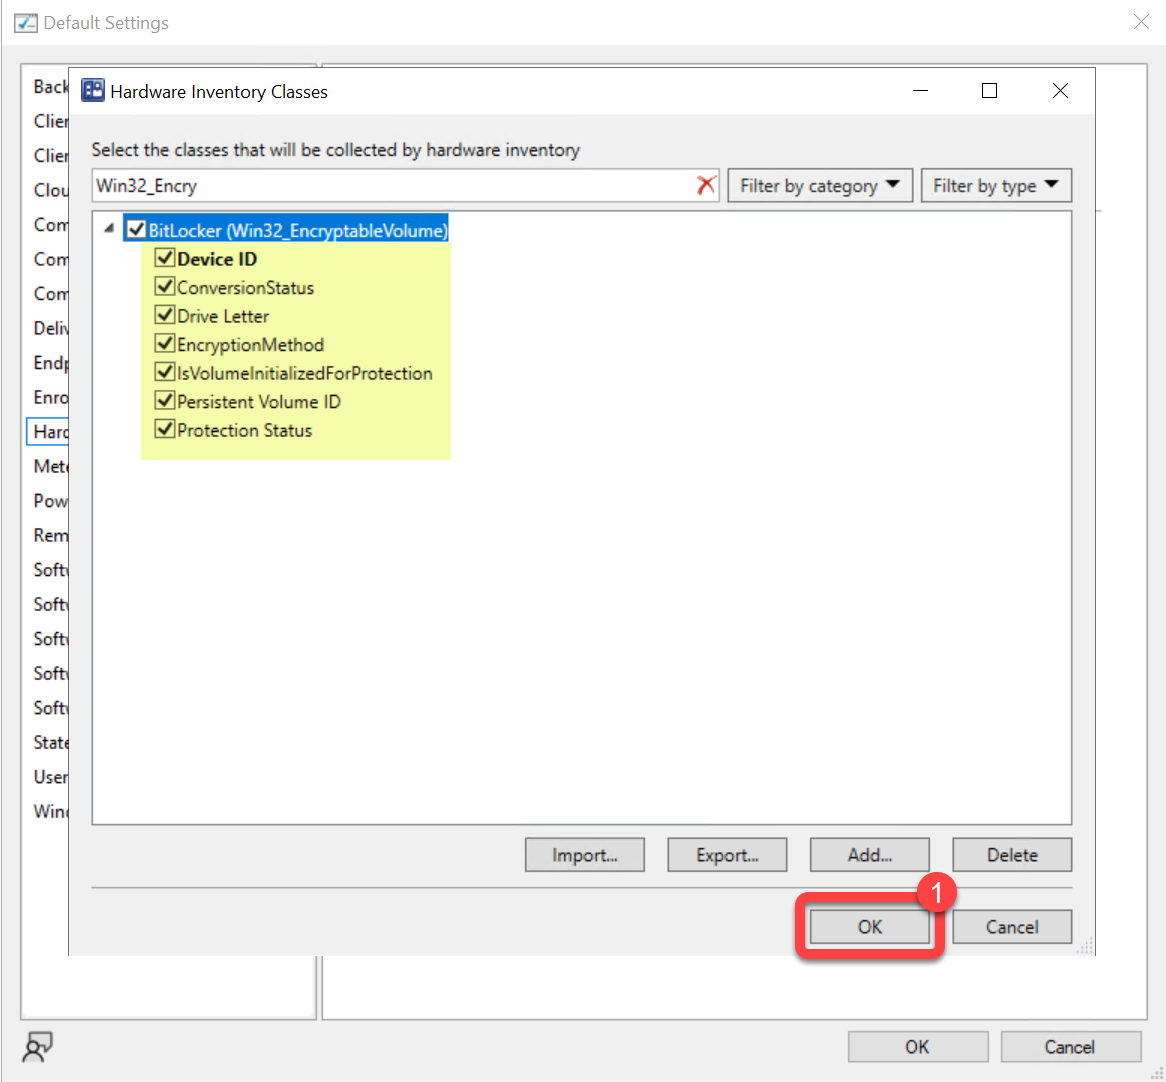
Section titled “Step 6: Confirm the Extended Properties”After the import, the Win32_EncryptableVolume class reports the full set of properties, all selected: Device ID, ConversionStatus, Drive Letter, EncryptionMethod, IsVolumeInitializedForProtection, Persistent Volume ID, and Protection Status. Confirm they are all selected, then select OK.
Step 7: Confirm Client Settings
Section titled “Step 7: Confirm Client Settings”- In the Default Settings dialog, select OK.
