Deploy to Azure
The custom-deployment wizard provisions every Azure resource App Store for Intune needs in a single deployment. Migrations apply on first start. Plan for 10 to 15 minutes of total deployment time.
Before you start
Section titled “Before you start”Have this value ready from Create the Entra app registration:
- Application (client) ID of the App Store app registration
You’ll also choose a SQL administrator username and password during the wizard. Save them in your password manager so you have them for any future direct database access.
Install from the Azure Marketplace
Section titled “Install from the Azure Marketplace”App Store for Intune is published in the Azure Marketplace. Installing from the Marketplace runs the same custom deployment wizard documented below.
- Sign in to the Azure portal with an account that can create resources in the subscription that will host App Store for Intune.
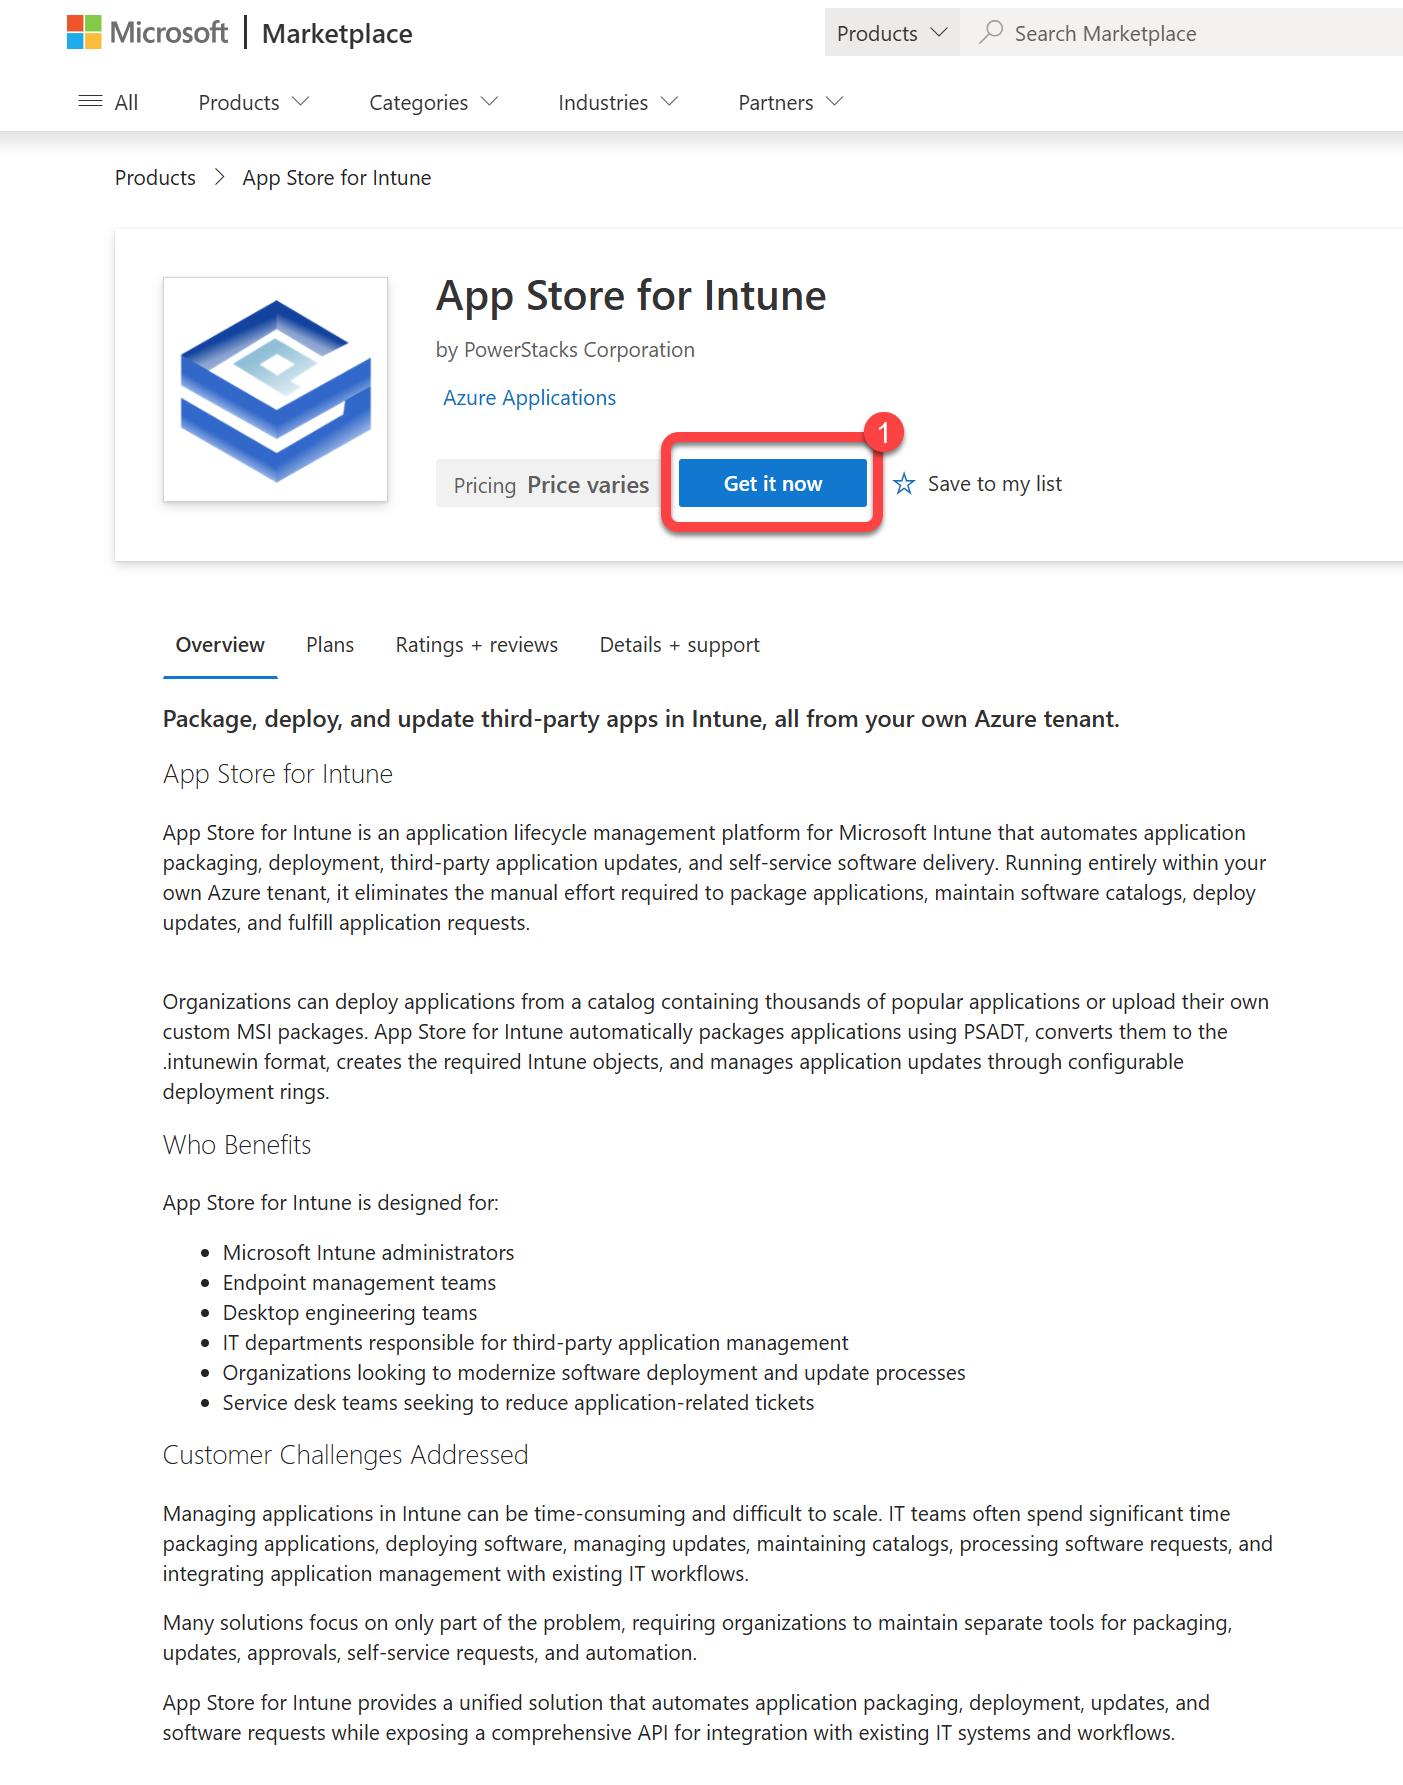
- Find the offer. Select Create a resource, then search for App Store for Intune, or open the App Store for Intune listing in the Azure Marketplace.
- On the offer page, select Get It Now (or Create, if you started from inside the portal).
- Select the App Store for Intune plan, then select Create.

Azure opens the custom deployment wizard. Continue with the steps below.
Complete the custom deployment wizard
Section titled “Complete the custom deployment wizard”Basics
Section titled “Basics”- Subscription: select the Azure subscription that will host App Store for Intune.
- Resource group: select Create new and give it a name. Deploying into an existing resource group isn’t supported.
- Region: select the Azure region for all resources.
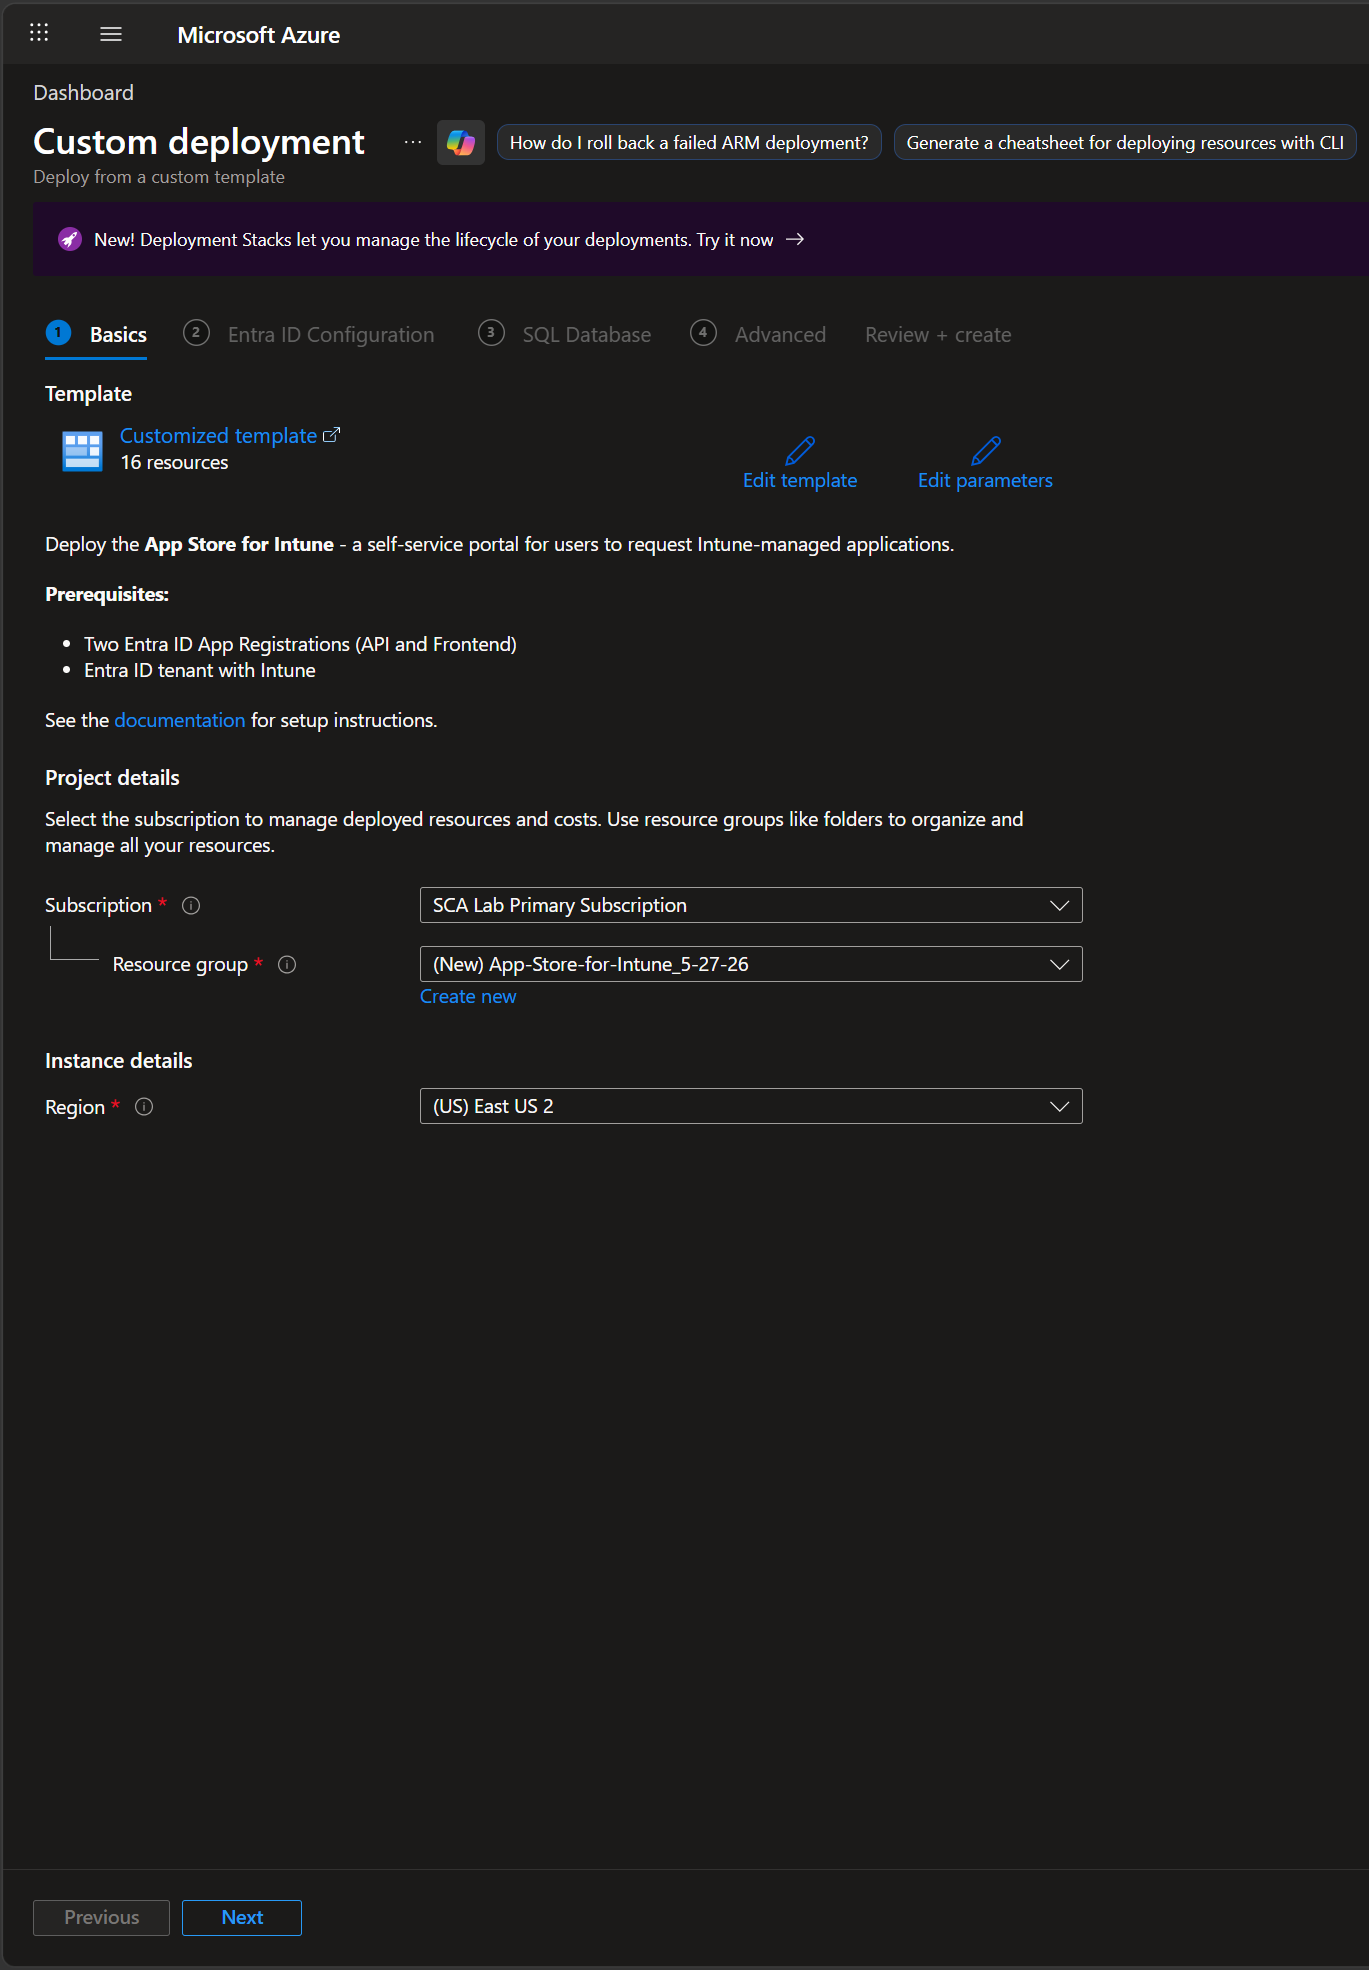
Select Next.
Entra ID Configuration
Section titled “Entra ID Configuration”- App Registration > Application (Client) ID: the application (client) ID of the App Store app registration from the previous step.
The tenant ID is detected automatically from your session, so there’s nothing else to enter on this page.
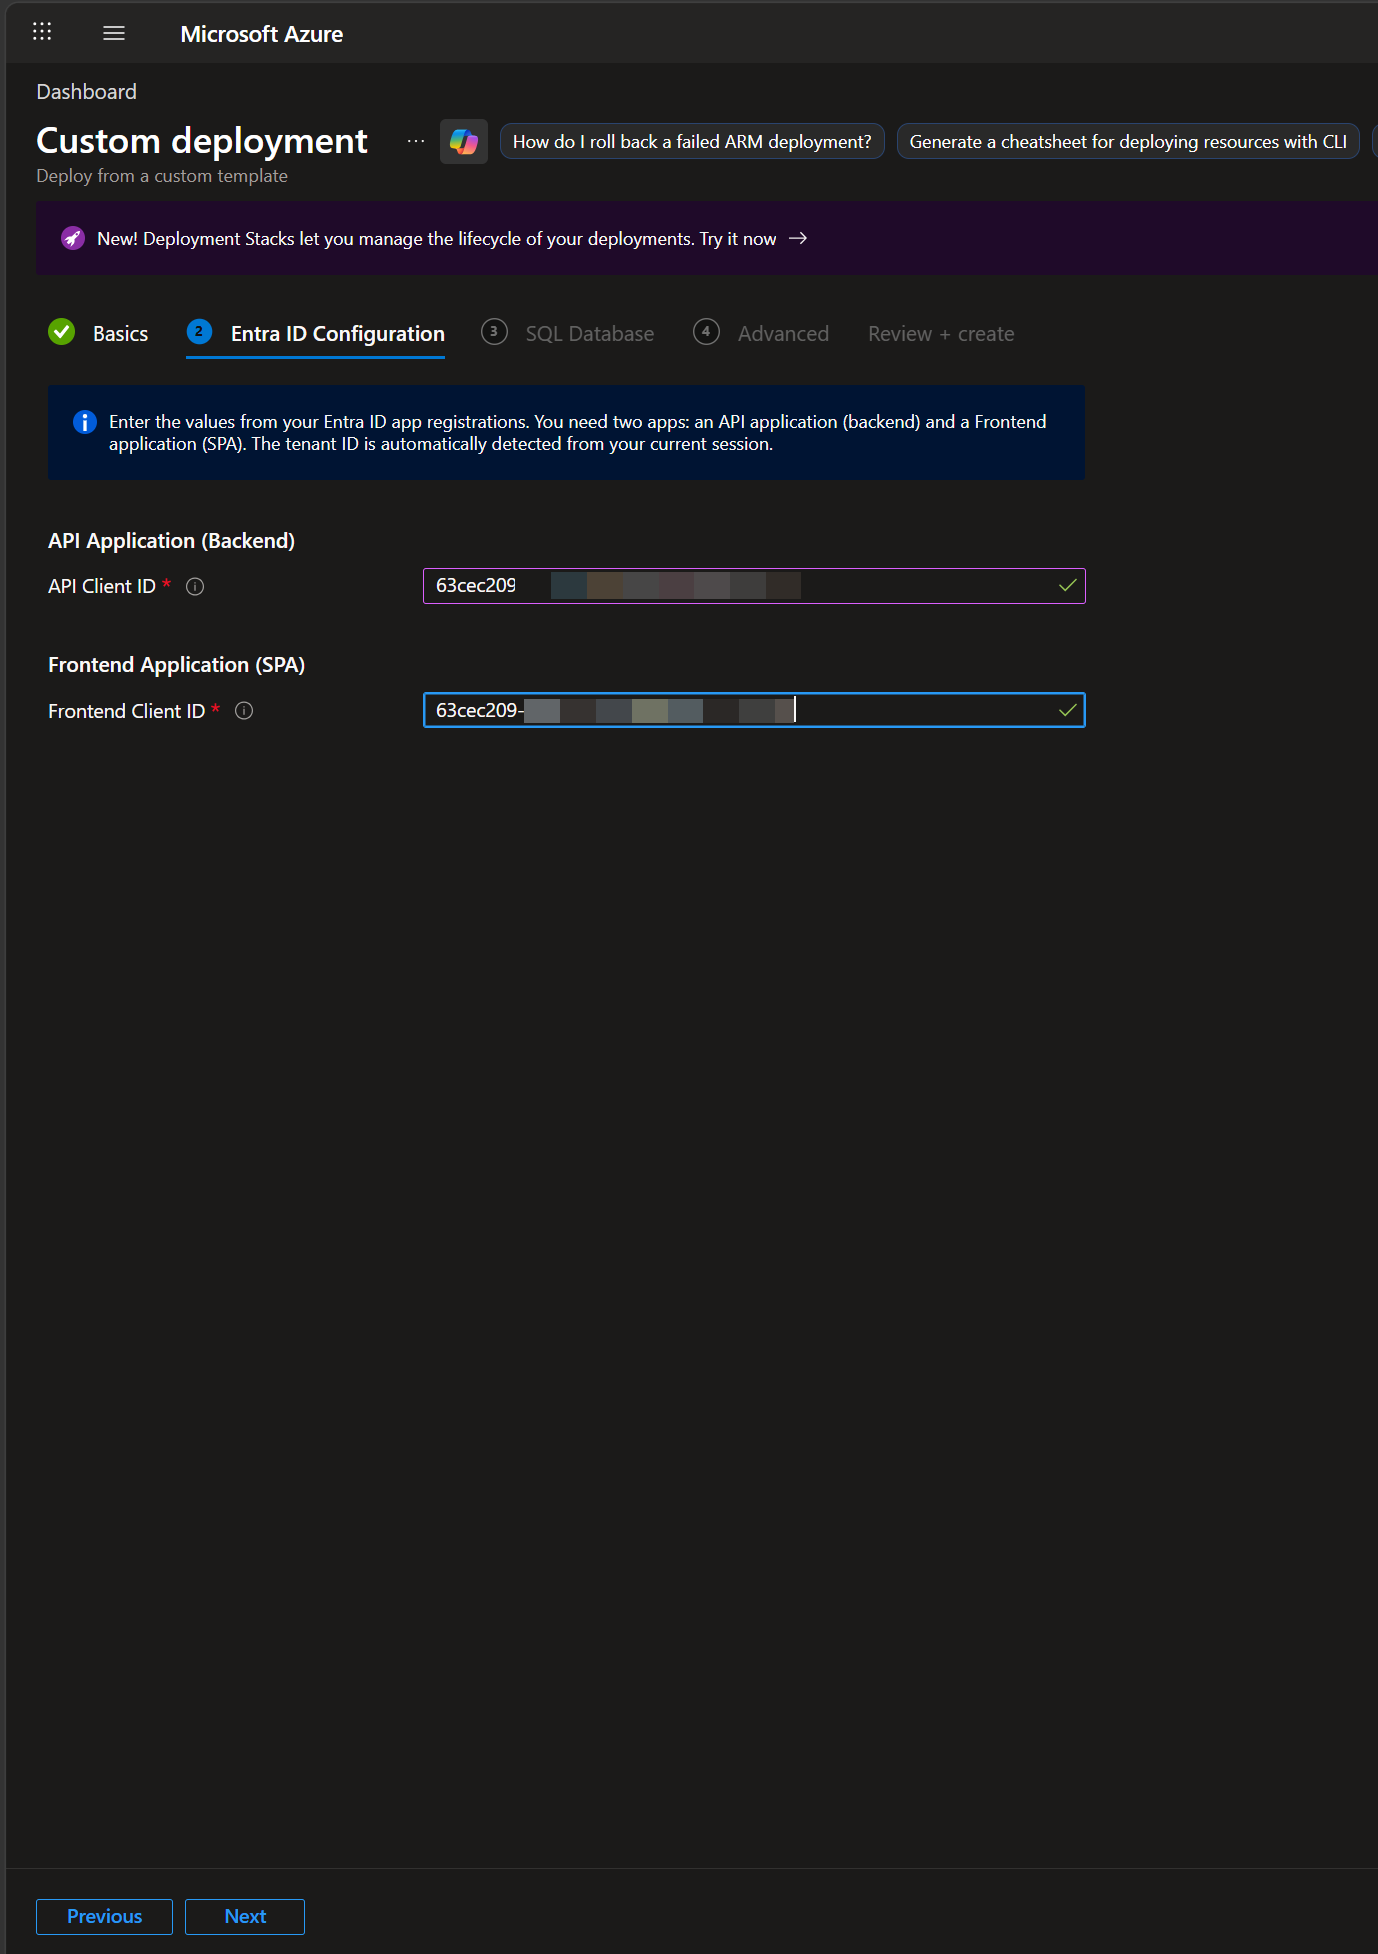
Select Next.
SQL Database
Section titled “SQL Database”- SQL Admin Username: a new administrator login name for the Azure SQL Server that will be created.
- SQL Admin Password: a strong password meeting Azure SQL complexity requirements.
- Confirm password: re-enter the password.
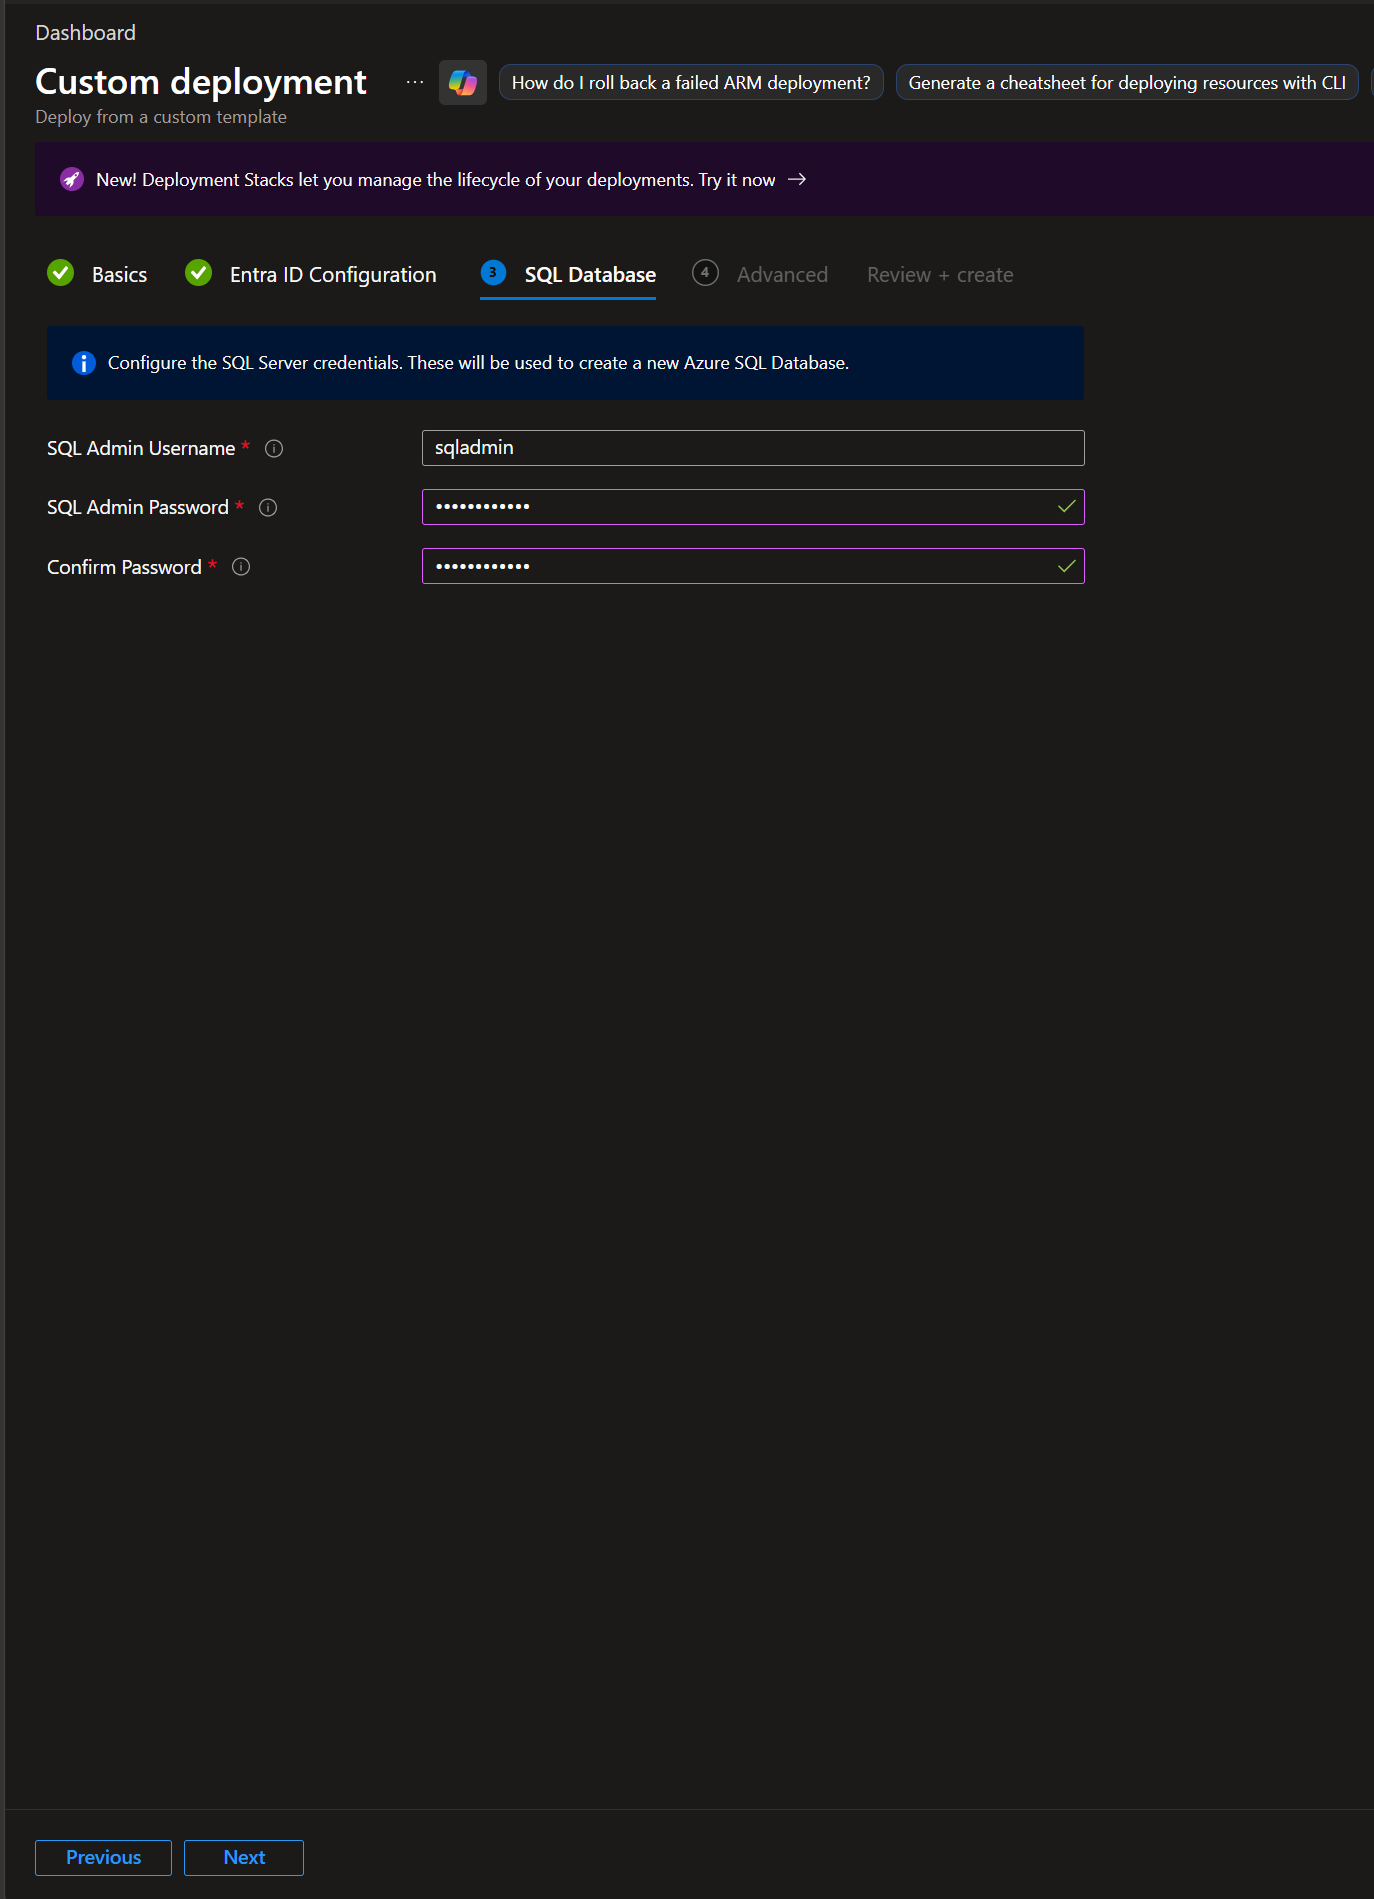
Select Next.
Advanced
Section titled “Advanced”- Release Channel: select Latest (Recommended) for the current stable release. The other option, Preview (Early Access), gets early access to upcoming features but should only be used on non-production deployments.
- App Service Plan Size: select the App Service plan SKU. B2 is the recommended starting point and can be scaled later.
- Instance Count: number of App Service plan instances. Start with 1 unless you have a known scale requirement.
- Enable Auto-Heal (Recommended): leave selected. Automatically restarts the app when issues are detected.
- Enable Health Check (Recommended): leave selected. Routes traffic away from unhealthy instances.
- Enable Teams Bot Notifications (Recommended): select if you want personal Teams Adaptive Card notifications for approvers and requestors. Provisioning the bot resource at deploy time is the cleanest path; you can also enable Teams notifications later from the Admin Settings tab.

Select Next.
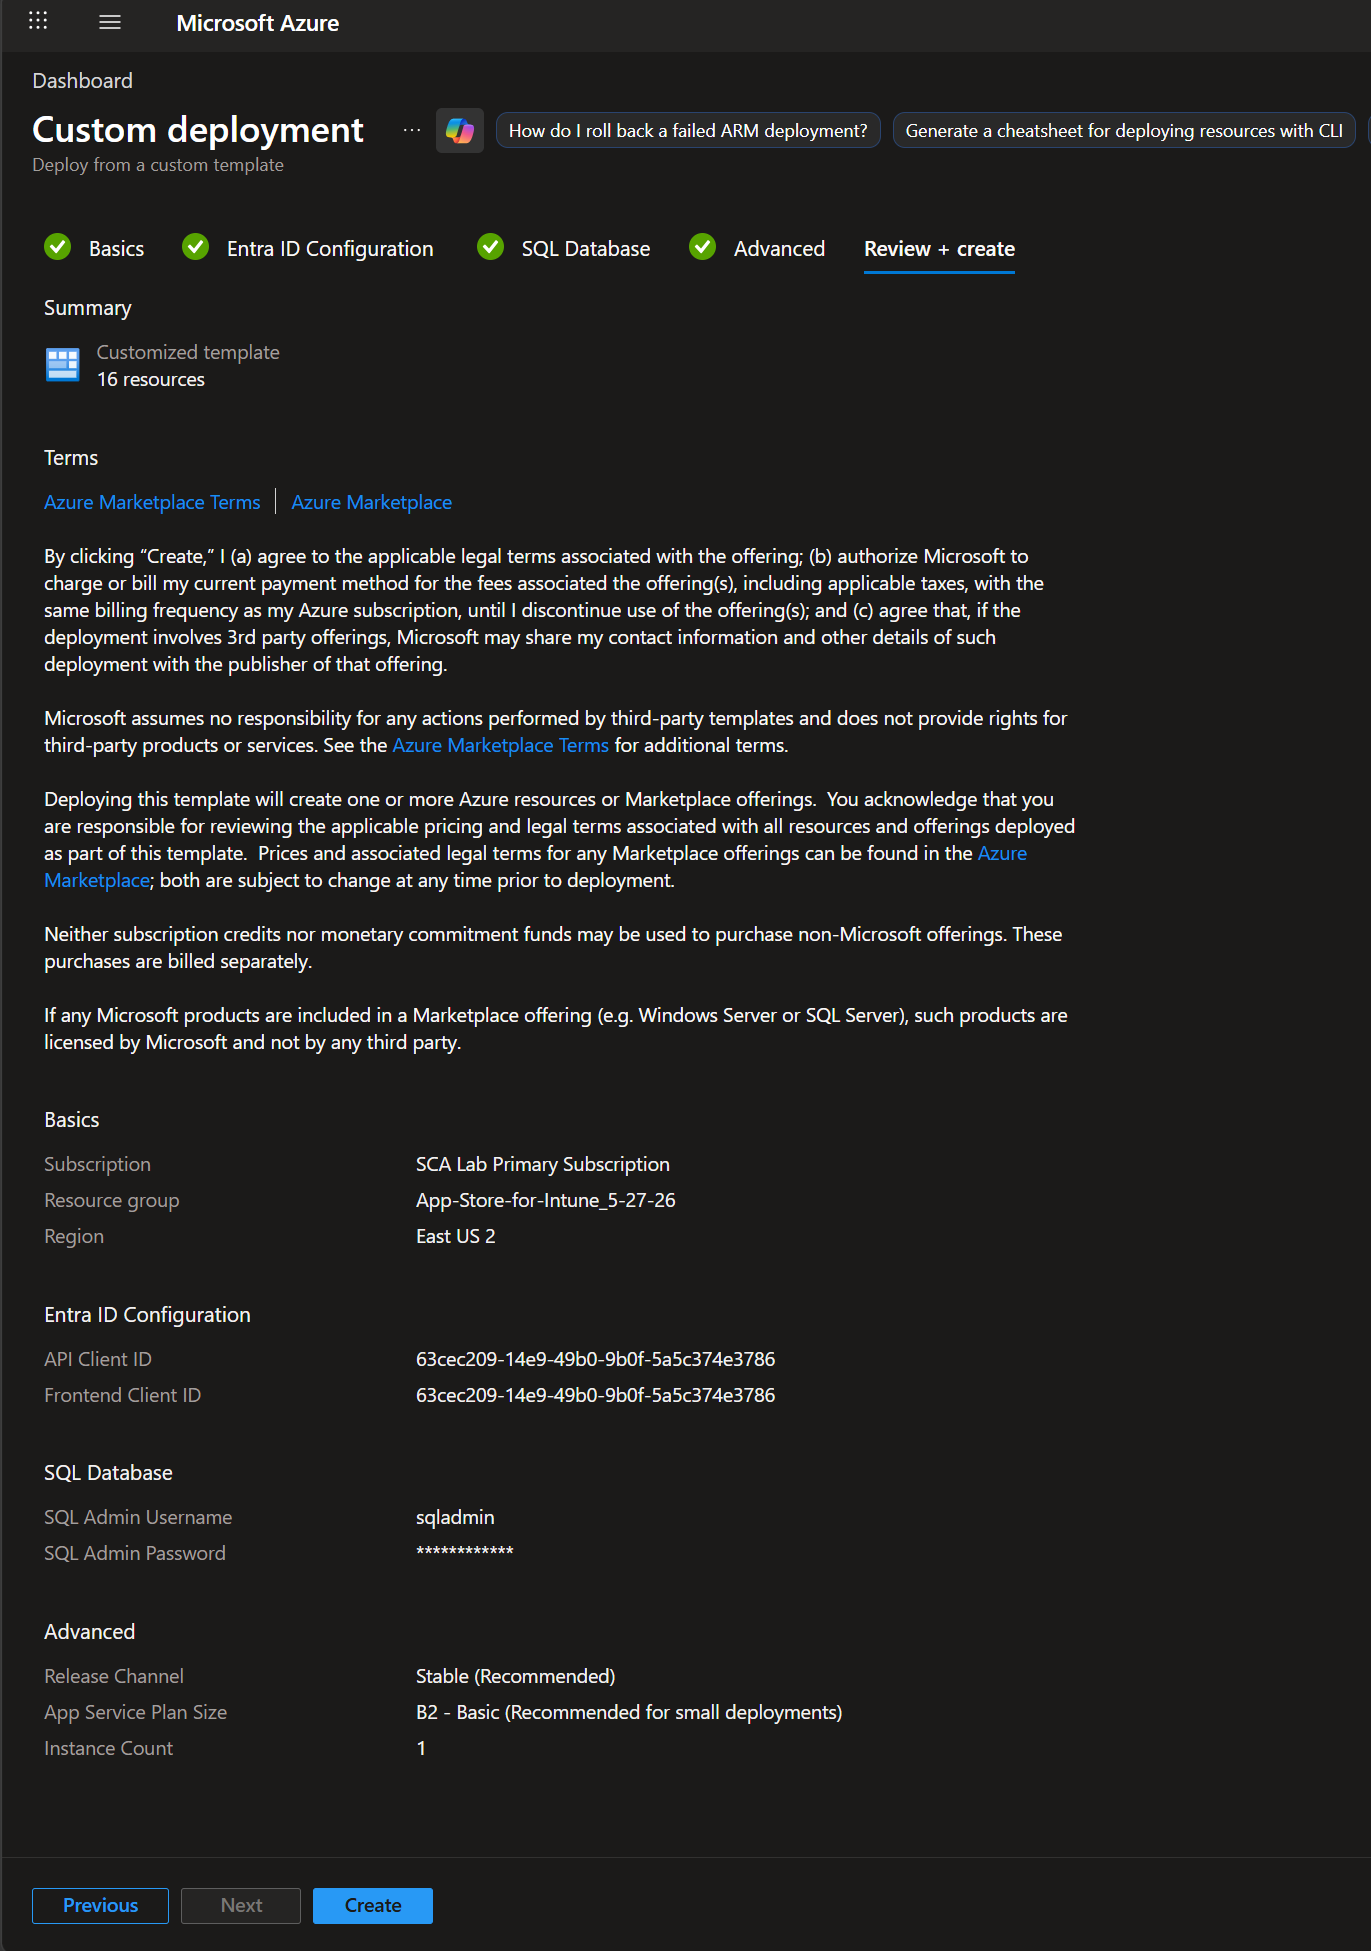
Review + create
Section titled “Review + create”After you select Next on the Advanced tab, the wizard runs a final round of validation against your inputs. The page may appear unresponsive for a few seconds while these checks complete, this is expected, don’t refresh or navigate away.
Once validation passes, review the deployment summary and select Create. The deploy takes 10 to 15 minutes.
What the template provisions
Section titled “What the template provisions”- Azure App Service Plan and the App Service itself with system-assigned managed identity enabled. The managed identity is the runtime identity for Microsoft Graph calls.
- Azure SQL Server plus the App Store database. Database migrations apply automatically on first start.
- Azure Key Vault containing the SQL connection string and the storage connection string. The App Service’s managed identity has Get and List permissions on the vault.
- Azure Storage account used by the packaging pipeline.
- Application Insights workspace for application logging and telemetry.
- Azure Bot resource, Teams channel registration, and a dedicated user-assigned managed identity for the bot, when Enable Teams Bot Notifications is selected.
- App Service application settings, pre-populated with every value the API needs.
After the deploy completes
Section titled “After the deploy completes”Capture the deployment outputs
Section titled “Capture the deployment outputs”Once the wizard reports a successful deployment, you’ll see the deployment overview page:
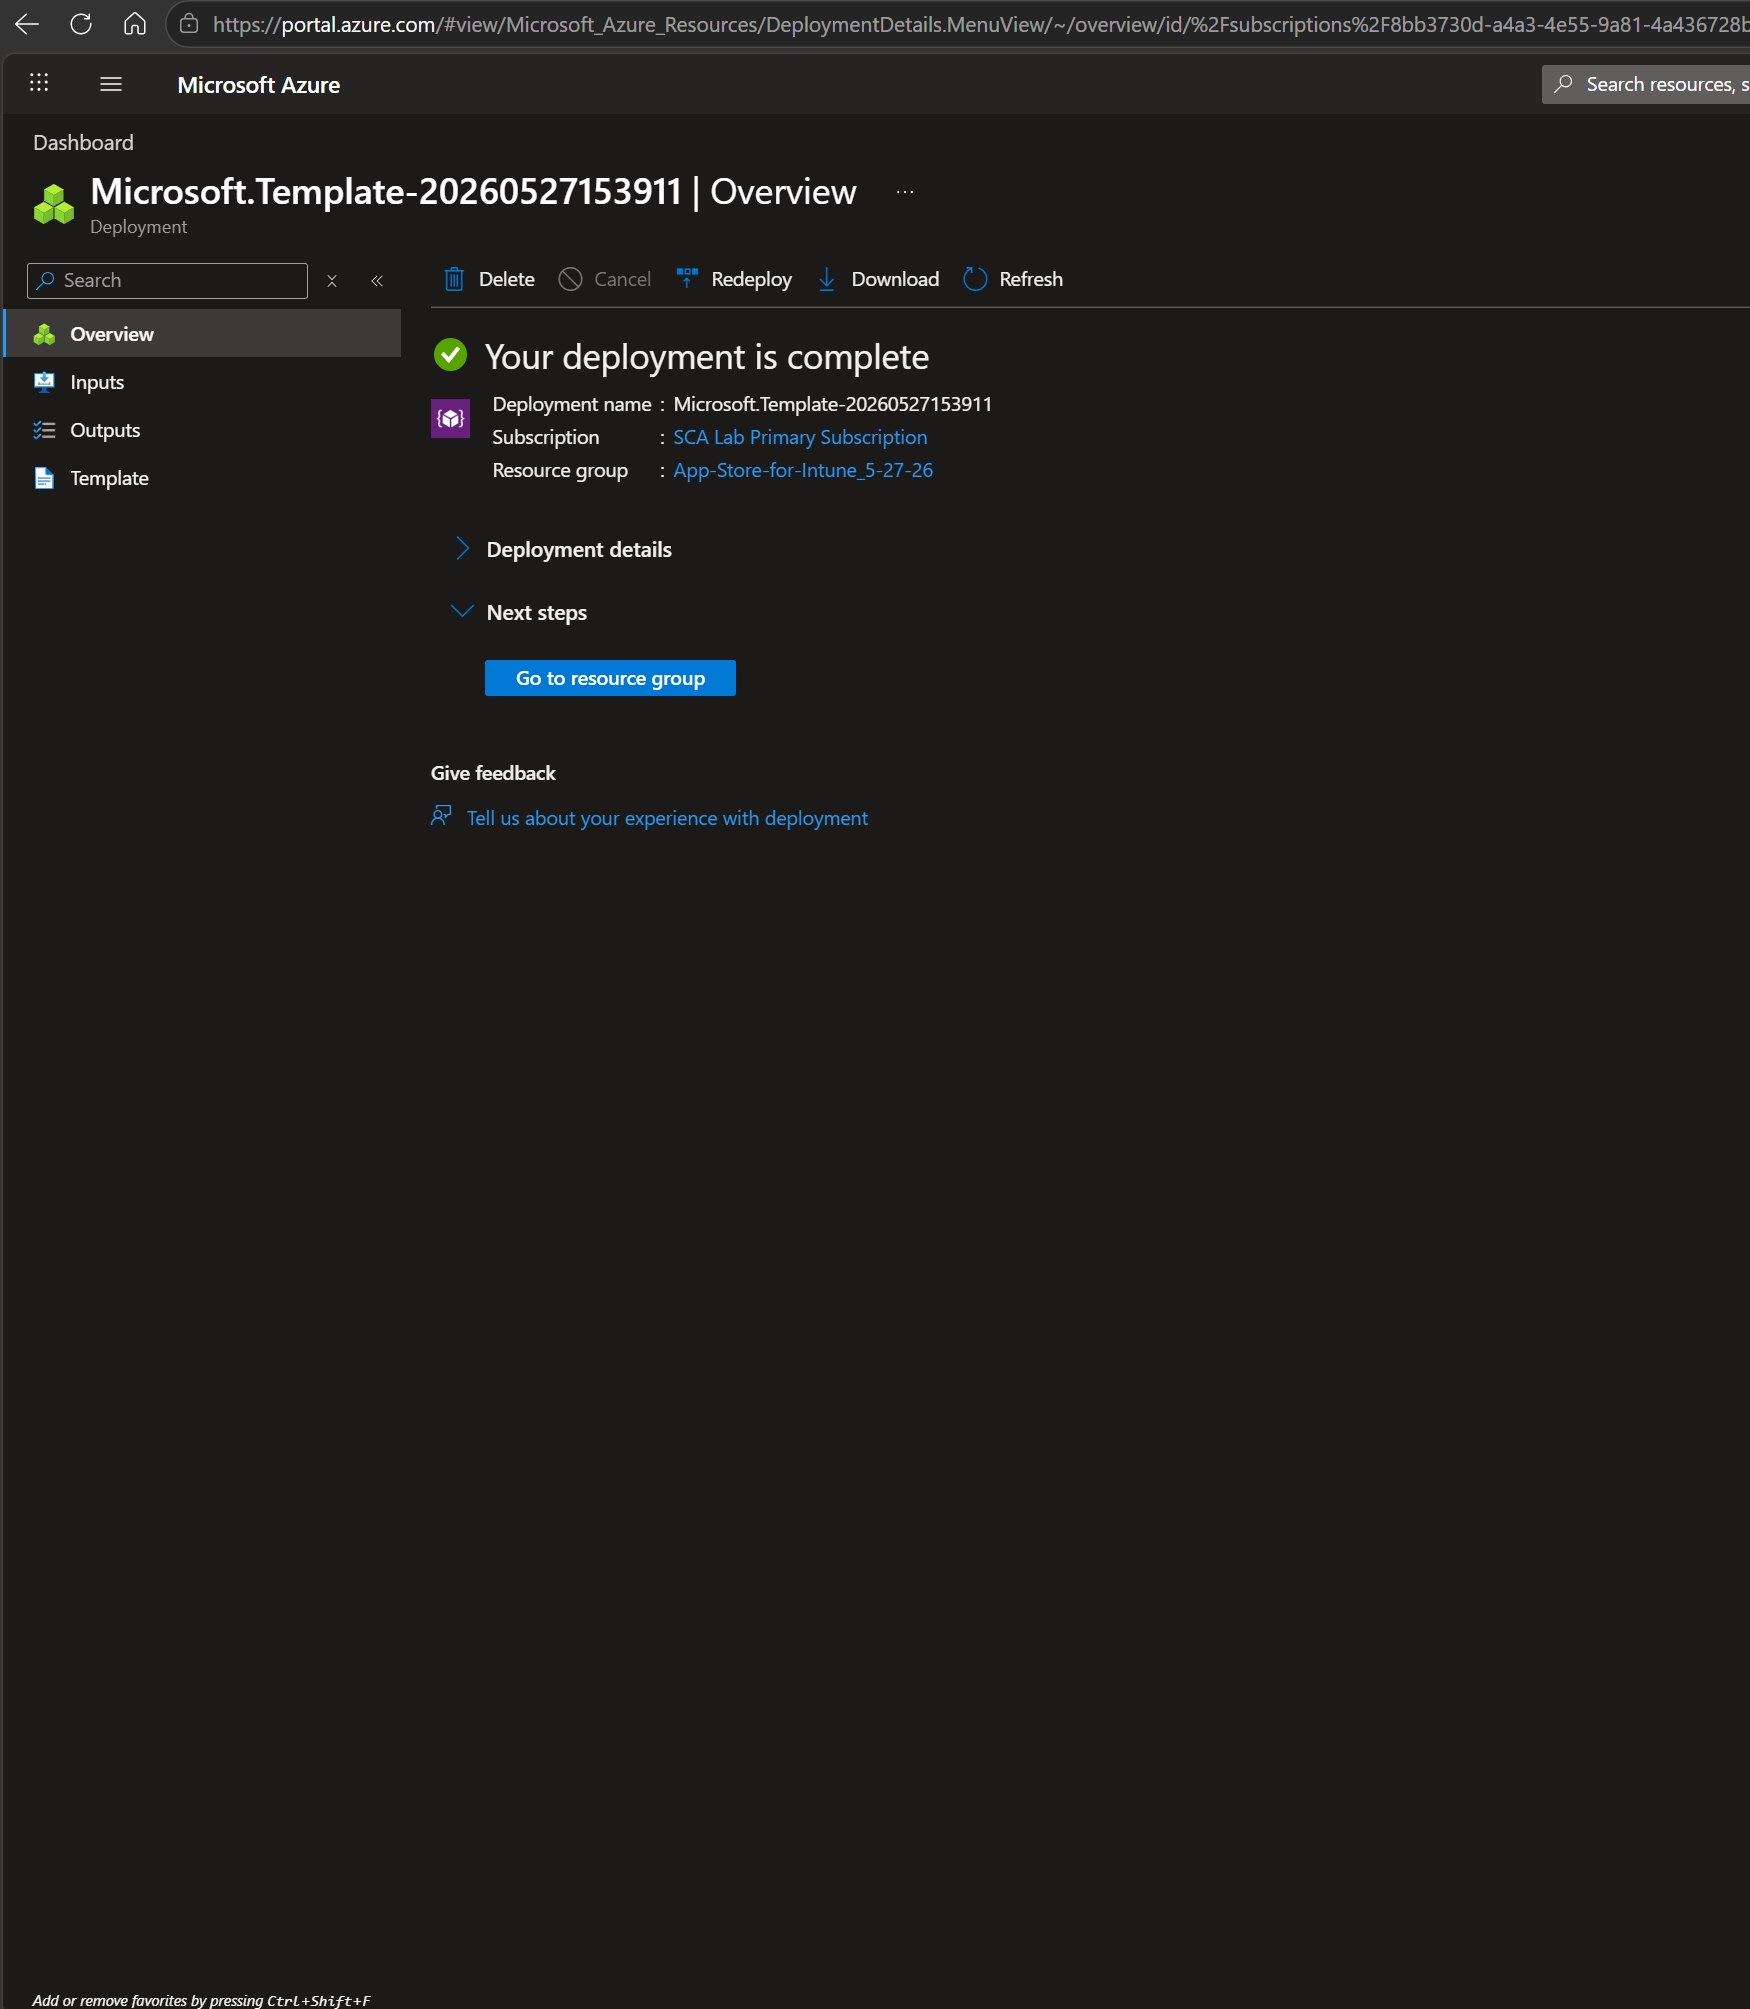
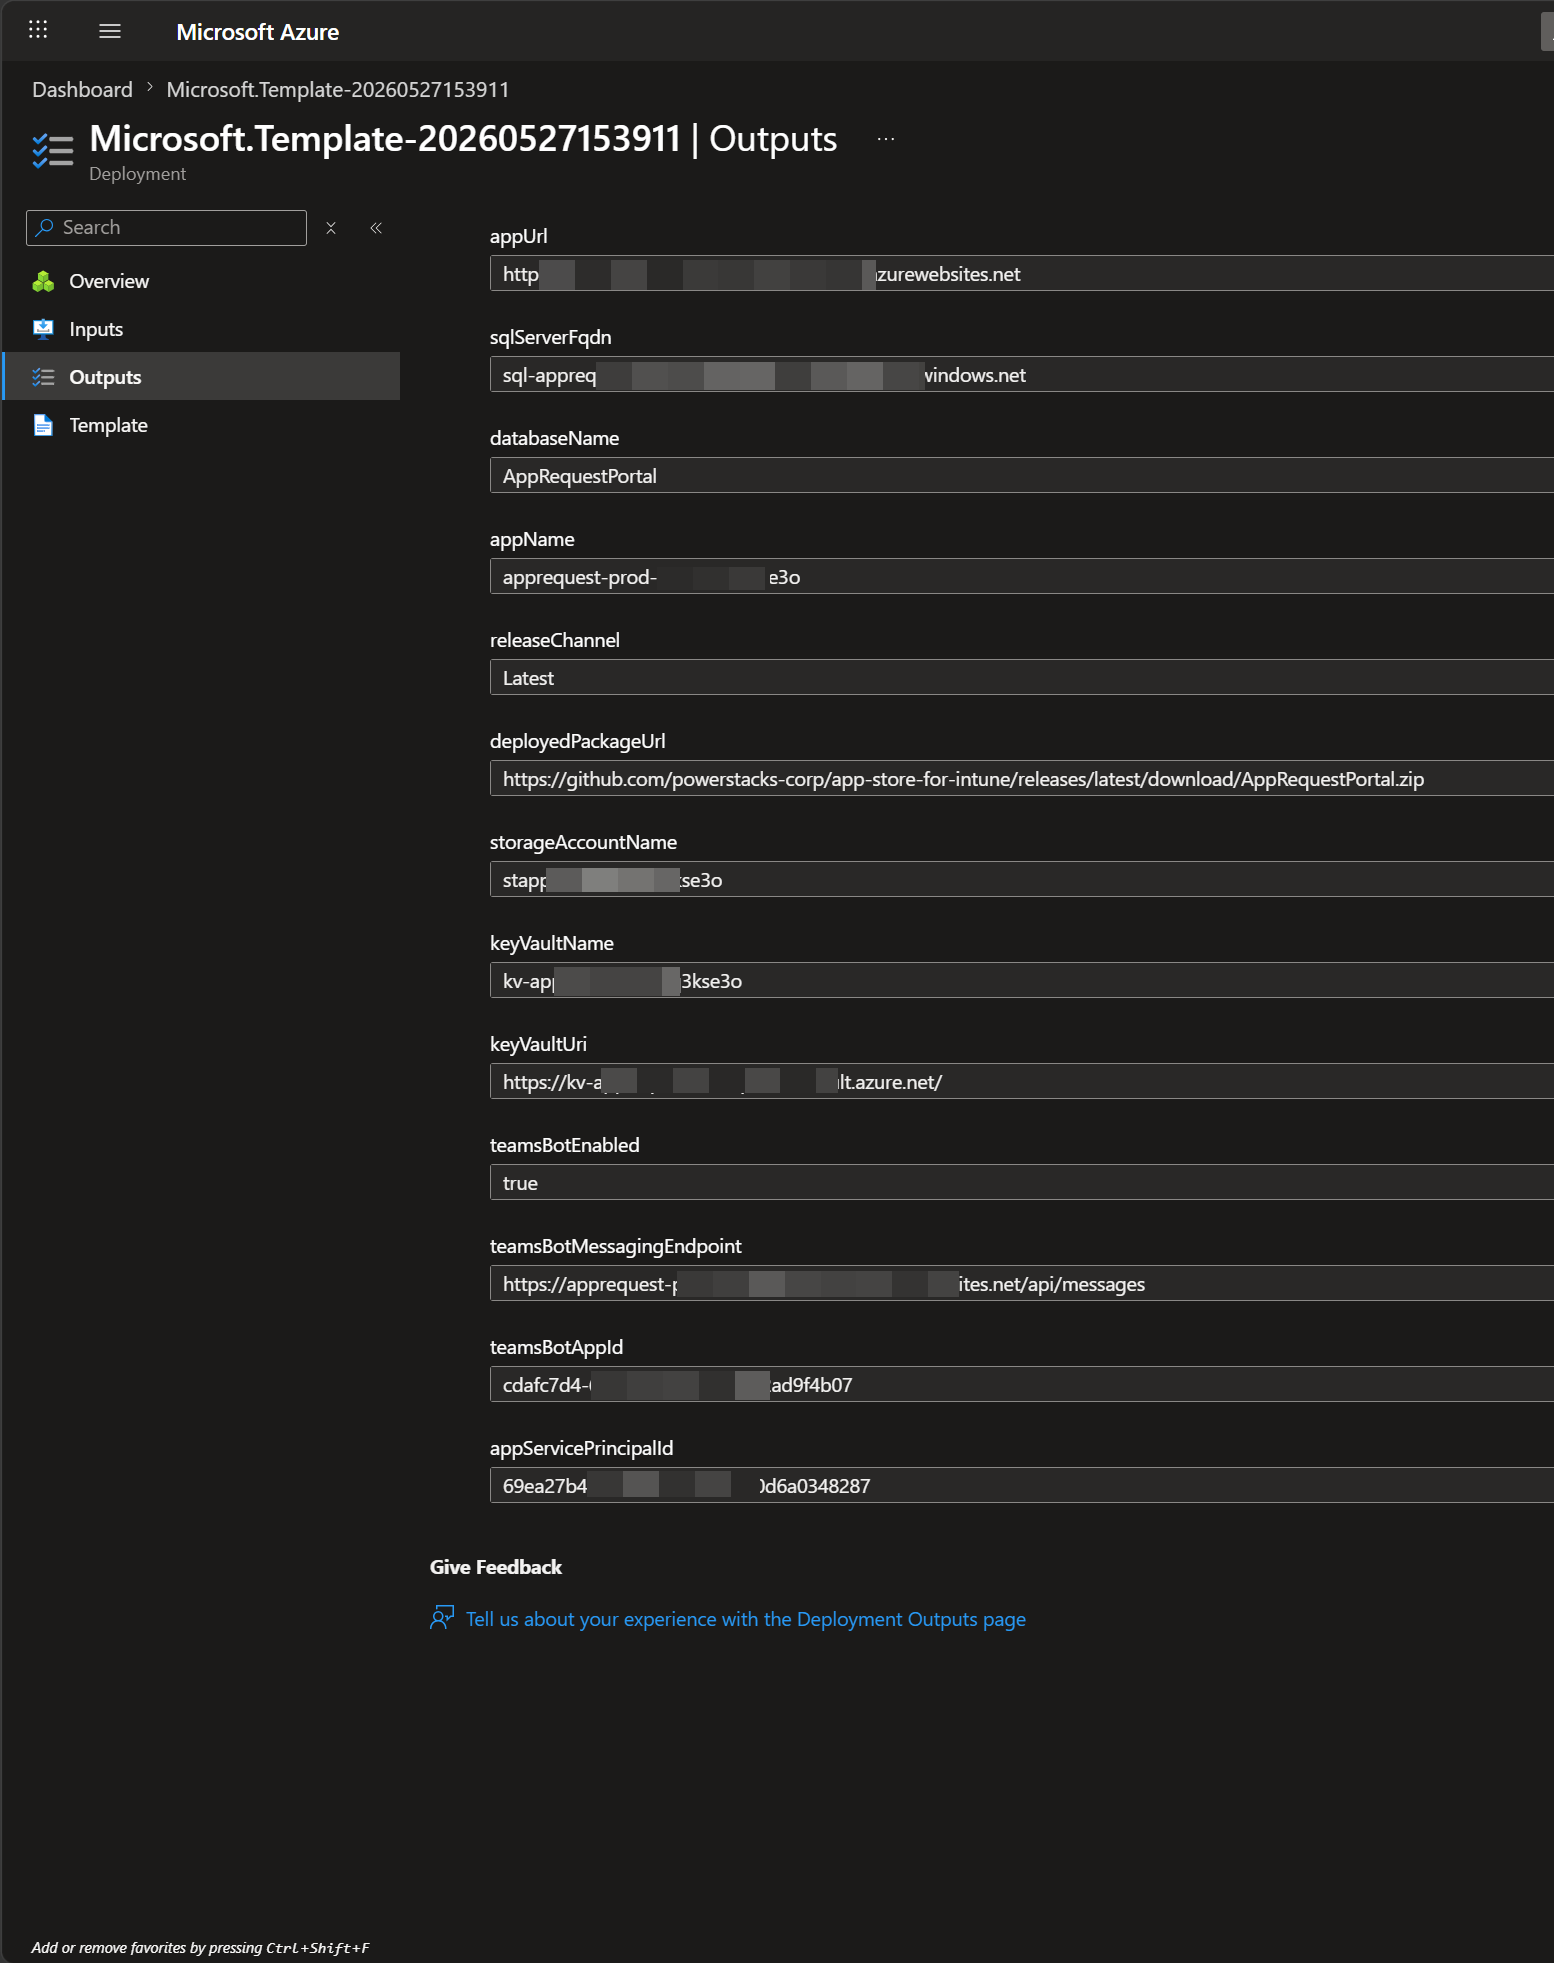
Open the deployment’s Outputs blade (in the left navigation) and capture the values below before navigating away.
Path: Azure Portal > your resource group > Deployments > the deployment that just completed > Outputs.
| Output | Used for |
|---|---|
appUrl | Required. The portal URL. You’ll add it as the production redirect URI on the App Store app registration. Also available later from App Service > Overview > Default domain. |
sqlServerFqdn | SQL Server FQDN. Used for direct SSMS access during troubleshooting. |
databaseName | Database name. Used with the SQL Server FQDN for direct access. |
appName | App Service name. Useful for finding logs and configuring scaling. |
storageAccountName | Referenced by the app catalog packaging pipeline. |
keyVaultName | Holds the SQL and storage connection strings. Referenced when rotating secrets. |
keyVaultUri | Full Key Vault URI. Useful for scripted secret access. |
teamsBotMessagingEndpoint | Teams bot configuration (only if Enable Teams Bot Notifications was selected). |
teamsBotAppId | Teams bot configuration (only if Enable Teams Bot Notifications was selected). |
appServicePrincipalId | Required for the next step. Paste into the PowerShell snippet that grants Microsoft Graph permissions to the App Service. Also available later from App Service > Identity > System assigned > Object (principal) ID. |
Save these values in your internal runbook or password manager alongside the SQL credentials you chose during the wizard.
Wait for the managed identity to propagate
Section titled “Wait for the managed identity to propagate”After capturing the outputs, wait 10 to 15 minutes for the App Service’s system-assigned managed identity to propagate across Microsoft Entra ID before continuing. Running the next step before this completes returns a “service principal not found” error.
Continue with the setup
Section titled “Continue with the setup”Work through these pages in order:
- Grant Microsoft Graph permissions to the App Service, uses
appServicePrincipalId - Add the production redirect URI, uses
appUrl - Sign in and verify
If anything during or after the deploy goes wrong, see Troubleshooting.